Use Azure DevOps as a Content Source
SearchUnify can crawl and index Work Items on Boards in Azure DevOps. This article walks you through the process of installing Azure Devops as a content source.
Prerequisites
- To establish a connection between Azure DevOps and SearchUnify, an admin needs a Personal Access Token. The process of generating it has been described in Generate Personal Access Token in Azure DevOps.
Establish a Connection
- Navigate to Content Sources.
- Click Add new content source.


- Find the content source through the search box and click Add.
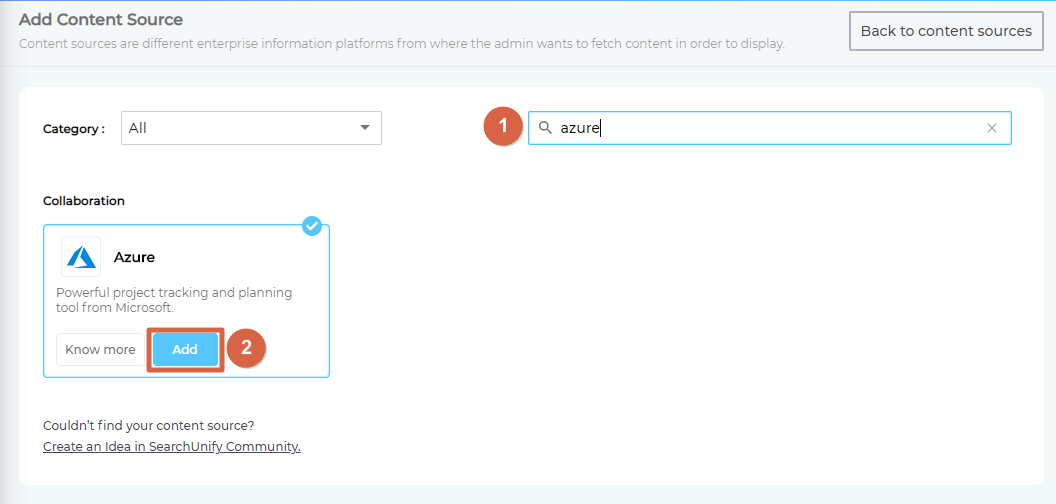
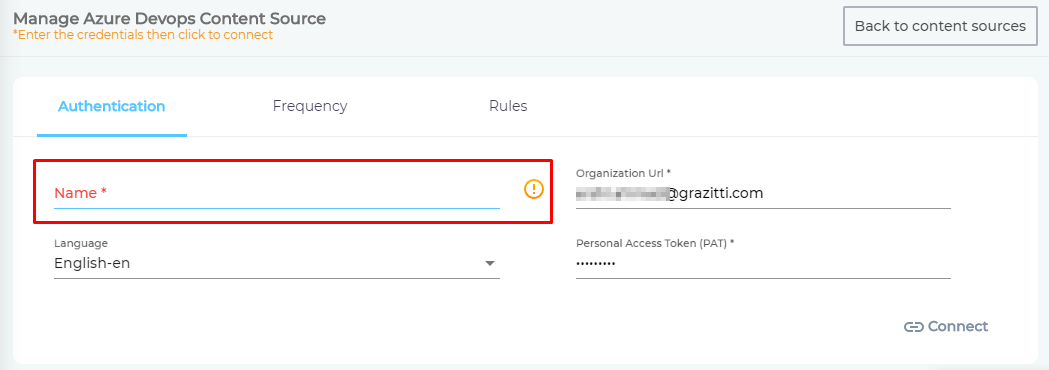
- Give your content source a Name.

- Enter the web address of your Azure devops account in Organization URL. For example,
https://dev.azure.com/test123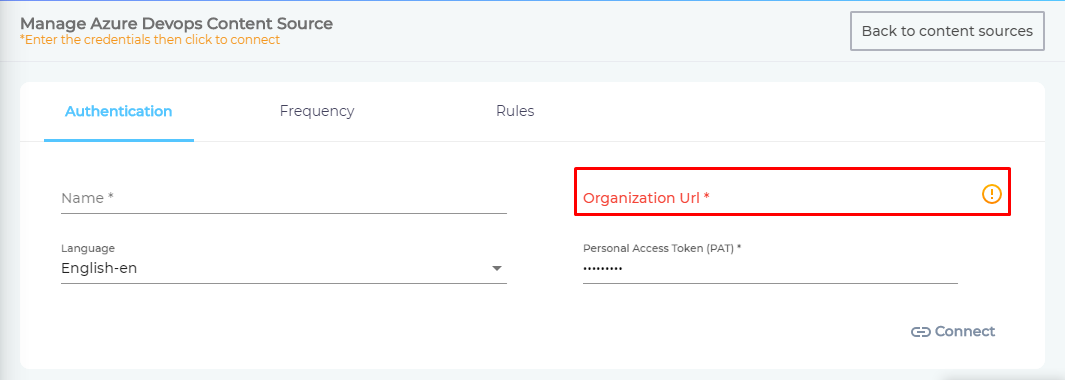
- Enter your Personal Access Token (PAT) and click Connect.
NOTE. Personal Access Tokens are temporary. Their maximum lifespan is one year. Then they have to be regenerated and content source has to be authenticated (or connected) again.


Set Up Crawl Frequency
- Click
 to fire up a calendar and select a date. Only the Work Items created after the selected date will be indexed.
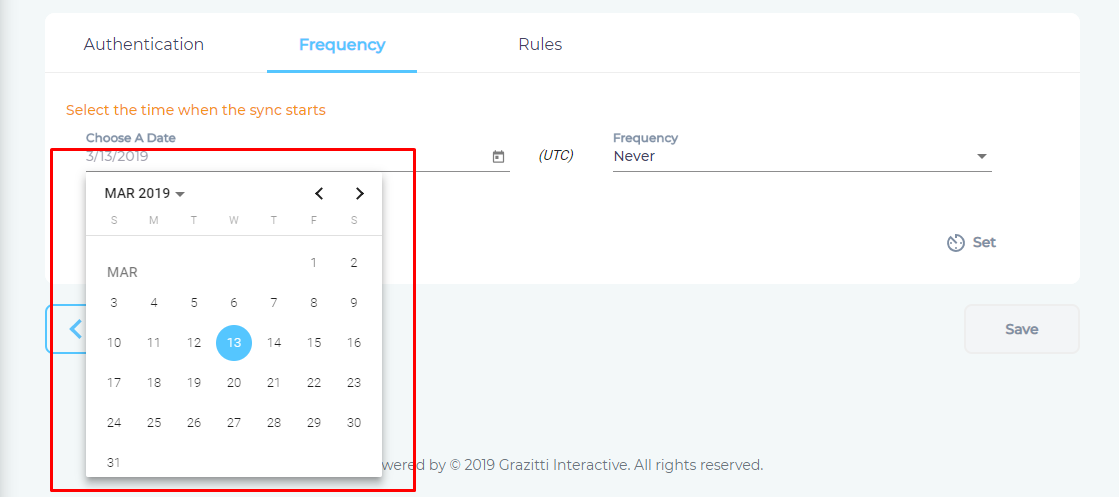
- Use the Frequency dropdown to select how often SearchUnify should index the Work Items in your Azure DevOps Boards..

- Click Set.


Frequency Notes
Azure DevOps crawling is quick and efficient because the down time during crawling is nonexistent. Each time the SearchUnify crawler runs it adds to index the Work Items that have been changed since the last crawl or are new.
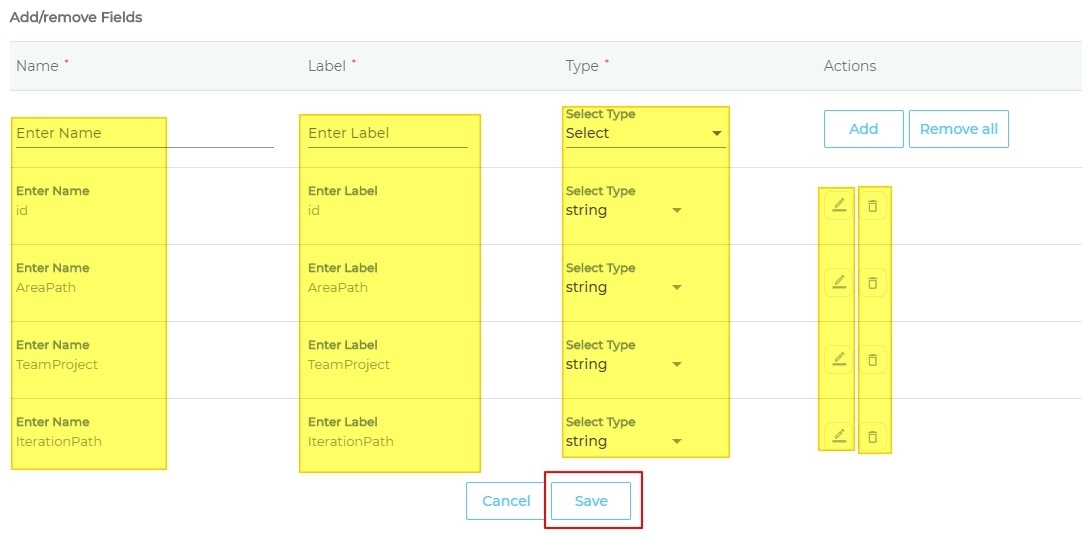
Select Fields and Projects for Indexing
Each Work Item has properties, such as an ID or the Team Project it is linked with. These properties are together called meta data and stored in the content type, azuredevops. Admins can specify which properties (content fields) are to be crawled and indexed on the screen By Content Type. The second screen, By Rules, enables Admins to select the projects whose Work Items are crawled. The next diagram summarizes.

- Click
 to view
 azuredevopsproperties.
- A dialog will open where you can click
 to remove a content field. The removed content fields are not indexed. To find a field that is not listed, use the Name column. To find standard fields, look up the field name and for custom fields append the field name with custom. Here's an example:
 custom.<filename>. Labels and Types are assigned to each field, but admins can choose to change the default labels and types. To edit existing content fields, click. Once the configurations are complete, click Save.
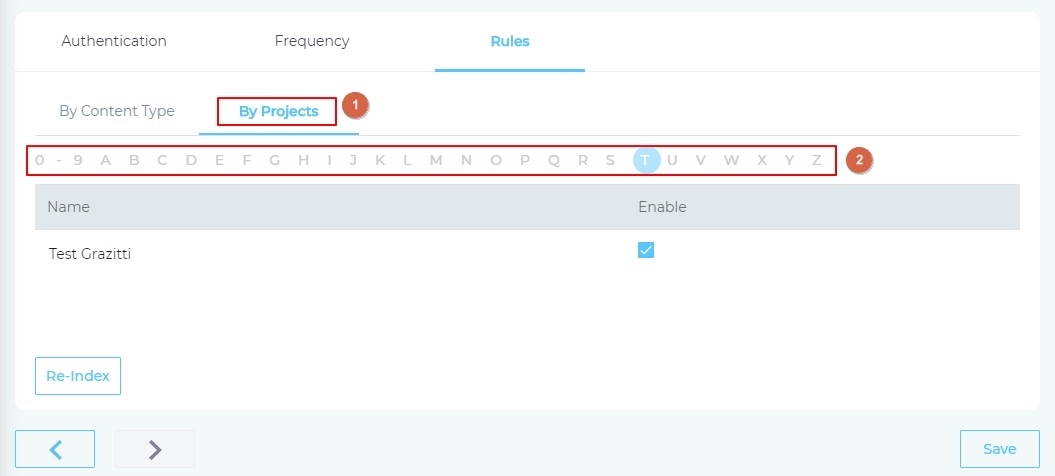
- Navigate to By Projects and use the alphabetical index to find your Azure projects. A project named ‘Test Grazitti’ will be found by clicking the letter T, a project named Sirius by clicking the letter S, and so on. 0-9 lists all the websites that either start with a digit or with a non-ASCII Latin character. Both 6-dimensional and éducation-de-nos-amis will be listed under 0-9.
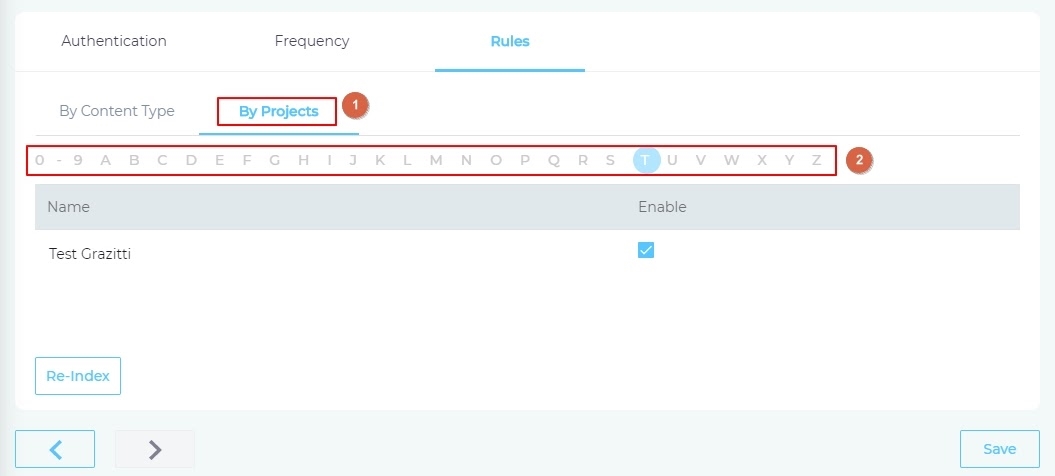
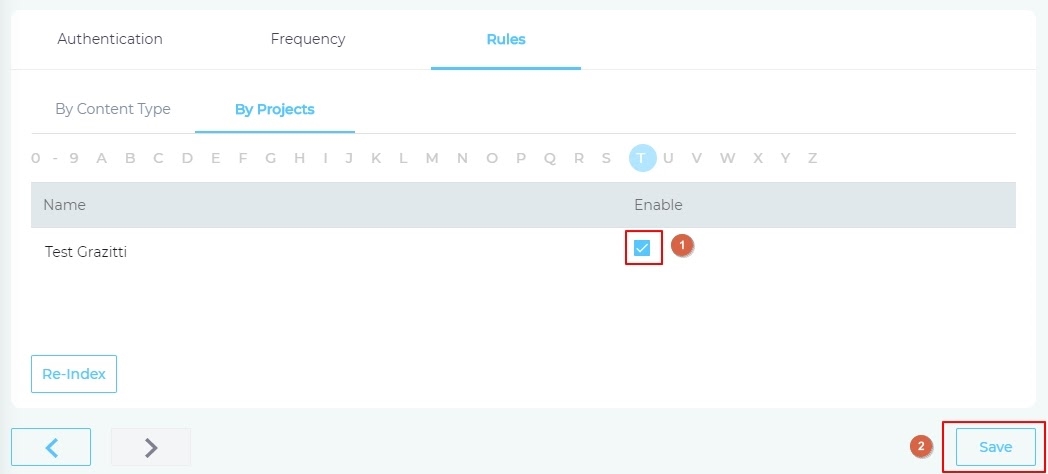
- Use the checkboxes in the Enable column to set projects for indexing. Once you have checked all the projects, click Save.NOTE. All the Work Items will be crawled if no project is selected.


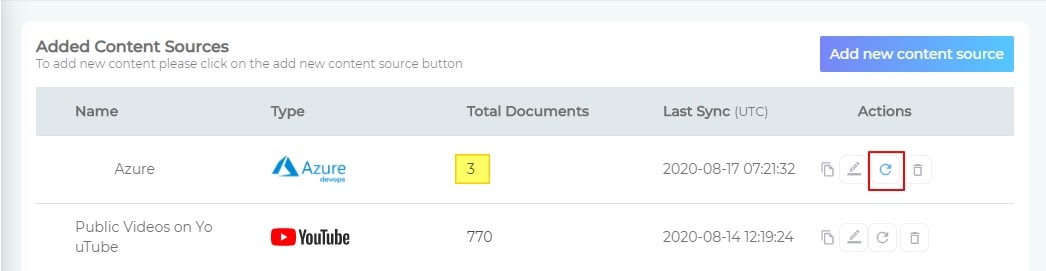
Run the First Crawl
Return to the Content Sources screen and click ![]() . If the number in the Total Documents column is one or more, then you have successfully set up Azure DevOps as a content source.
. If the number in the Total Documents column is one or more, then you have successfully set up Azure DevOps as a content source.
IMPORTANT.
Either your Azure DevOps account has no Work Items or the content source wasn't successfully set up if the number of Total Documents remains zero.
Last updated: Friday, February 26, 2021Was this article helpful? Send us your review at help-feedback@searchunify.com