Use a Website as a Content Source
Submitting a website to a web search engine is relatively straightforward. Simply submit a sitemap to Google, Bing, DuckDuckGo, or another search engine. The simplicity, however, comes at a cost.
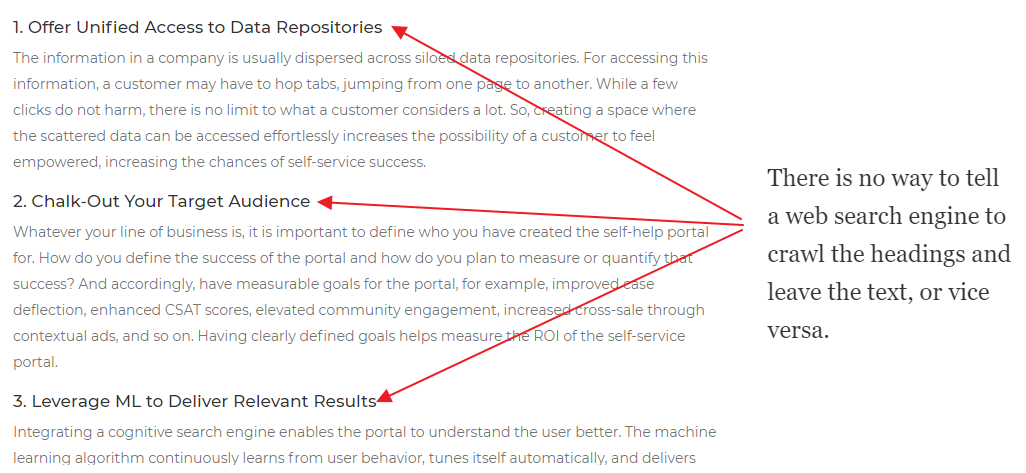
Besides a robots.txt file, which tells search engines what not to index, there is little webmasters can do to customize crawling and indexing. Advanced configurations—such as limiting crawl and
index only to titles, headings, or the content in a particular div—are lacking.
SearchUnify is different. Webmasters (known as Admins in the SearchUnify realm) can upload a sitemap to index a website or configure a highly customized crawling plan that allows them to:
- Crawl and index multiple public and gated websites simultaneously (although not the ones behind a captcha wall)
- Control the depth of crawl
- Crawl and index websites in languages other than English (more than 20 languages supported)
- Crawl and index websites that rely on JavaScript to function properly
Three Stages of Website Crawling
This article covers how SearchUnify can be used to crawl and index almost any website. The entire process consists of three stages, which are first summarized and then laid out.
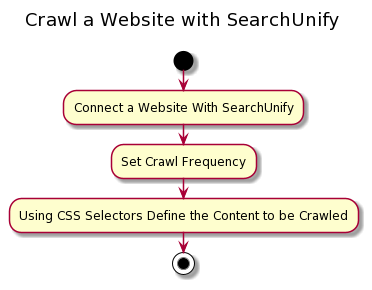
- Establish a connection with the website. It's here that an admin
- Uploads a sitemap or inserts a website address in the URL field to specify the website(s) to be crawled
- Inserts an integer in Depth and toggles Limit Crawling to SiteMap to define crawl depth
- Specifies whether a website is public or gated through the Authentication Method dropdown
- Defines the role of JavaScript on a website's functionality in JavaScript Enabled Crawling
- Gives an internal (to be used in the SearchUnify instance) name to the website in Name
- Set up crawl frequency. In contrast to mainstream web search engines, whose crawl rate depends on how often updates are pushed to the website in consideration, SearchUnify admins can set up a crawl frequency ranging from every 24 hours to once in a year. Irrespective of the Frequency, the first crawl is manual.
- Define what is to be crawled. On top of specifying what URLs to crawl and what to avoid, admins can mention precisely what data to crawl by specifying the tags in which that data is stored. The usage requires some familiarity with HTML and CSS selectors.
Stage 1: Establish a Connection
- From Content Sources in main navigation, go to Add a Content Source.

- Find website from the search box and click Add.

- Selecting Website takes you to the Authentication screen, where seven—actually nine if you count each authentication method separately—connection settings are available. Next, each field on the screen is explained.


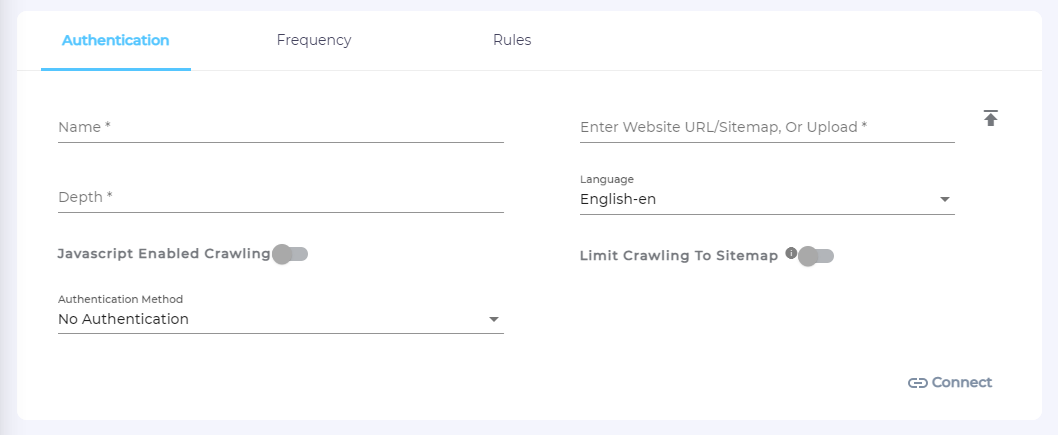
Understand the Authentication Screen
Name
Each content source in an instance has a name, which helps admins distinguish one from another.

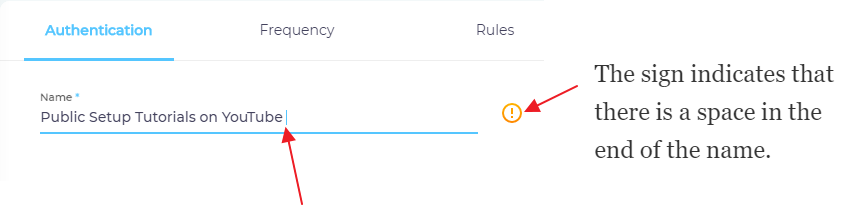
A good practice is to enter a descriptive term, such as "Public Setup Tutorials on YouTube" or "Promotional Videos on YouTube", in the Name field.

⚠ IMPORTANT
In the Name field, the only characters allowed are lowercase, uppercase, and spaces. Note that a space at the end of a name will throw an error.
Public Setup Tutorials on YouTubeis correct butPublic Setup Tutorials on YouTube" (notice the trailing space) is not.

URL
Right next to Name is the URL field, which can be used in two ways:
- An admin can insert the address of the website to be crawled or the URL of the sitemap. A typical website address will be for the form:
https://searchunify.com/and a sitemap might look likehttps://docs.searchunify.com/Sitemap.xml. Don't forget to enterhttp(if the website is unsecure) orhttps(if the website is secure).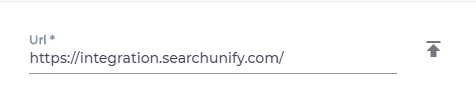
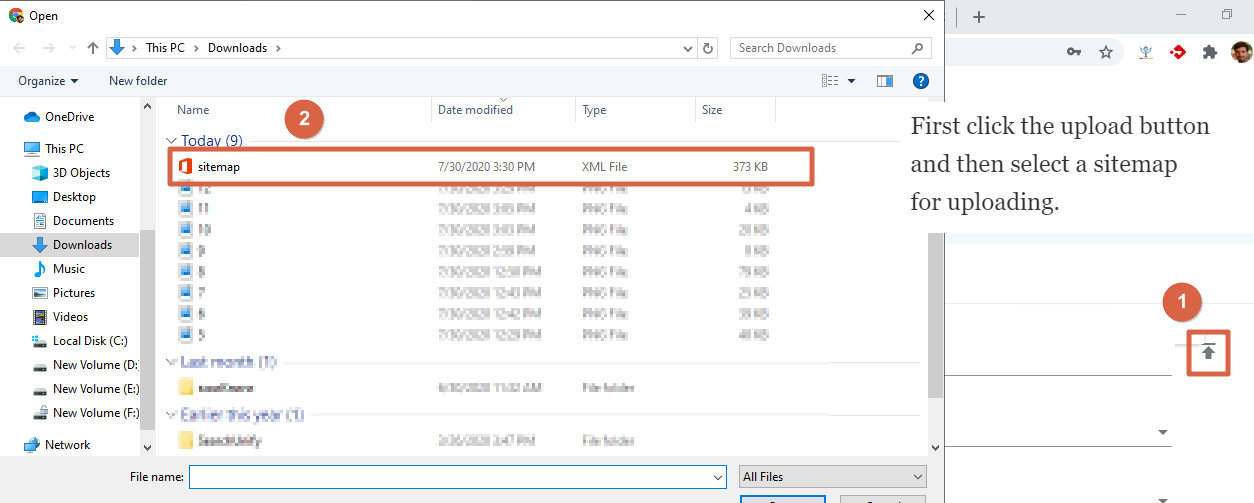
- An admin can upload a TXT or an XML file using the upload button (
 )
on the right end of the URL field. The uploaded file will contain one of the following:
)
on the right end of the URL field. The uploaded file will contain one of the following:
- Links; one link on each line
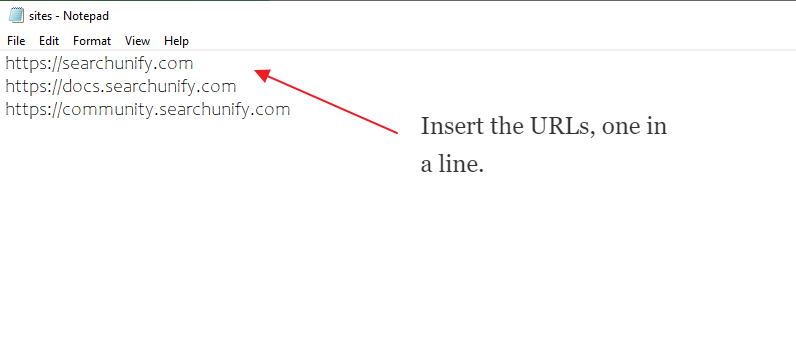
- Sitemap.xml

- Links; one link on each line


Sitemap.xml Capabilities
Uploading a sitemap offers several advantages. The primary two are:
- Accelerated Recrawls. SearchUnify crawler identifies the URLs in a sitemap with the attribute
<lastmod>and crawls only the pages updated or created since the last crawl. This type of crawling can be several times faster on a large website. Related: Generate a Sitemap from URL (loc) and Last Modified (lastmod) Attributes (Requires a login to the SearchUnify Community) - Customer Filters. Admins can add custom attributes, such as
<author>,<priority>for each URL in the sitemap. After crawling, these customer attributes can be used as filters on a search client. To index a filter, use the format{{sitemap}}{{filterName}}in Rules.
SearchUnify is capable of handling complex sitemaps which contain more than just a list of plain URLs. One such feature is the tag <lastmod>.
⚠ WARNING.
SearchUnify doesn't crawl a website when the links in the sitemap.xml or TXT file doesn't match with real web addresses. Five common issues are:
- Redirects. If a link redirects, it will not be crawled.
- HTTPS and HTTP. If a website is secure, then crawling will proceed only when sitemap.xml or TXT file contain secure links; starting with HTTPS. If a website is insecure, then HTTP links will work. In both cases, the web addresses should be exactly the same.
- Trailing Spaces. Any space after the end of a URL causes the indexing to stop.
- Comments. If there are any comments in the TXT file or sitemap.xml, remove them before the upload.
- Empty Lines. Indexing can stop abruptly if empty lines are found in the beginning, middle, or end of a TXT file or sitemap.xml.
Depth
If you are uploading a TXT file or Inserting a URL, then specify Depth. Else, for sitemap.xml, keep Depth equals to one.
When Depth is one, SearchUnify crawls the links in the URL field or the TXT file. When Depth is two, SearchUnify follows the hyperlinks on the webpages in the URL field or the TXT file and crawls them as well.
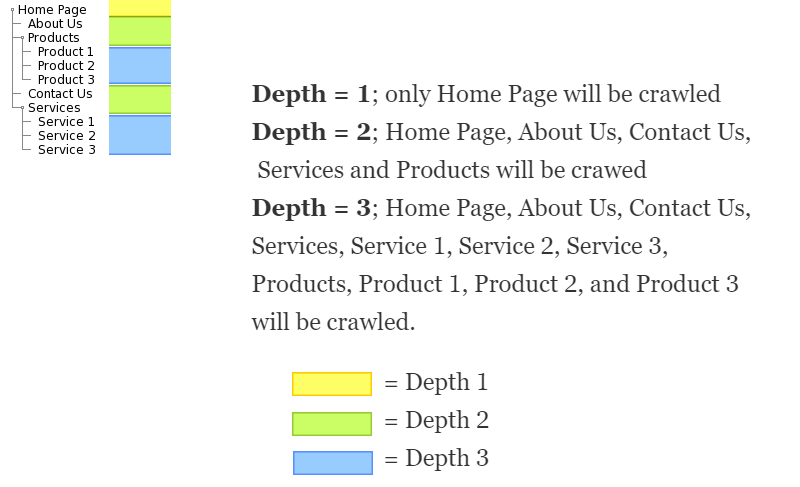
The recommended value of Depth is less than 10.

JavaScript Enable Crawling
Some websites rely on JavaScript to function while others, such as Wikipedia, can function without it. If the content source website is dependent on JavaScript, then toggle JavaScript Enable Crawling on. Else, keep it turned off. A way to find out if a website depends on JavaScript for its regular functions is to go to Chrome://settings/content/javascript, turn off JavaScript.


Authentication Method
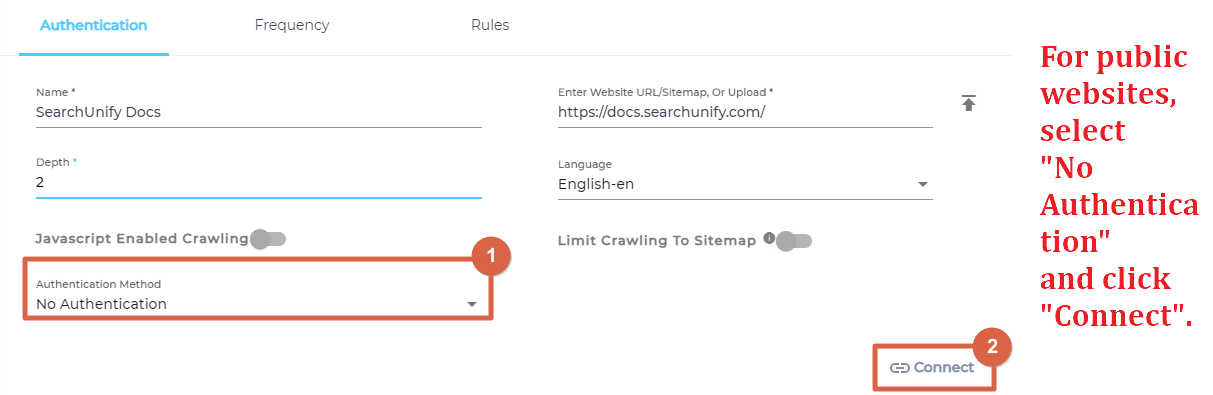
The settings described in the first two sections are adequate if the content source is a public website, such as Wikipedia or SearchUnify Docs. A public website is any website that is accessible to anyone with an Internet connection and the web address.
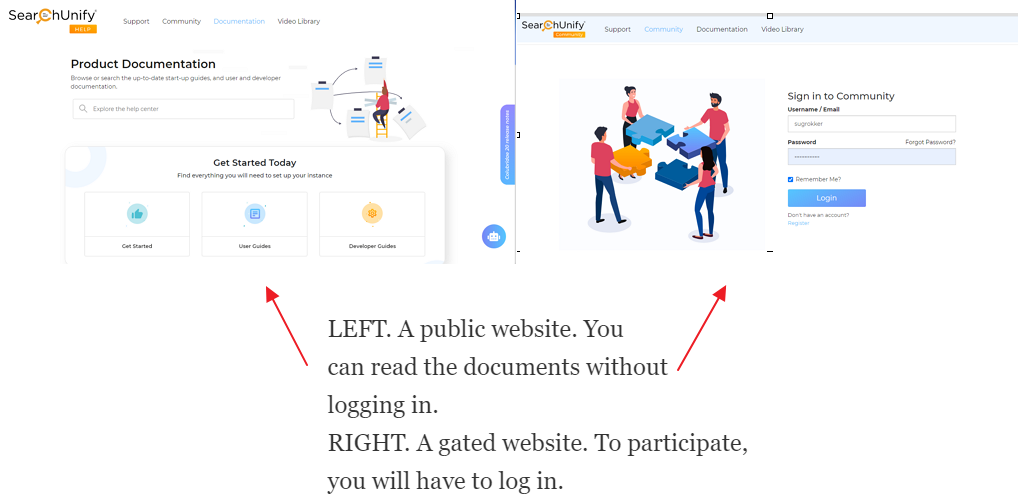
If you website is public, click Connect and jump to the section Frequency.
However, if your content source is a website that requires users log in before they can view an article, a video, or another content, you will see to configure security settings as well. The configurations are found in Authentication Method can be of the type Basic or Form.
⚠ IMPORTANT.
Gated websites cannot be crawled and indexed until Basic and Form are set up.
Basic
Select Basic from the Authentication Method dropdown if the website requires users to enter their username and password. Two new fields will appear. Enter a valid ID and password and click Connect.

⚠ IMPORTANT.
If there is a captcha on the login form, then your website will not be crawled.
Form
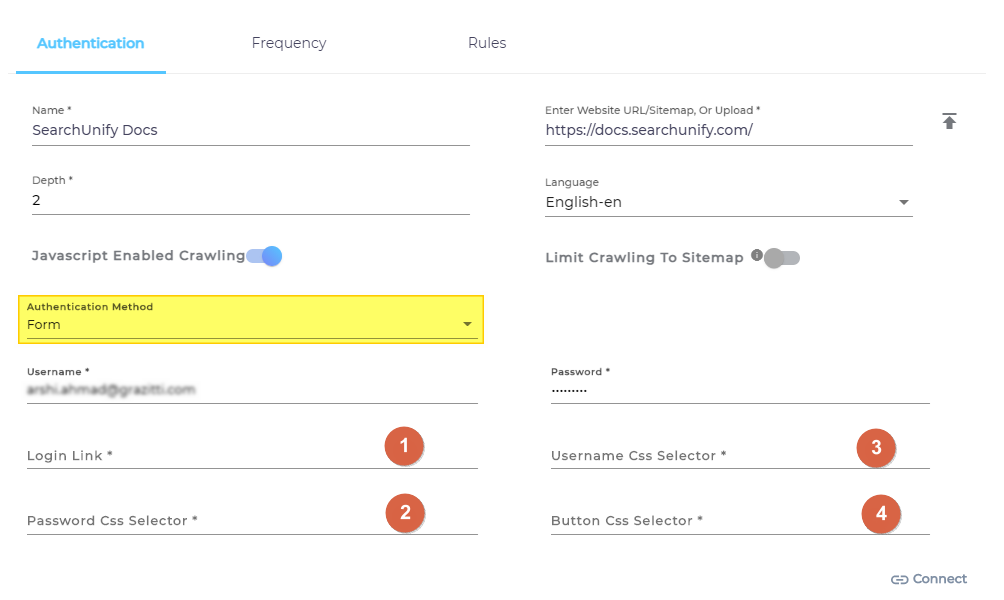
Form is an advanced version of Basic and requires an acquaintance, on part of the SearchUnify admin, with CSS selectors to set up. You can think of them as guideposts which tell a browser how to interpret data.
Consider the next image where a pair of <h1> tags tells browser to interpret the text contained within them as a heading and a pair <p> tags tells the browser to interpret the text contained with them as a paragraph. Both are CSS selectors.

When Form is selected, then an admin has to specify, besides the username and password:
- Login URL
- CSS selectors of the username field
- CSS selector of the password field
- CSS selector of the login button
Login URL is straightforward. A quick way to find the CSS selectors is to press Ctrl+Shift+I if you are using Chrome and hover the cursor over the each field and button one at a time. In the next image, you can see the CSS selector of username, which is #username.

Stage 2: Set up Crawl Frequency
The first crawl is always manual. After that you can set up a crawl frequency. When a sitemap.xml with a <lastmod> tag is used, the crawls are faster because only the web pages updated or added since the last crawl are indexed. In case or website URL or a TXT file, the entire website is indexed during each crawl.
Stage 3: Select Fields for Indexing
SearchUnify indexes a website by capturing and storing the data inside HTML elements.
⚠ IMPORTANT
A website is not indexed if no HTML element is specified.
The admins can write CSS selectors to specify the elements for indexing. The CSS selectors are stored in an Object, which we will create next.
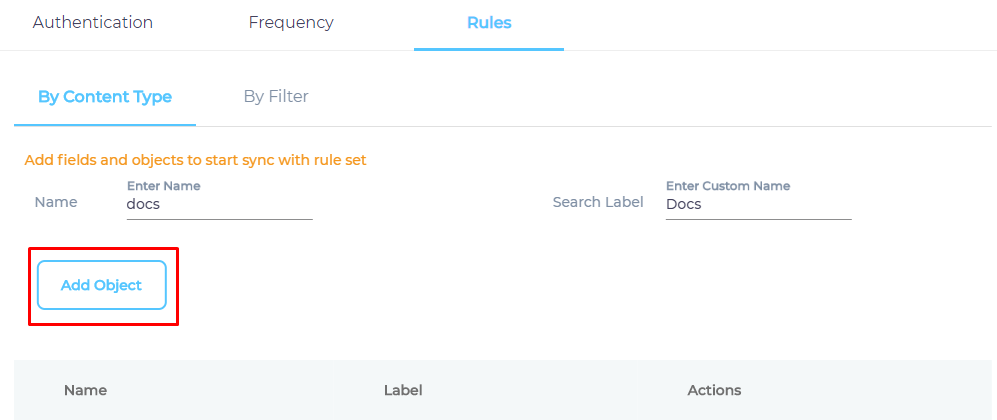
- Give your Object a Name and a Label. The name and the label do not have to be valid HTML tags.
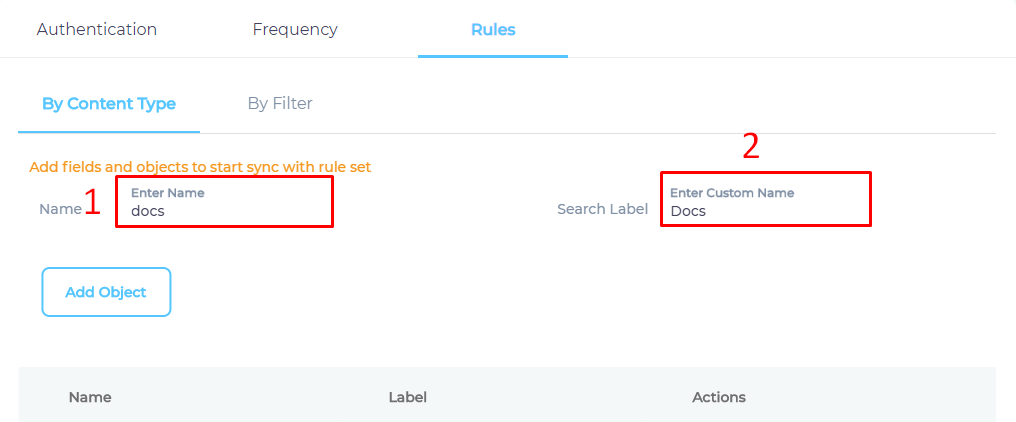
- Click Add Object to create an empty object.
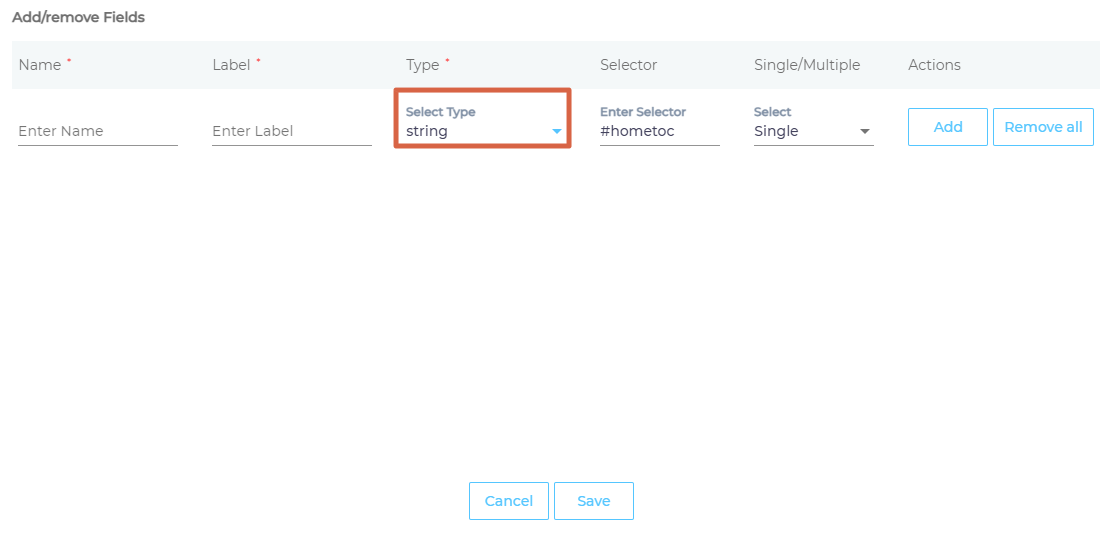
- Click
 to add content fields for indexing.

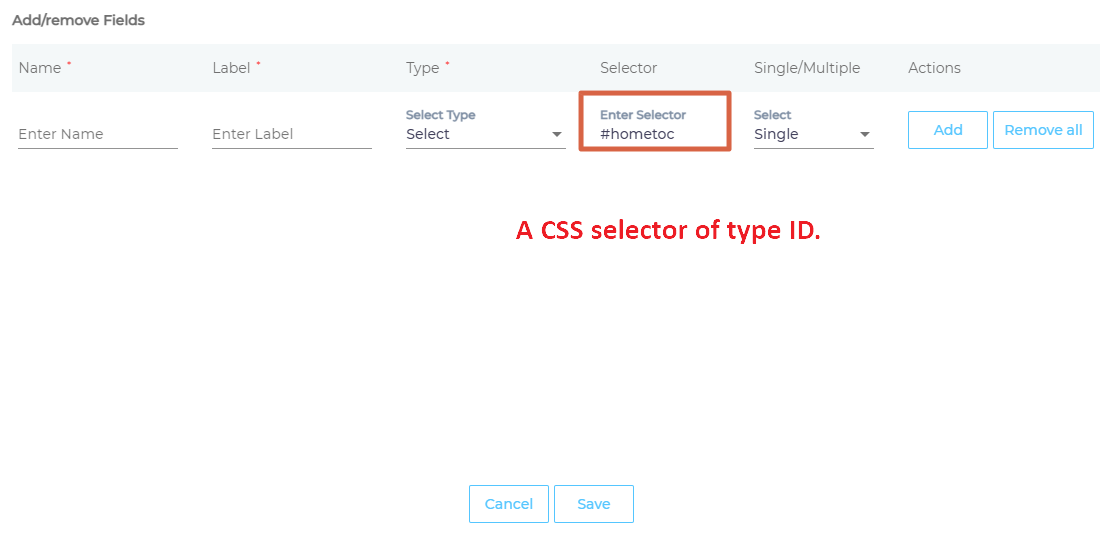
- Selector is the most important field. HTML tags, classes, and IDs are valid selectors. IDs are preceded by an # (octothorpe), classes by a . (dot), but the standard HTML tags are not surrounded by angle brackets.
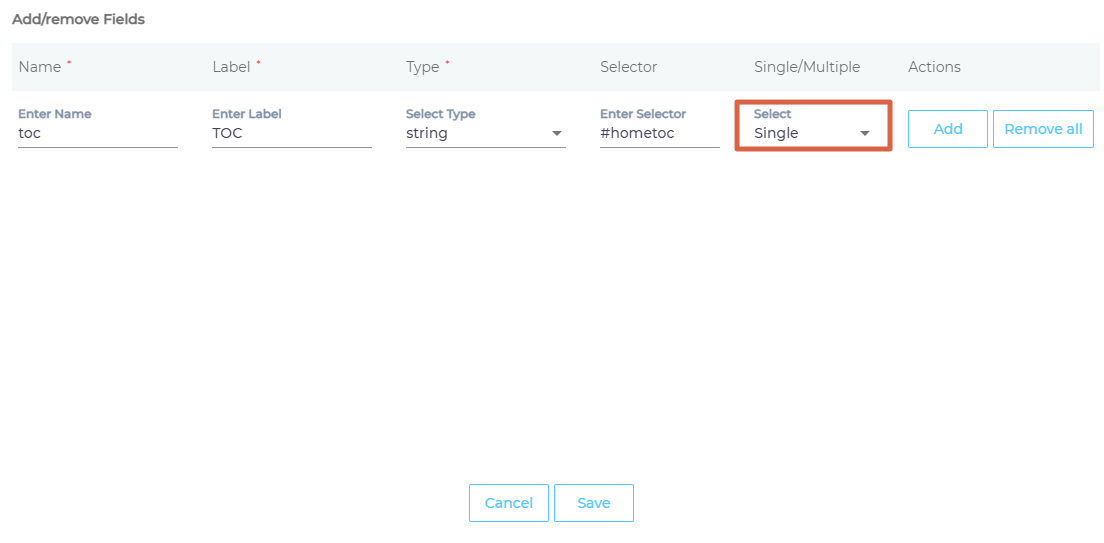
- Assign the Selector a Type.

- Give the selector a Name and Label.
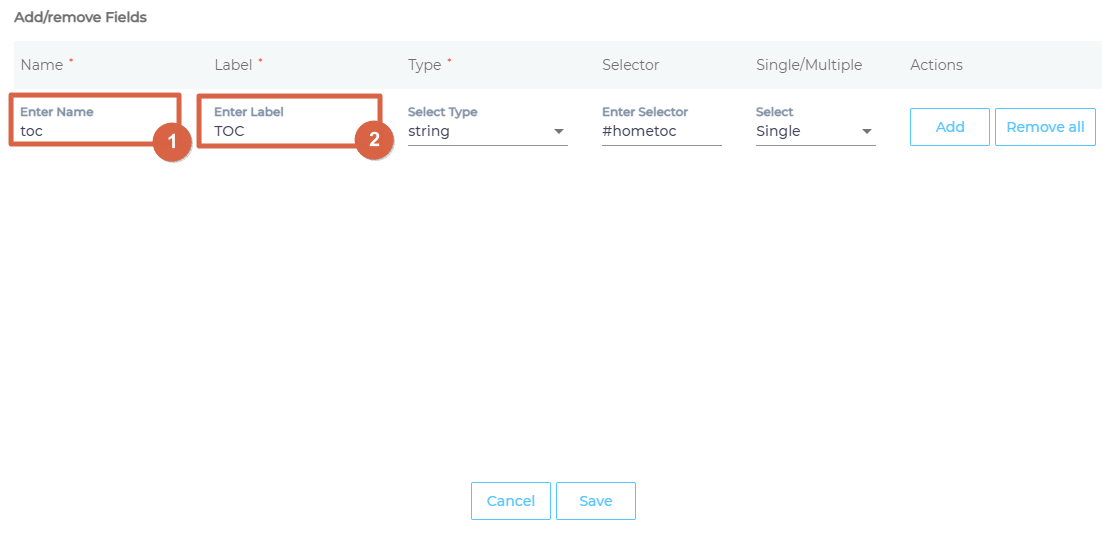
- Select Multiple to treat each instance of a matched HTML element separate in search, or Single to combine their data into a field.
- Press Add and then Save.

- Switch to By Filter.
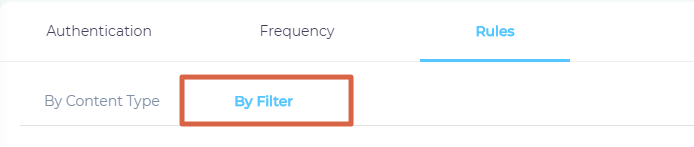
- Next, the four fields in URL Filter Configuration enable admins to highly customize crawling.
Should crawl. Enter both the secure and insecure addresses of the webpage that was mentioned in Authentication
Should not crawl. Enter the secure and insecure addresses of the webpages that should not be crawled.
Outlink filters for URL. These websites are cawled to the second Depth. It means that the webpages linked to are crawled as well.
Indexing filters for URL. Same as Should Crawl, but with a carel appended to the left end.

- Press Save.
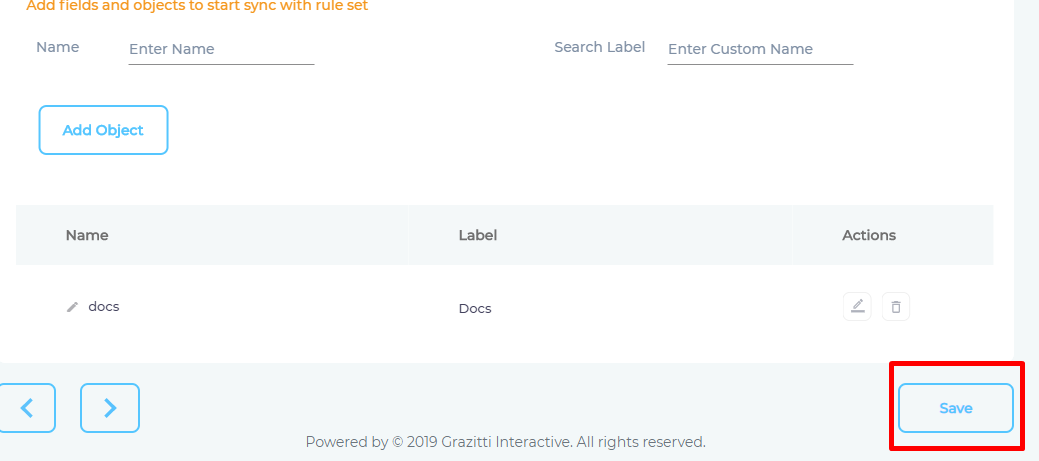


You have successfully added Website as a content source.
Last updated: Friday, February 26, 2021
Was this article helpful? Send us your review at help-feedback@searchunify.com