Use Service Now As a Content Source
ServiceNow stores tickets and help content. You can connect it with SearchUnify to find three ServiceNow content types quickly: incidents, knowledge articles, and knowledge questions.
PERMISSIONS.
SearchUnify ignores user permissions during searches. Juan can find "Accounts.pdf" in search irrespective of whether he has access to the file or not.
Establish a Connection
- Click Content Sources, then Add new content source, find ServiceNow, and click Add
- Select ServiceNow.
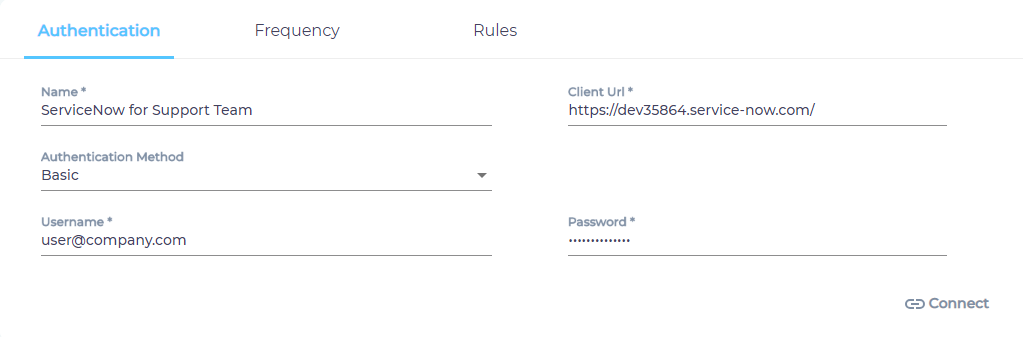
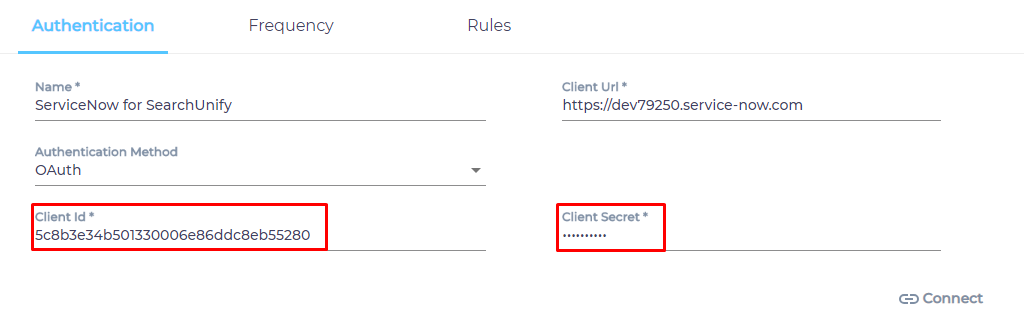
- Give your content source a Name.
NOTE.
Pick a descriptive name for easier management. For instance, "ServiceNow Tickets and Help" or "Support Team ServiceNow."
It's a good practice to stick to ASCII characters because non-ASCII Unicode characters display as a series of question marks (?). - Enter your ServiceNow instance URL in the Client URL field.
- Select the content language(s) from the Language dropdown.
- Select either Basic or OAuth for authentication.
- If you have selected Basic, then enter your ServiceNow instance user name and password and skip to step 9.
- If you have selected OAuth, then follow the instructions in Prepare Your ServiceNow Instance for OAuth Authentication to generate a Client ID and Client Secret.
- Paste your ServiceNow Client ID and Client Secret.

- Click Connect, then Allow, and finally Next.

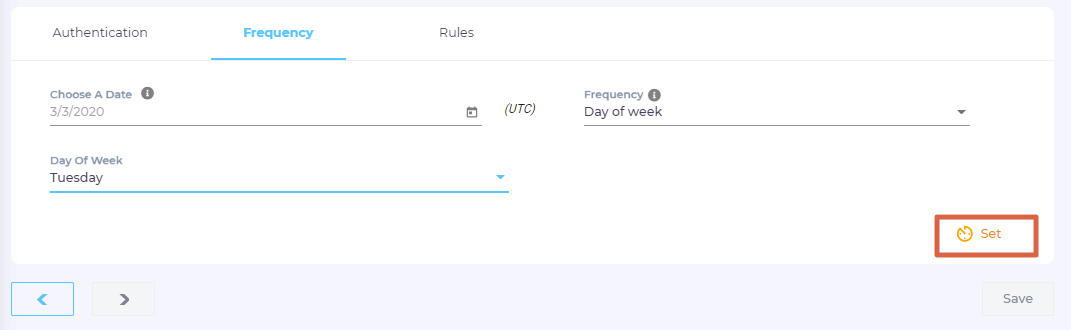
Set Up Crawl Frequency
The first crawl is always manual. Click Set and move to the next section.

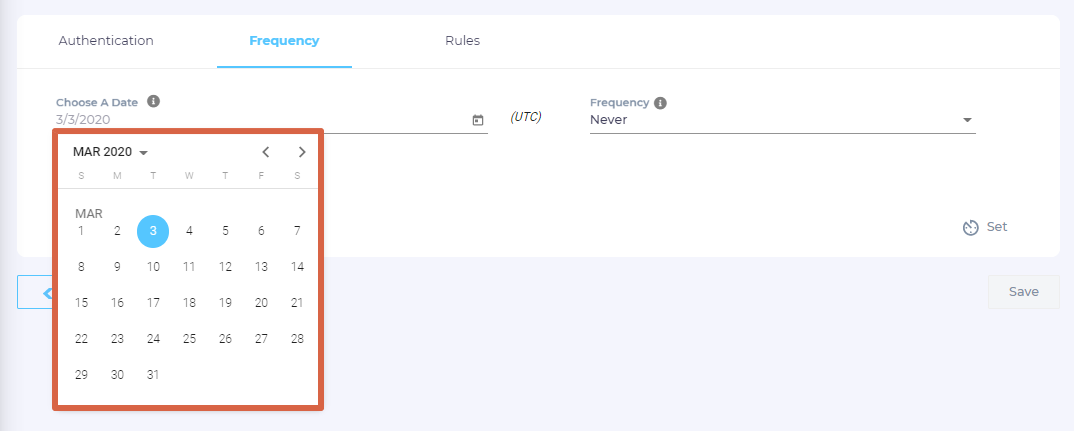
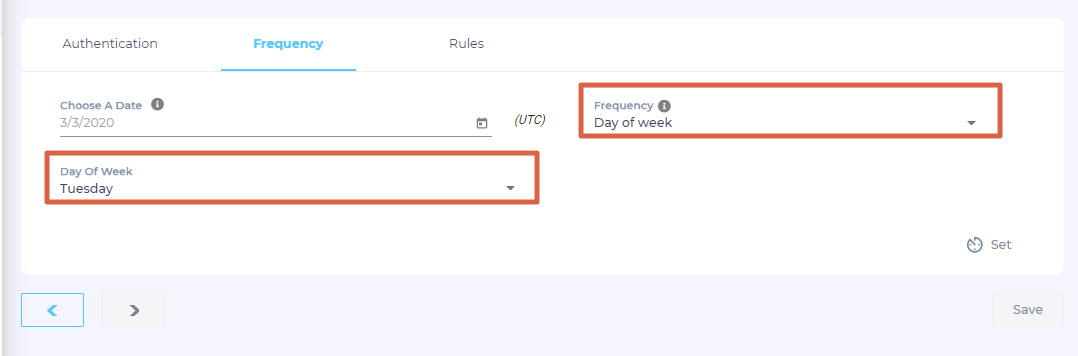
- In Choose a Date, click
 to fire up a calendar and select a date. Only the data created or updated after the selected date is indexed.
- Use the Frequency dropdown to select how often SearchUnify should index the data. For illustration, the frequency has been set to Weekly the Tuesday has been chosen as the crawling day. Whenever the Frequency is other than Never, a third dropdown appears where you can specify the interval.

- Click Set to save crawl frequency settings. On clicking Set, you are taken to the Rules tab.

Select Content Types and Fields for Indexing
- In the Rules tab, you can click
 to prevent a content type from being indexed.
 - Use
 to add, edit, or remove content fields and click Save.
 - Under By Projects, select the knowledge bases that should be indexed and click Save.
Last updated: Friday, June 10, 2022
Was this article helpful? Send us your review at help-feedback@searchunify.com