Install a Search Client in Higher Logic
Find information faster on Higher Logic with SearchUnify. This article walks you through the process of installing a SearchUnify search client in your Higher Logic community.
Installation Overview

Prerequisites
- Admin access to a Higher Logic community
- Token Generation URL, which can be obtained from the Higher Logic support team
Create a Search Client for Higher Logic
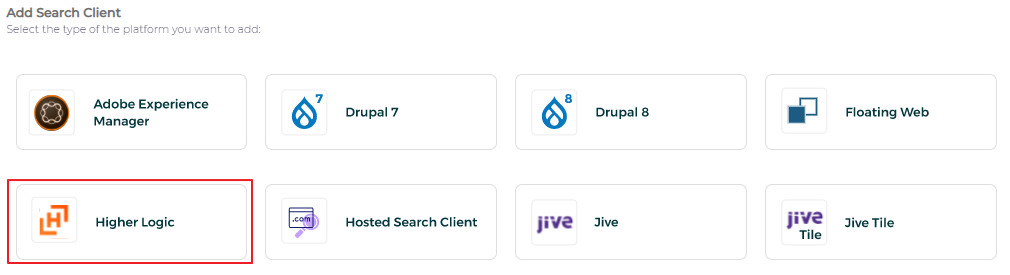
- Go to Search Clients and click Add New Search Client.

- Select Higher Logic.'

- Enter the details:
- Enter Platform Name. Label your search client.
- Enter Base URL. Mention your Higher Logic instance URL or the web address of your community. For instance,
https://myawesomecommunity.mygreatcompany.com/. - Enter Token Generation URL. The URL is used to secure data flow between your search clients and content sources. Simply paste the URL that you received from the Higher Logic support team.
- Enter Token Expiry Time (in milliseconds). Tokens are generated at fixed periods to maintain secure communication between your Higher Logic search client and content sources. Shorter intervals tend to be enhance security and longer intervals don't consume much computing power.


Install a Search Client in Higher Logic
- Download your Higher Logic search client.

- Unzip the downloaded file, find
index.html, and open it in a text editor.
- Log into your Higher Logic community as an admin and select the tab where the search will be added.

- Open settings.

- Click Edit This Page in settings and select HTML Content in the Type of Content dropdown.

- From
index.htmlcopy all the text and paste it in the Source Code field.
- Click OK and then Save.


Result
A SearchUnify search client on a Higher Logic community.

Last updated: Friday, June 10, 2022
Was this article helpful? Send us your review at help-feedback@searchunify.com