

Use Jive As a Content Source
This feature is not available in the SearchUnify Cloud Edition.
Add Jive as a content source using three easy steps:
- Step 1 - Click the ‘Content Sources’ tab on the left sidebar
- Step 2 - Click the ‘Add New Content Source’ button to view the content sources
- Step 3 - Select ‘Jive’ tab to proceed
PERMISSIONS.
Security groups and roles are fetched on the basis of user email and can be available on the document level.
When you select the Jive tab you will be redirected to the configuration screen. This is divided into three subsections:
- Authentication
- Frequency
- Rules
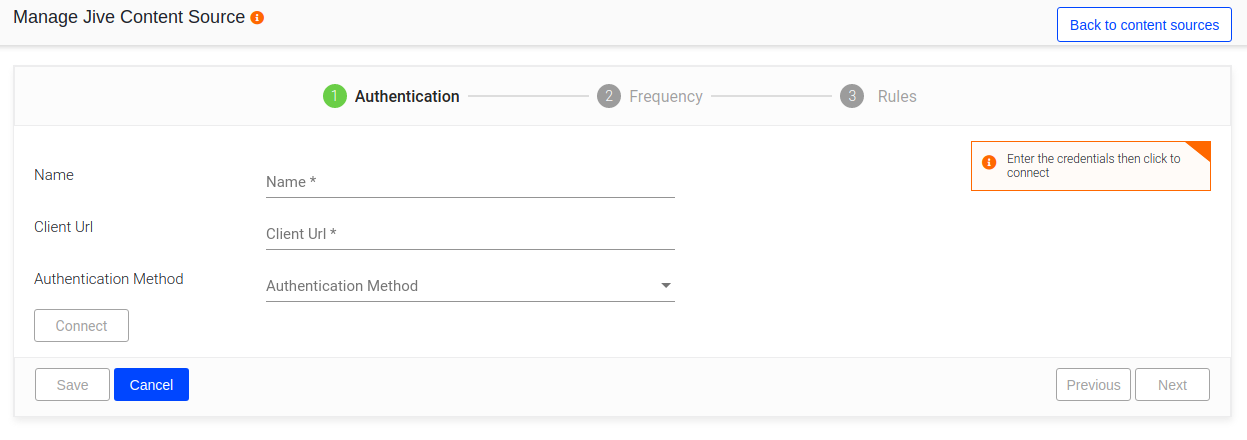
Step 1 - Authentication
Enter the information in the designated fields as shown in the image below:
- Name - Enter an API name for the Jive object you wish to add
- Client URL - Mention the URL of the Jive instance from where the content needs to be fetched
- Client id - Enter the Jive Addon client id {2-factor authorization}
- Client secret - Fill in the Jive Addon client secret {2-factor authorization}
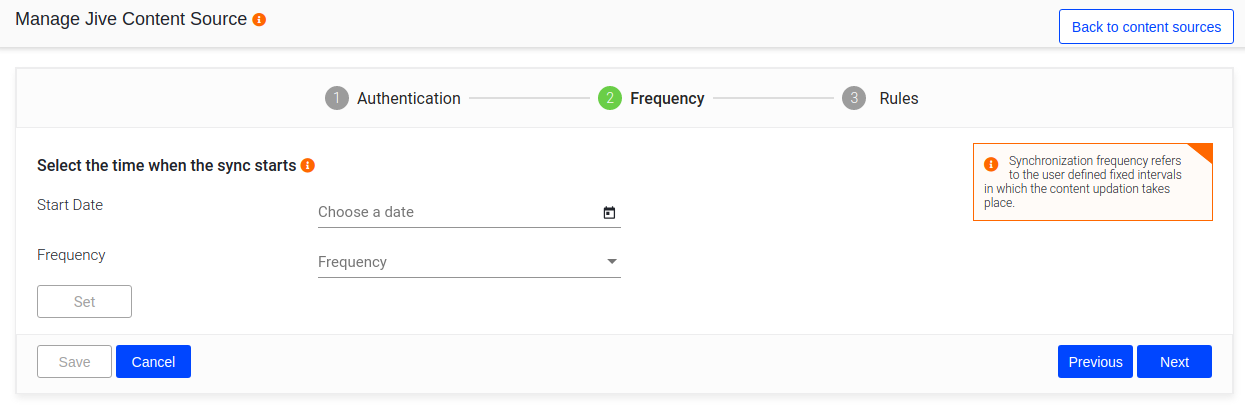
Step 2 - Frequency
Set the frequency, which includes
- Start Date- Choose a start date, this will define the date when the synchronization process needs to start
- Frequency- Fix the intervals in terms of hours, this will trigger the synchronization process for the fixed number hours mentioned by the user
Step 3 - Rules
The Rules section is divided into two parts:
a. The By Content Type tab allows you to sync information by content type.
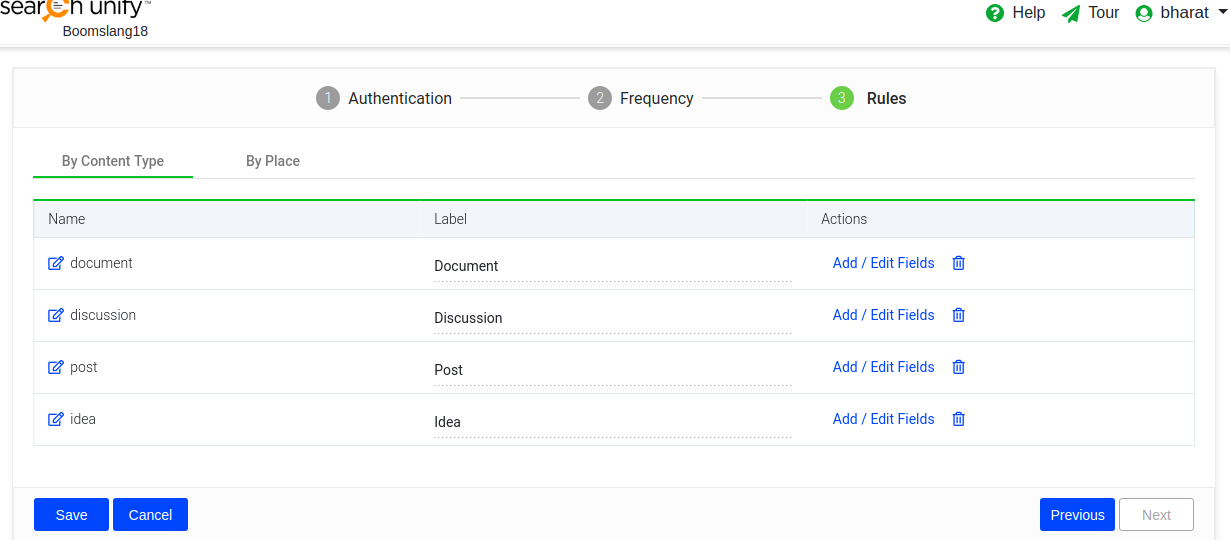
We support Issue objects: This object will support all issues , bugs logged inside any jira project
Enter the following details:
- Name - Enter the API name of the object
- Label - Enter the label for the object
- Type - Select the type
- Searchable/Filterable - Select whether you want the field to be searchable (will appear in search results) or filterable (will appear in filters)
- Action - Click on "Add /Add All / Remove All" accordingly

b. Go to the 'By Places' tab to sync information by board.
Enter the following details:
- Name - It displays the name of the boards on the platform by alphabet
- Is Enabled - Check off the box for boards that you want to sync
