Synonyms Configuration
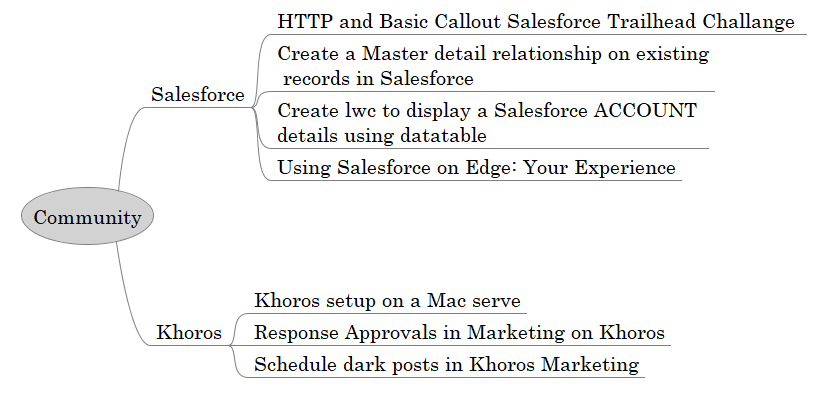
Synonyms Configuration enhances content annotation capabilities a great deal. To understand how it can help you, imagine a community where discussions have been annotated with values from a field Products. For simplicity's sake, assume that Products holds only two values: Salesforce and Khoros.
In this scenario, running Content Annotation on the community links discussions with product names. A discussion on "Using Salesforce in Edge: Your Experience" is connected with Salesforce and a discussion on "Khoros setup on a Mac server" is tagged with Khoros.
This arrangement works fine unless you consider that not everyone uses a given official name all the time. Instead of "Create lwc to display a Salesforce ACCOUNT details using datatable", a user can write "Create lwc to display a SFDC ACCOUNT details using datatable." Humans understand that those two questions are identical, but the algorithm powering Content Annotation needs to be explicitly educated about synonyms. Else, the discussion "SFDC" will never be linked to "Salesforce."
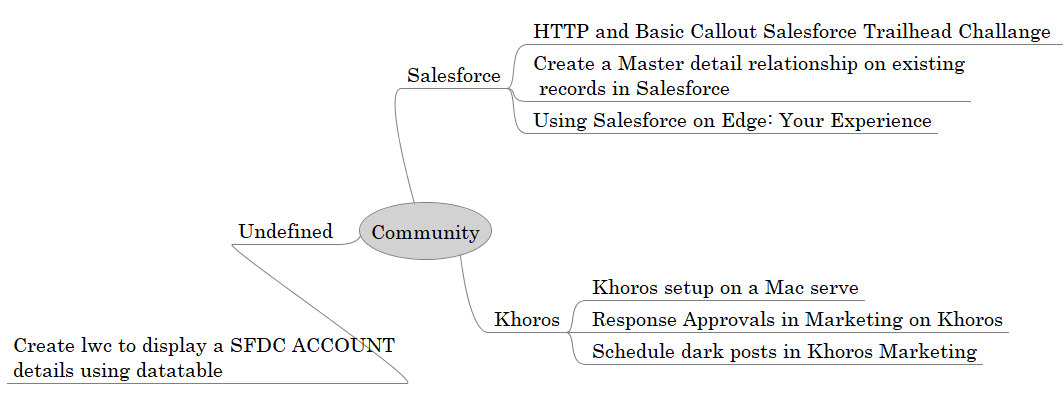
This is exactly what Synonyms Configurations does. When it's activated, it links "Create lwc to display an SFDC ACCOUNT details using datatable" with the facet or tag Salesforce because it understands that "Salesforce" and "SFDC" are synonyms. To find such pairs (or triplets, or groups), Synonyms Configurations digs into two sets of data.
-
Search Synonyms dug synonyms added under NLP Manager > Synonyms.
-
Custom Synonyms are the ones that you enter in Synonyms Configurations yourself.
Enough of theory. Let's see how it's actually done.
Insert Entries into Synonyms Configuration
-
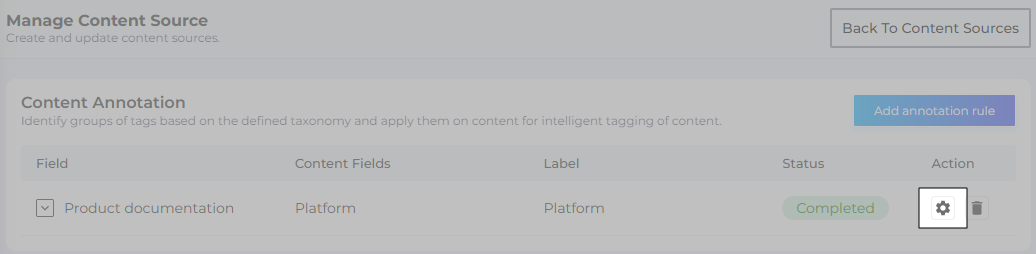
From Content Sources, go to Content Annotation.

-
Edit an existing content annotation rule to which you want to configure synonyms.
-
Jump to Synonyms Configuration.
-
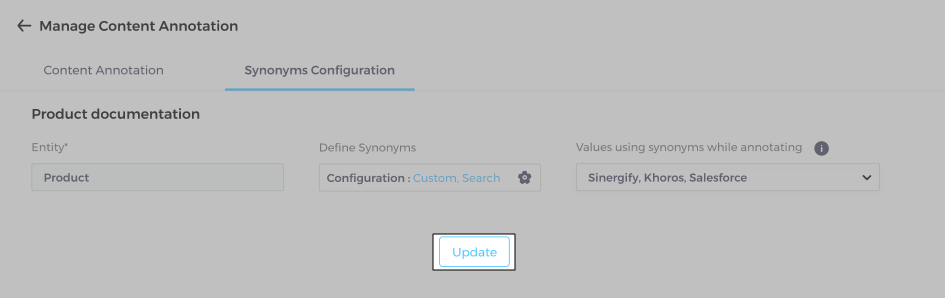
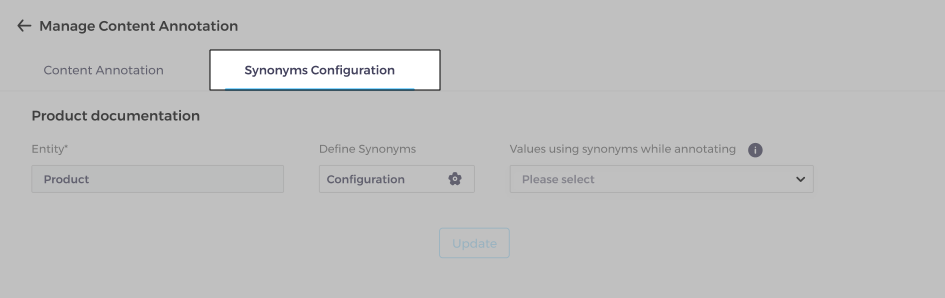
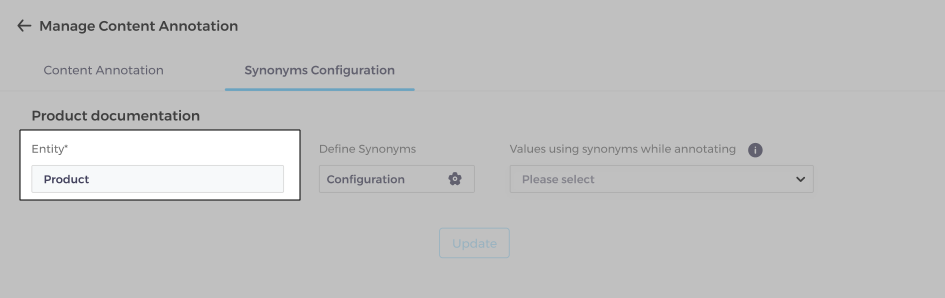
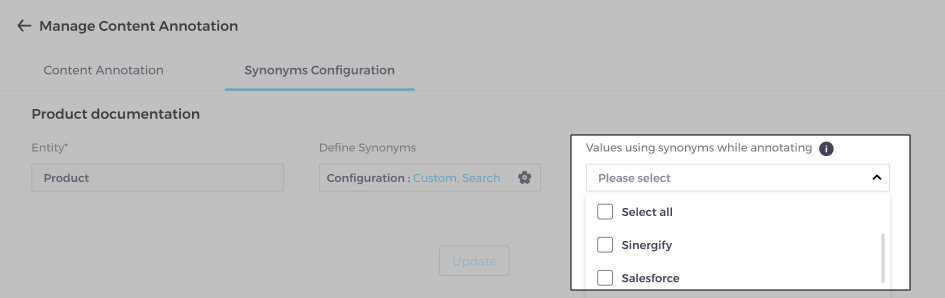
The value in Entity is picked from the Content Annotation screen. The value cannot be edited. Synonyms are to be defined for the Entity. If the Entity value is "Salesforce", then the values entered in Define Synonyms are going to be synonymous with "Salesforce".
-
Click
 in Define Synonyms. It opens a dialog.
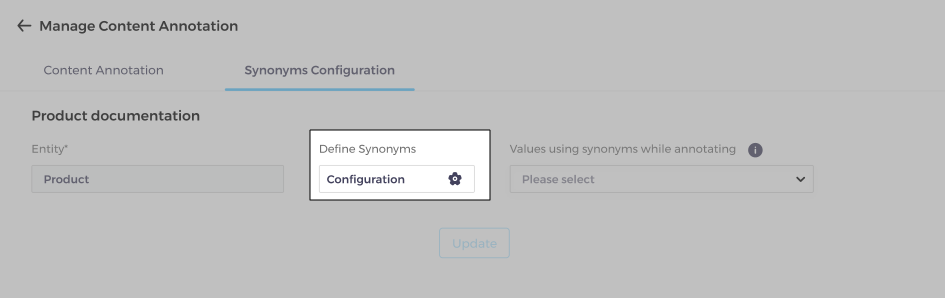
-
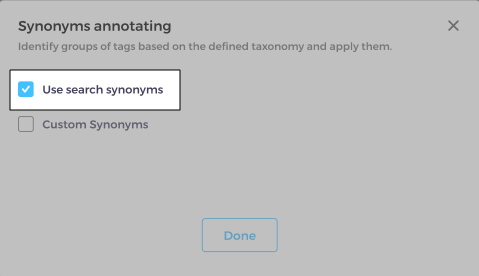
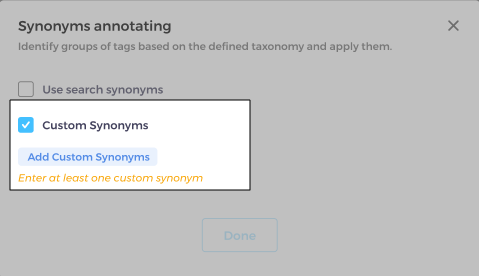
When the Use search synonyms is checked, it opens the gateway for fetching the synonyms defined under NLP > Synonyms.The entire process is automated. Admins play no role other than accept or reject the synonyms suggested by the instance. If search synonyms is all you want, check Use search synonyms and click Done.
-
An alternative is Custom Synonyms, where the admin can add more synonyms. You can select both Use Search Synonyms and Custom Synonyms. That way, you enable the system to fetch the synonyms defined under NLP > Synonyms and you can add custom synonyms.
-
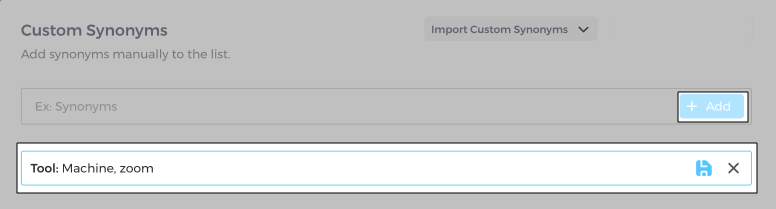
In the dialog, insert Entity: Synonym One, Synonym One, and click Add.
-
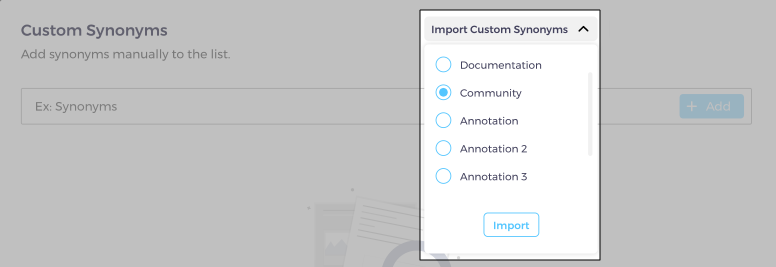
You can also import custom synonyms defined under other content annotation rules from Import Custom Synonyms.
-
On clicking Values Using Synonyms While Annotating, you can see the values, as they are saved in Taxonomy, of the selected Entity.
-
Once done, click Update. All the synonyms can be viewed under the Synonyms Configuration tab and edited when required.