Install a Search Client in Drupal
Use SearchUnify-powered search to find information faster in your Drupal instance. Currently, SearchUnify works only for Drupal 7 and Drupal 10 instances. This article walks you through the process of installing a SearchUnify search client in Drupal.
PREREQUISITES
- Drupal admin login credentials.
- Provision key; contact a SearchUnify representative to obtain it
Download Drupal Search Client
After adding a Drupal Search Client, Download the search client.
Note. Drupal 7 and Drupal 10 produce two separate zip files. Select the correct platform while creating a new search client.
-
Open the downloaded Drupal 7 search client file and extract the searchunify_drupal_connector.zip file.
-
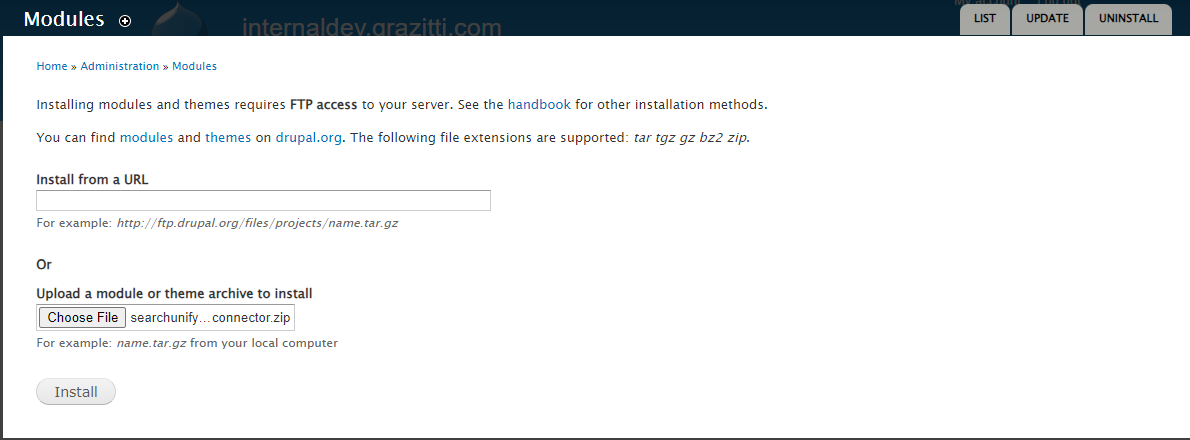
Log into your Drupal 7 instance and navigate to Modules > Install new module.
-
Upload the downloaded searchunify_drupal_connector.zip file here and click Install.
NOTE. For security reasons, you need to confirm FTP access to install the package. Make sure that you have FTP credentials to complete the installation of the connector.
-
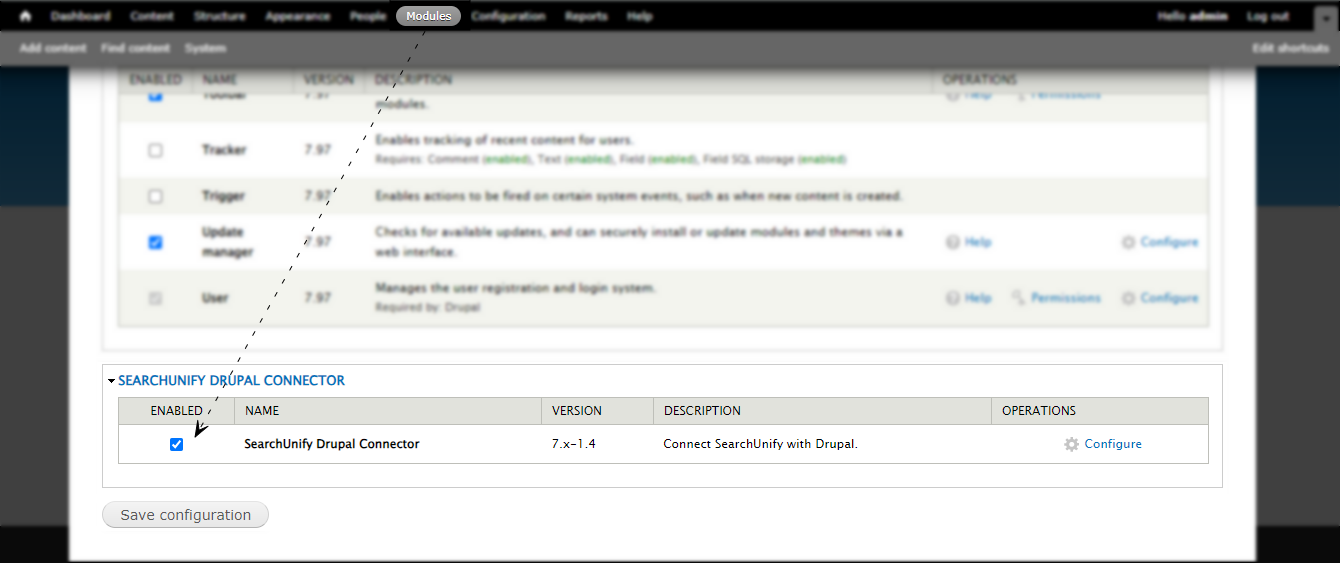
After the SearchUnify-Drupal Connector is installed, navigate to Modules, and enable SearchUnify Drupal Connector. Click Save Configuration to save the settings.
-
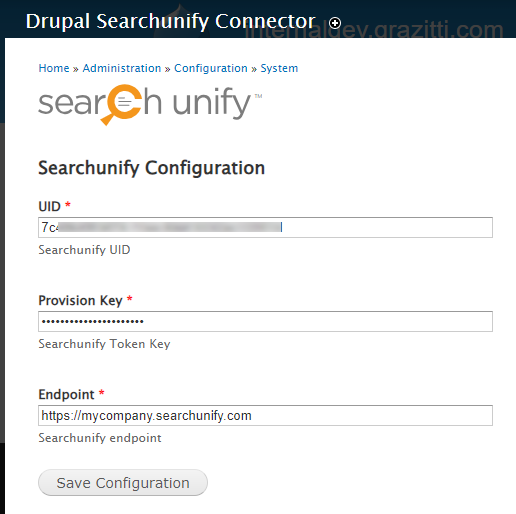
Click Configure from the Operations column to open the configuration page.
-
Enter the following details:
UID. Enter the UID of your Drupal search client (you can find it in the readme.txt file).
Provision Key. Enter the provision key provided by the SearchUnify team.
Endpoint URL. This is your SearchUnify instance URL (you can find it in the readme.txt file).
-
Hit Save Configuration to save your settings.
Result
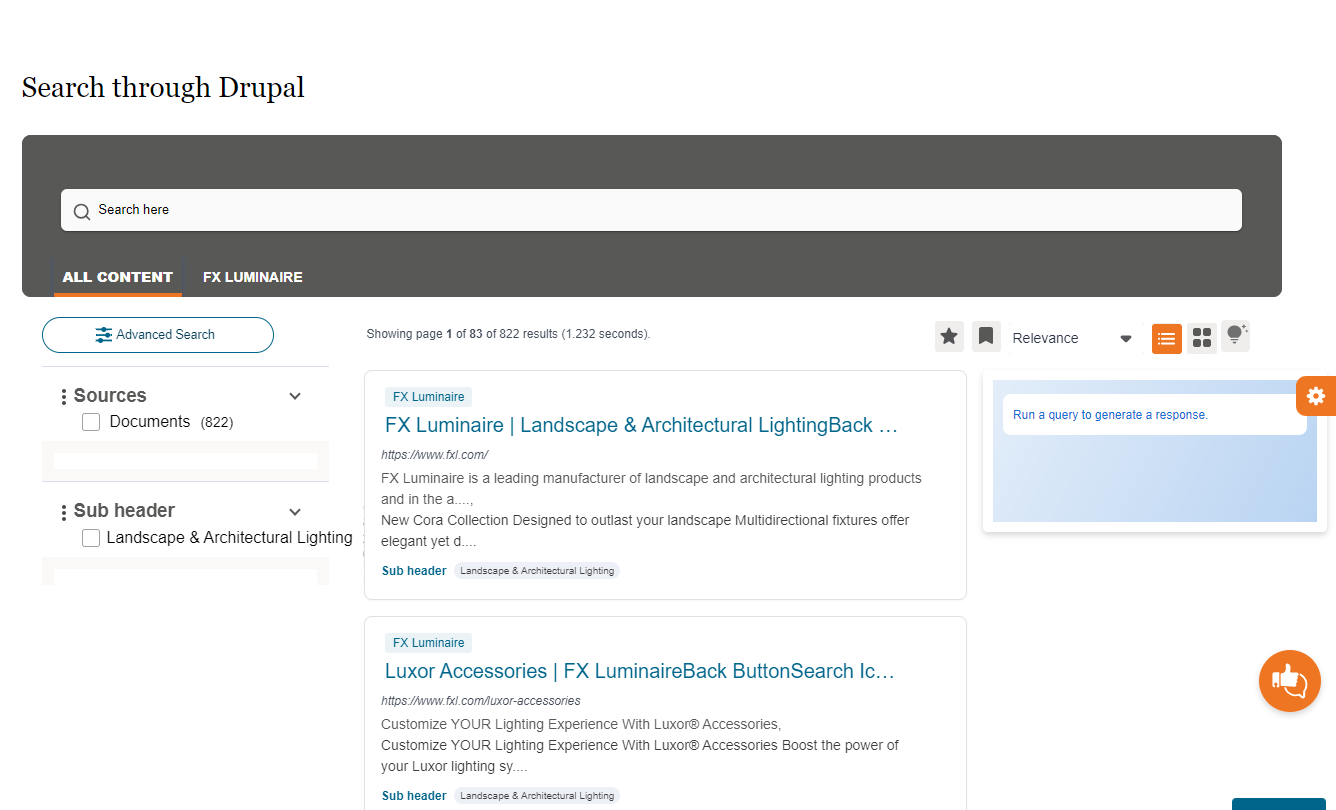
An illustration of how SearchUnify-powered search will look like on your Drupal 7 instance is as follows:
-
Open the downloaded Drupal 10 search client file and extract the searchunifyd10.zip file.
-
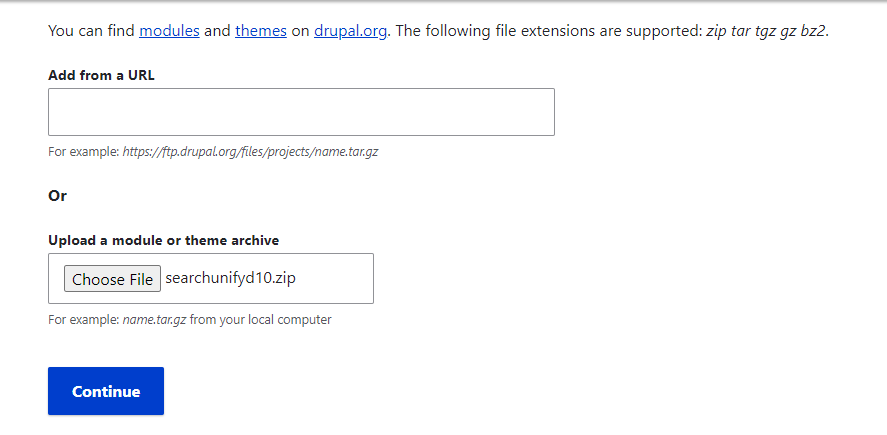
Log into your Drupal 10 instance and navigate to Extend > Install new module.
-
Upload the downloaded searchunifyd10.zip file here and click Continue.
NOTE. For security reasons, you need to confirm FTP access to install the package. Make sure that you have FTP credentials to complete the installation of the connector.
-
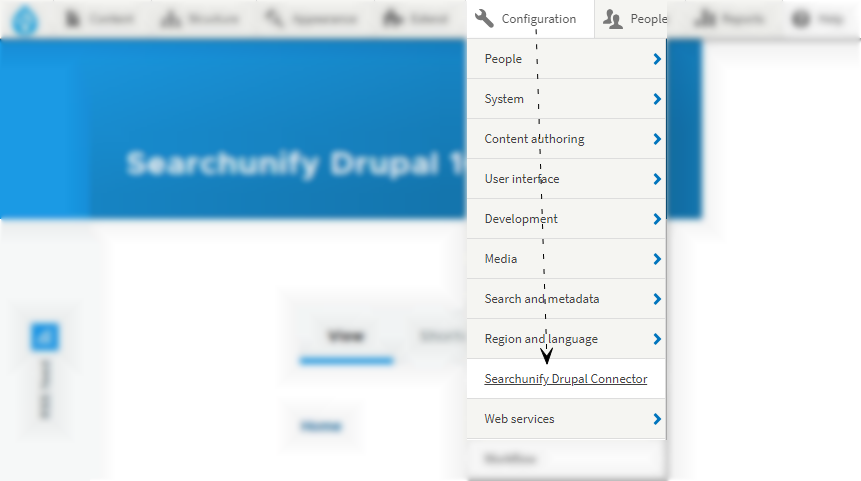
After the SearchUnify-Drupal Connector is installed, hover upon the Configuration tab and select SearchUnify Drupal Connector.
-
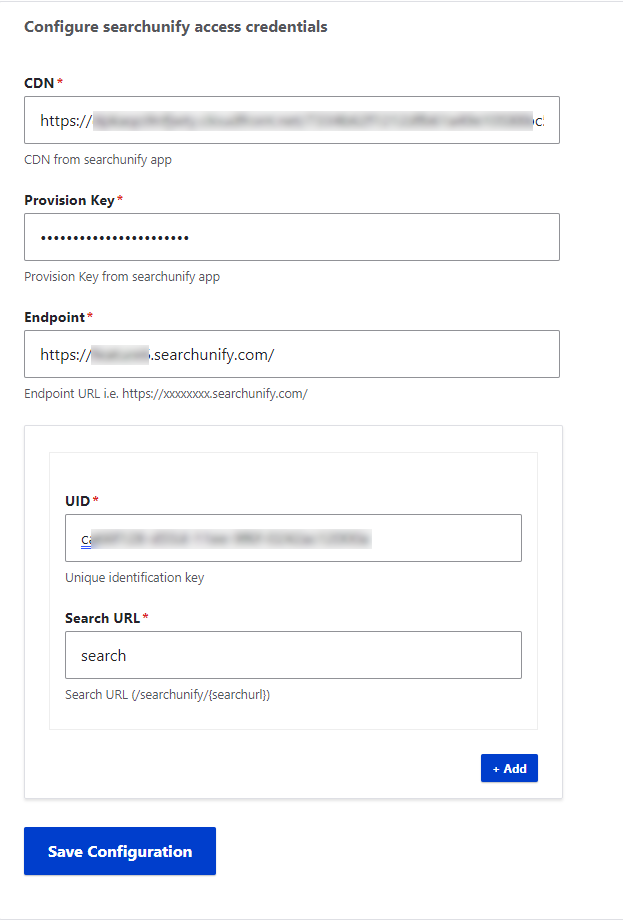
Enter the following details:
-
CDN. Enter the CDN given in the Readme.txt file in the Drupal 10 search client that you downloaded.
-
Provision Key. Enter the provision key provided by the SearchUnify team.
-
Endpoint. Enter your SearchUnify instance URL (you can find it in the readme.txt file).
-
UID. Enter the UID of your Drupal search client (you can find it in the readme.txt file).
-
Search URL. Enter the page URL where you want to deploy the SearchUnify-powered search. E.g. https://{your drupal instance URL}/searchunify/search.
-
-
You can add more than one search pages. Use the + Add button to add more page URLs where you want to deploy the search.
-
Hit Save Configuration to save your settings.
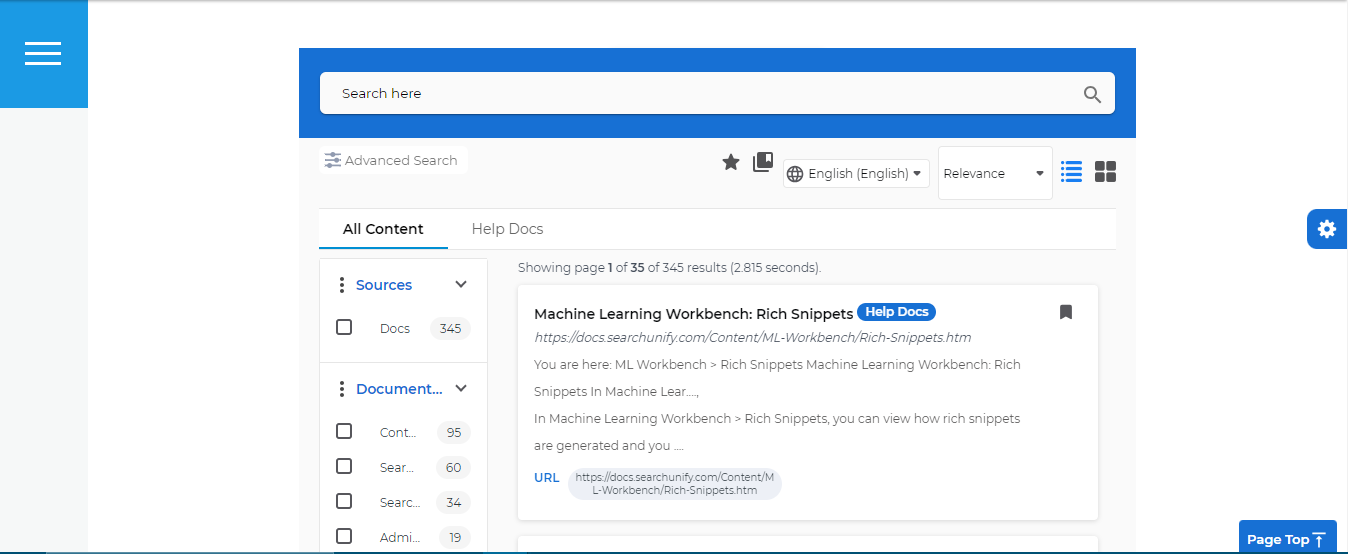
Result
An illustration of how SearchUnify-powered search will look like on your Drupal 10 instance is as follows:


