

Configure a Hosted Search Client
This feature is not available in the SearchUnify Cloud Edition.
Organizations can securely access SearchUnify search services using an SAML 2.0 identity management software (IMS). Using an IMS is safe and convenient. It’s safe because access control settings are defined and stored in one place. And it’s convenient because users can access any allotted application after logging into the IMS.
Hosted Search Client is a web-based search client which can be integrated with an IMS. On a SearchUnify instance, you can have at most one Hosted Search Client. This article explains how to set up a Hosted Search Client and integrate it with Okta, a popular identity management software. The entire configuration consists of five parts:
-
Create a Hosted Search Client and download it
-
Set up the Hosted Search Client in Docker
-
Create an app in Okta
-
Enter SSO-Sign In details in Administration > Manage Users
-
Optional: Add users who want to access the Hosted Search Client
Each part consists of several subparts. This article covers them all.
Prerequisites
-
Access to Okta or another identity management software
-
A server with Docker
-
A page to host the search client
Create a Hosted Search Client
-
In Search Clients, click Add New Search Client, find Hosted Search Client, and open it.
-
In Enter Platform Name, give you search client a name. Paste your SearchUnify instance web address in Enter Base URL and click Save.
Set up the Hosted Search Client in Docker
The password to log into Docker is in readme.txt . To find it, download your search client from Manage Search Clients.
-
Log into Docker with your SearchUnify credentials.
Username: searchunifyhosted
Password: {{password_in_readme.txt}}
$ sudo docker login --username=searchunifyhosted-
Fetch SearchUnify’s hosted service from Docker Hub.
$ sudo docker pull searchunifyhosted/searchunifyhosted:searchunifyhosted-
Run the hosted service on port 2999. Either ensure that the port is accessible externally or reroute the service to 2999 from NGINX. In {{server_URL}}, enter the web address of the server where the search client will be hosted. For example, https://yourinstance.searchunify.com/.
$ sudo docker run -it --init -p 2999:2999 -d searchunifyhosted/searchunifyhosted:searchunifyhosted {{server_URL}}-
In the file site-enabled/default, enter the route location:
/saml-sc/ {
    proxy_pass http://localhost:2999/;
}
-
Save the settings.
-
Define the Hosted Search Client URL in Docker. The URL has the format: {{server_URL}}/saml-sc/hostedLogin, where server_URL is the web address of the hosted search client. You can replace /saml-sc/ with a custom directory name. Don’t forget to append /hostedLogin after the URL.
Create an app in Okta
Keep your security certificate handy. It's stored in a file with the extension in .pem.
- Log into your IMS and open Add Applications.
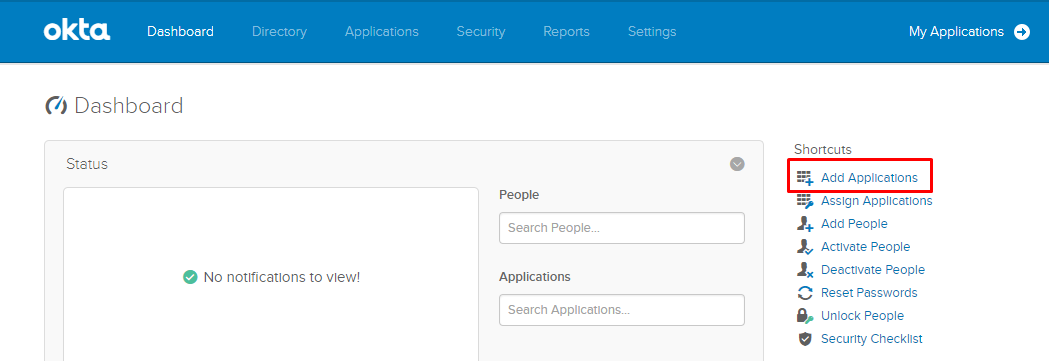
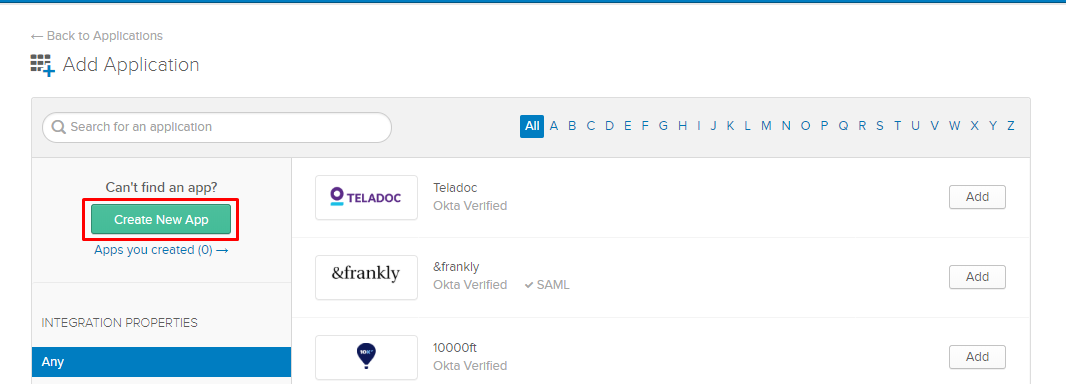
- Click Create New App.
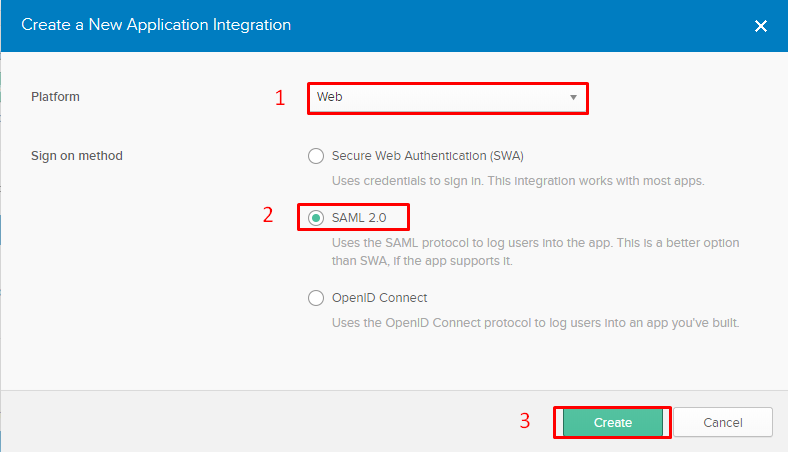
- Select Web in the Platform dropdown, check SAML 2.0 in Sign on method and click Create.
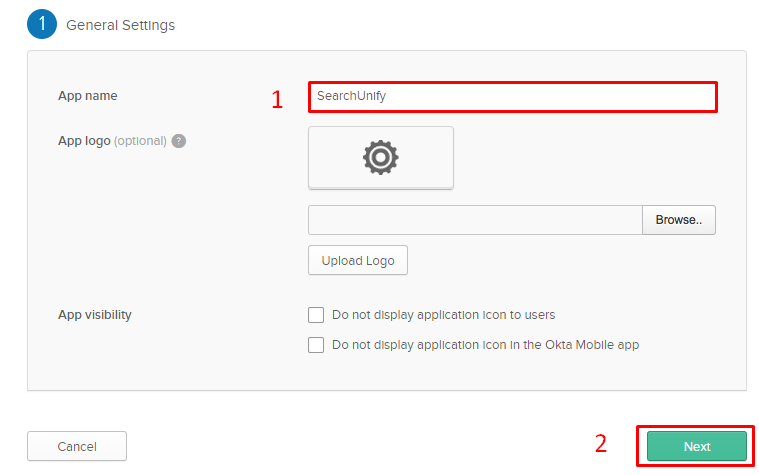
- Enter SearchUnify in the App name field and click Next. Uploading an app logo is not mandatory, but recommended. App Visibility settings will vary from organization to organization. They can be ignored for a minimal installation.
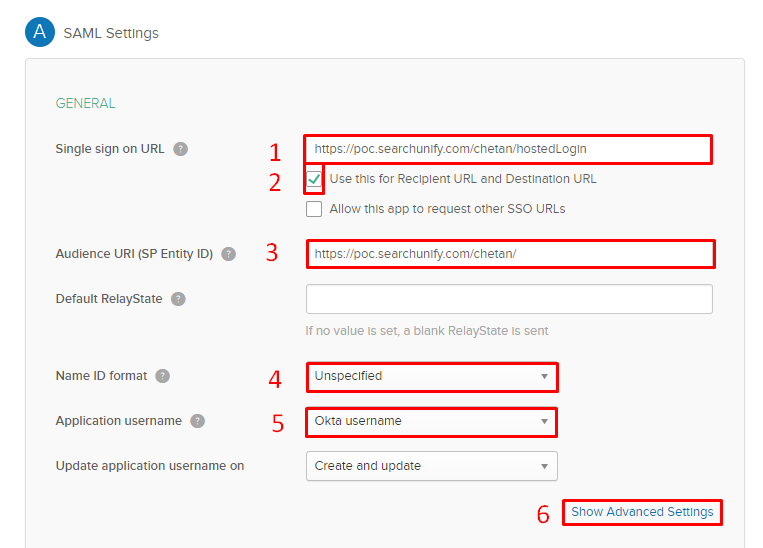
- On the SAML Settings screen, enter the following details and click Show advanced settings.
- Single sign on URL: {{server_URL}}/saml-sc/hostedLogin
- Use this for Recipient URL and Destination URL: Checked.
- Audience URI (SP Entity ID): {[server_URL}}
- Name ID format: Unspecified
- Application username: Okta username
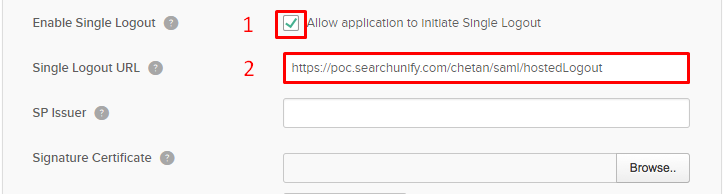
- Scroll down a little to find Enable single logout. Three new fields will appear when you check Allow application to initiate Single Logout. Enter {{server_URL}}/saml-sc/hostedLogoutin Single logout URL. Scroll down and click Next.
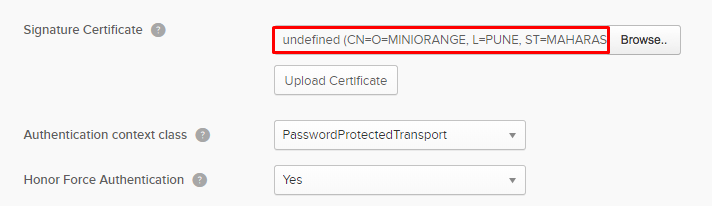
- In the Signature Certificate field, upload the security certificate received from SearchUnify. The next two fields (Authentication context class and Honor force authentication) will be populated if the upload was successful.
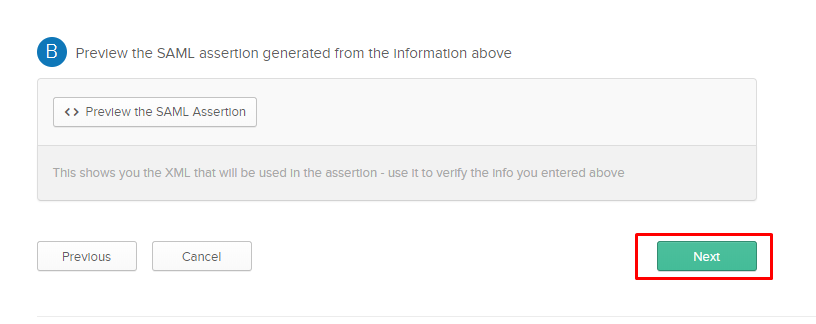
- Scroll down and click Next.
- Check an option in Are you a customer or partner? and click Finish.

- You will land on the SearchUnify app screen, where you can click View Setup Instructions.
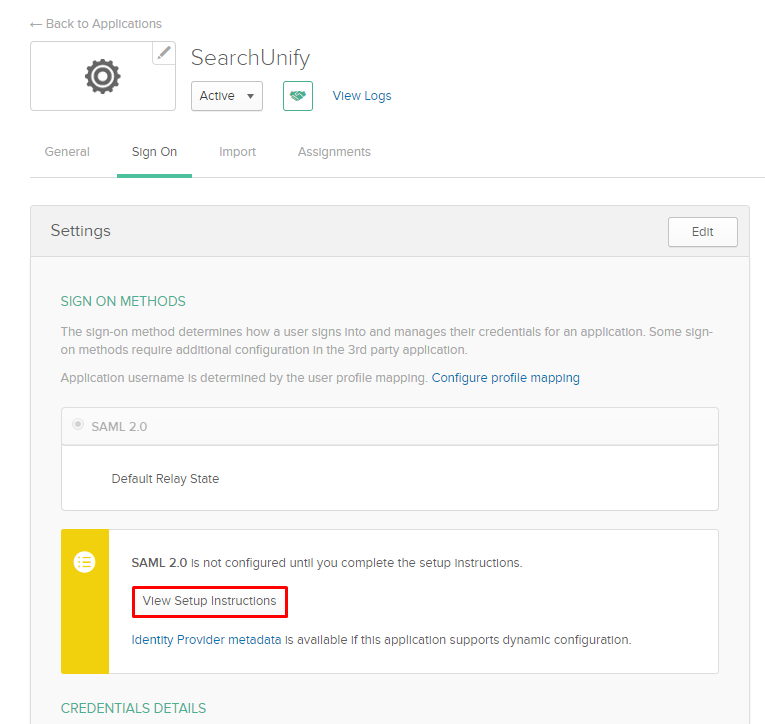
The app creation was successful if you can see a similar screen.

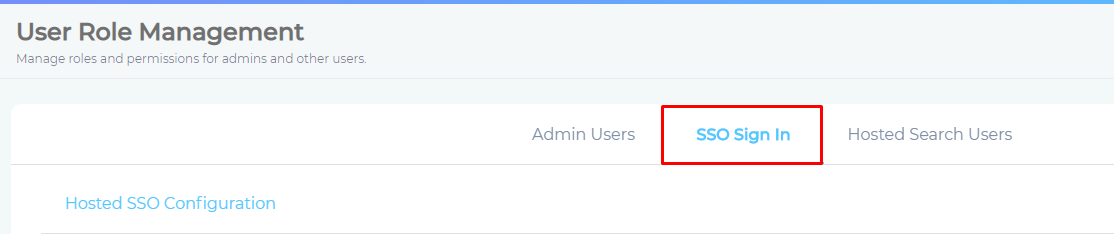
Enter SSO-Sign In details in Manage Users
- Open Administration > Manage Users from the left navigation.
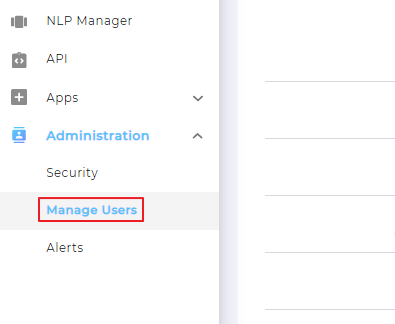
- Move to SSO Sign in.
- Enter the details which you found after clicking View Setup Instructions.
- Idp Display Name: Enter any name of your choice.
- Idp Identifier: Enter any name of your choice.
- Idp Entity Id: Identify Provider Issue
- SAML SSO Login URL: Identity Provider Single Sign-On URL
- X.509 Certificate: X.509 Certificate
- Saml Logout Url: Identity Provider Single Logout URL
- Enter Hosted Search Client URL. Search client web address configured in Docker (See the end of Step 2)
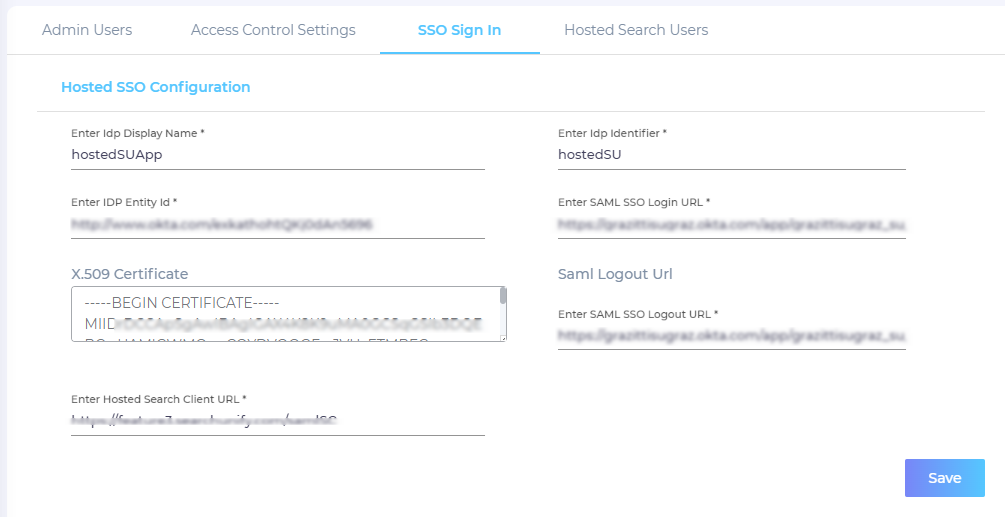
- Click Save.
Add and Remove Access
The users who have been allowed to access the Hosted Search Client in Okta run searches on {{server_URL}}. You can expand the list from Add Users in Manage Users > Hosted Search Users. You can use take back access from Hosted Search Users.

You can also deactivate a user from the Hosted Search Users screen.
Usage
To access your Hosted Search Client, log into Okta (or another identity-management software), find SearchUnify, and open it.