Install SearchUnify on Joomla
This article gives you a walk-through of how you can install the SearchUnify search client in Joomla. Follow the given instructions to install the SearchUnify search client in your Joomla instance.
Prepare Search Client for Installation
-
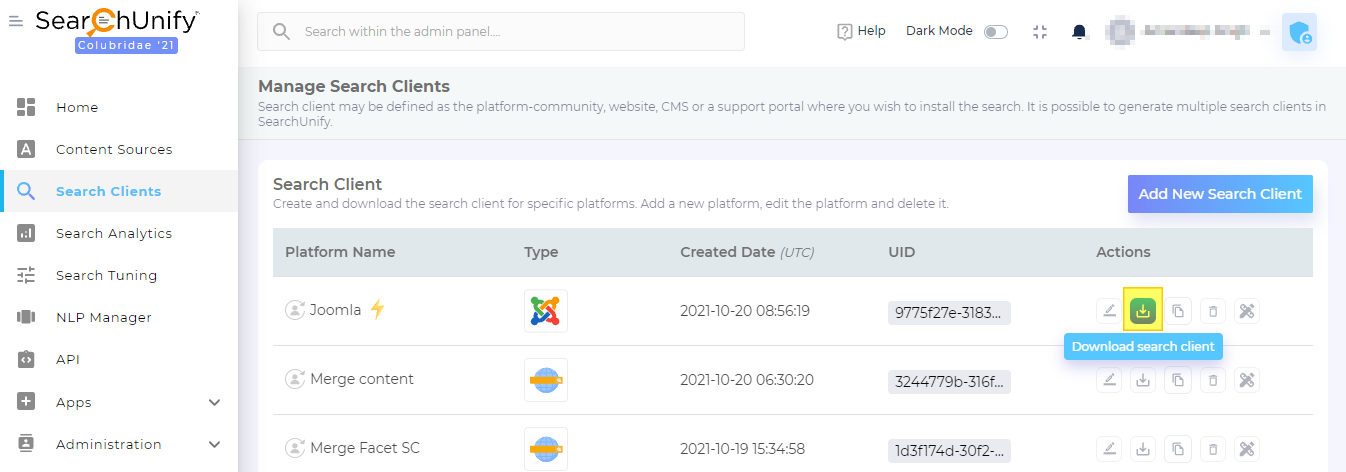
Once you have added Joomla as a search client, click Download search client.
-
Open the downloaded .zip file and extract its contents. Then, open index.html and copy the script and the CSS URL.

-
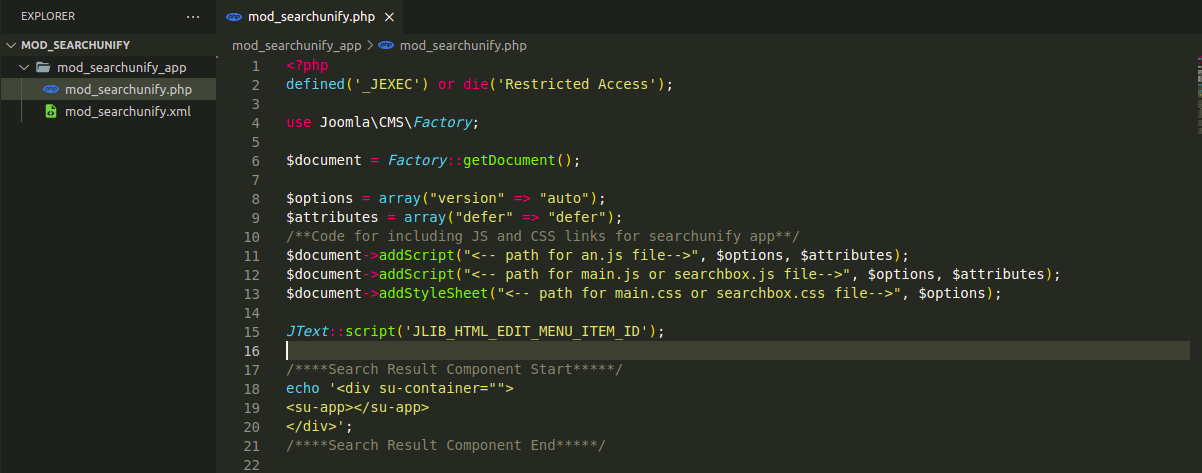
Extract files from mod_searchunify.zip. One of the extracted files will be mod_searchunify.php. Open it for editing and add the following paths in the script.
-
Savemod_searchunify.php. Create a new .zip file with the updated files with the same name mod_searchunify.
Install Search Client on Joomla
-
Log into Joomla.
-
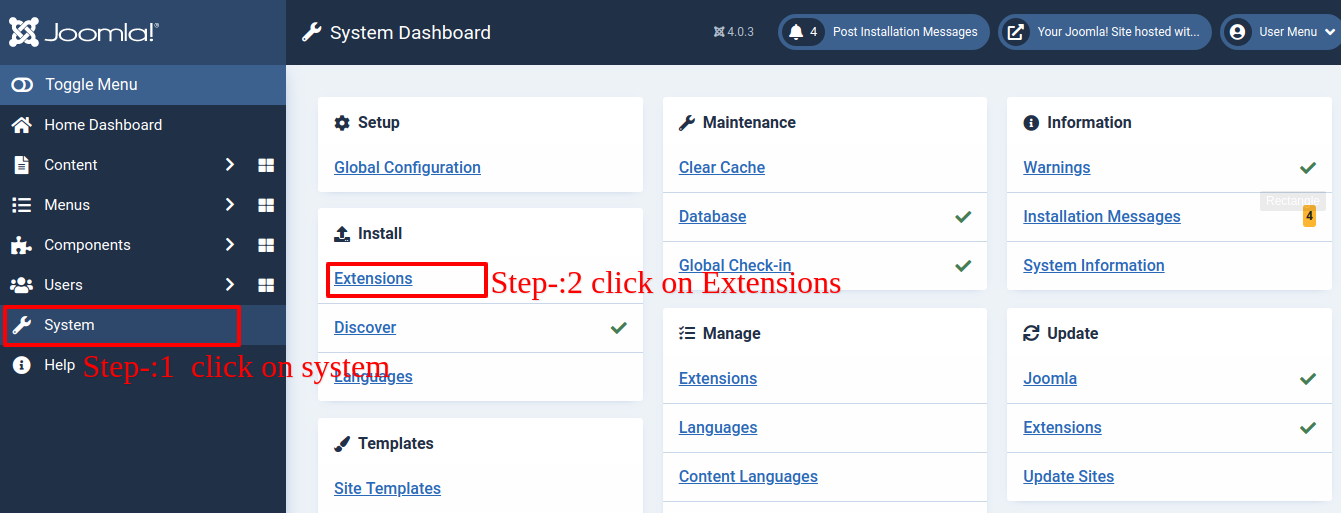
To install the SearchUnify app, click System from the side menu bar and subsequently, click Extensions.
-
Install the updated mod_searchunify.zip file.
-
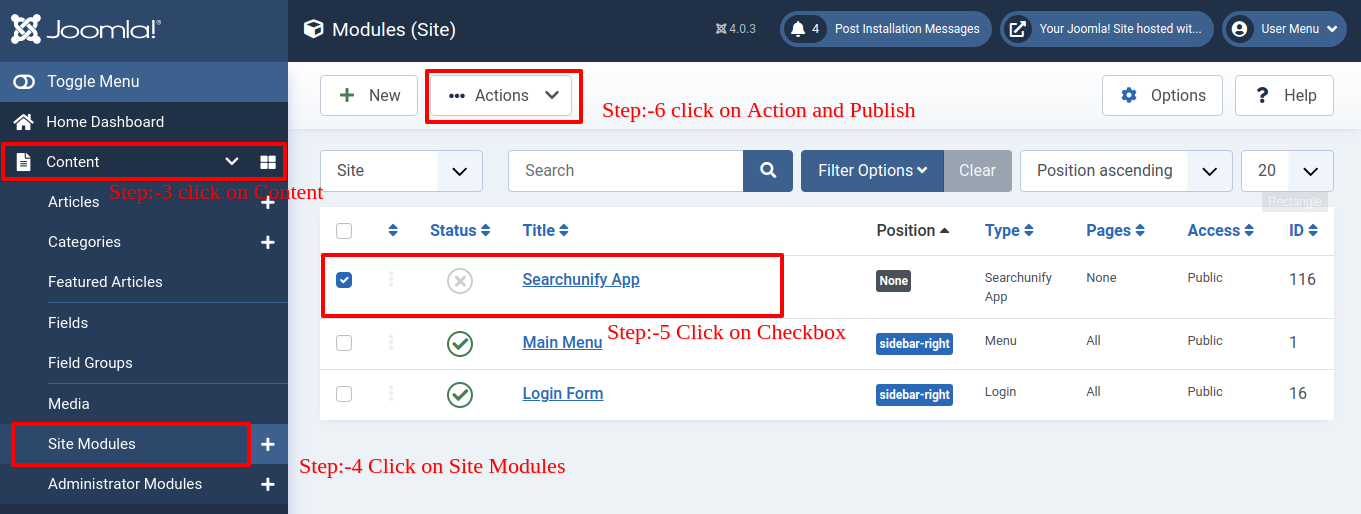
Upon receiving a notification about the completion of the installation, tick the check box.
-
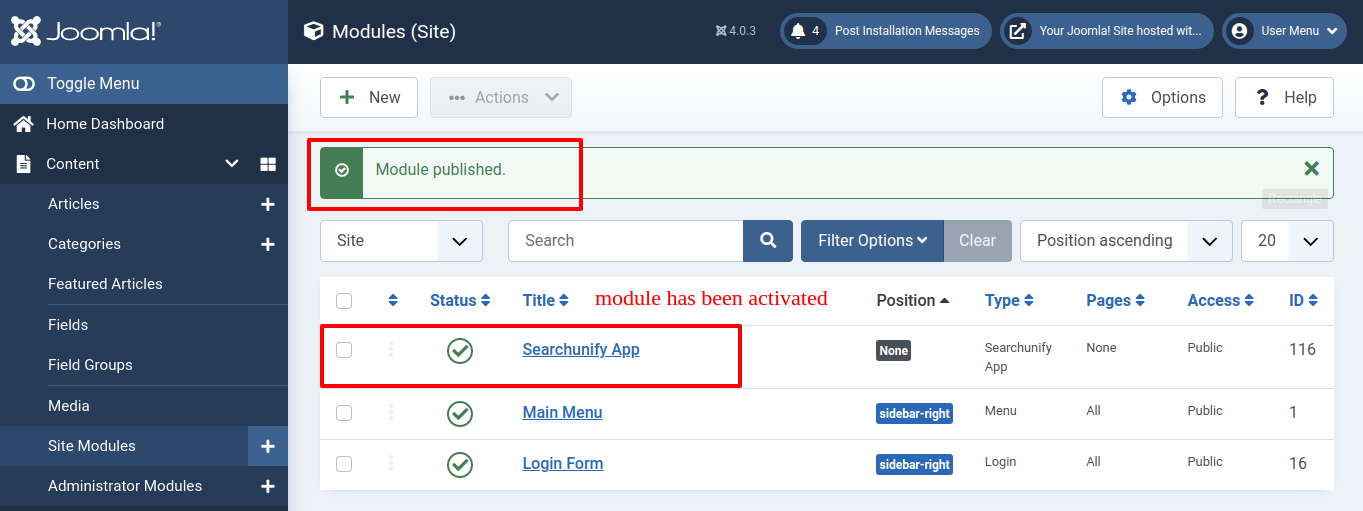
Click Action and publish the extension.
-
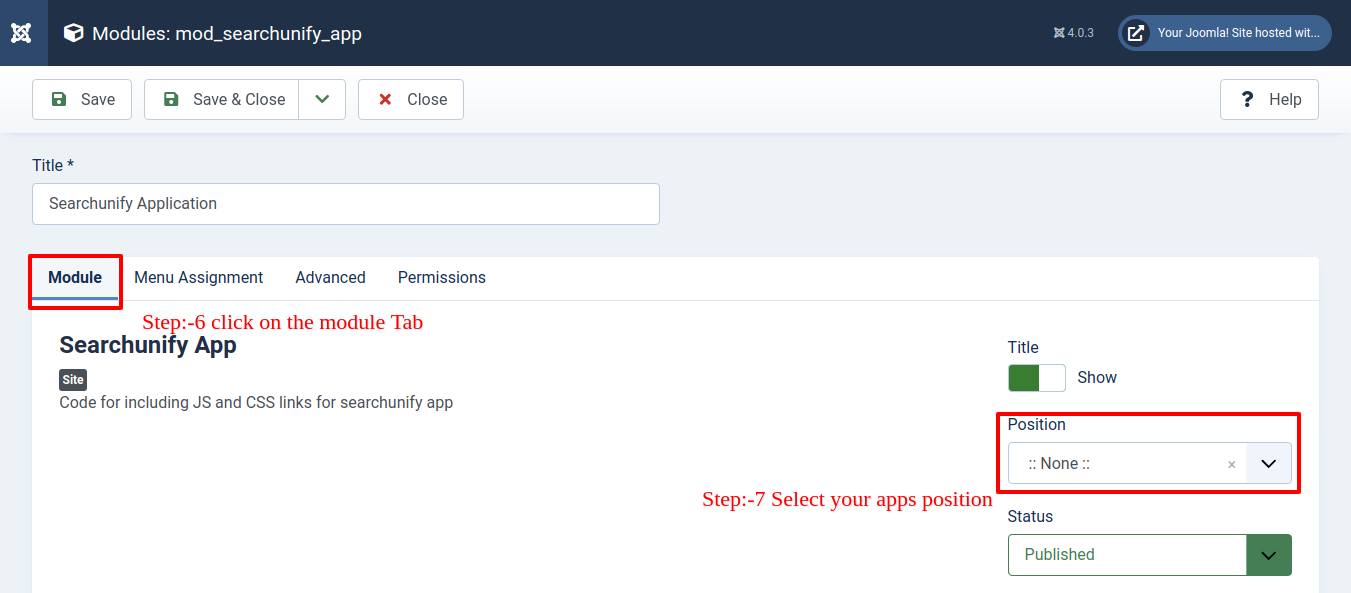
After publishing, click SearchUnify App.
-
Under the Module sub-tab, select the position of the app using the position drop-down field.
-
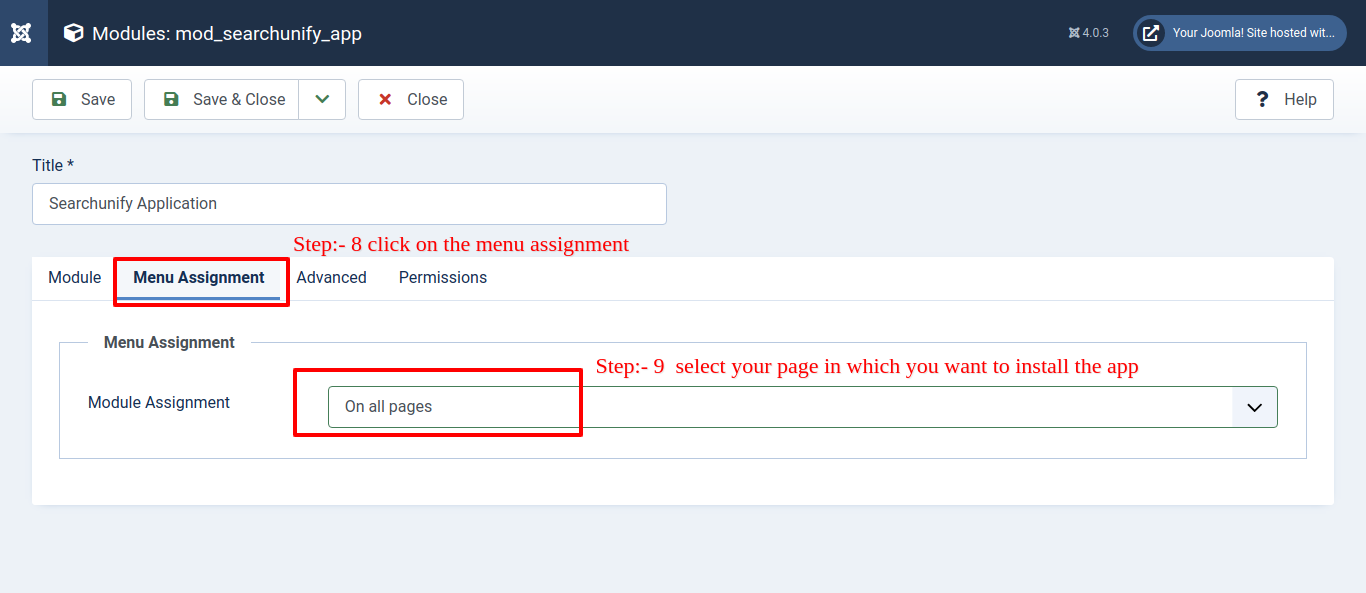
Click on the Menu Assignment sub-tab and select your module assignment, meaning the page on which you want to install the app.
-
For the next steps, go to the Articles and click New.
-
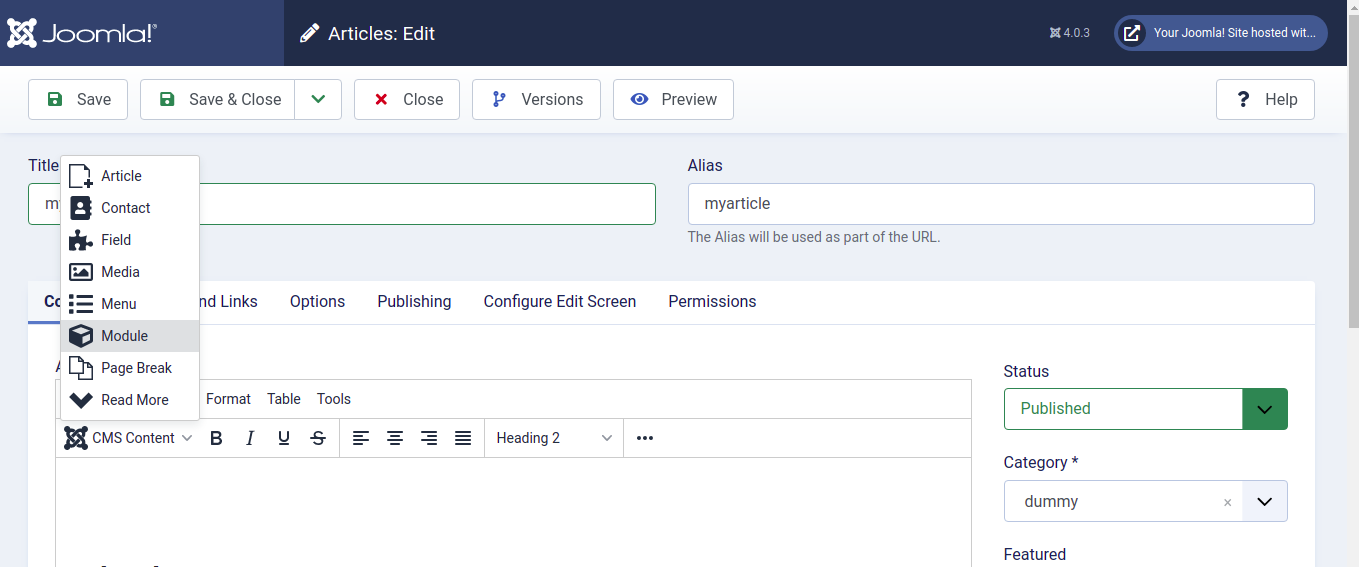
Add a Title Name. Then, click CMS Content and select SearchUnify Application.

-
You will now see the Shortcode in your articles like {loadmoduleid 117} for example.