Install a Search Client in ServiceNow
This feature is not available in the SearchUnify Cloud Edition.
This article walks you through the process of installing a SearchUnify search client in ServiceNow.
Installation Overview

Prerequisites
- Activated Customer Service plug-in in ServiceNow
- SearchUnify user scope set to either "Search" or "All"
Create a Search Client in SearchUnify
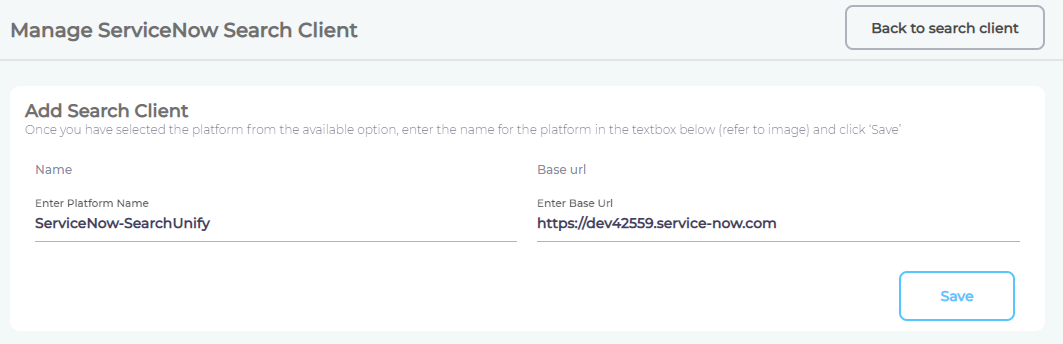
- Navigate to Search Clients from the menu bar and click Add new search client.
- Give your search client a name and enter your ServiceNow instance web address in Base URL.
- Click Save.
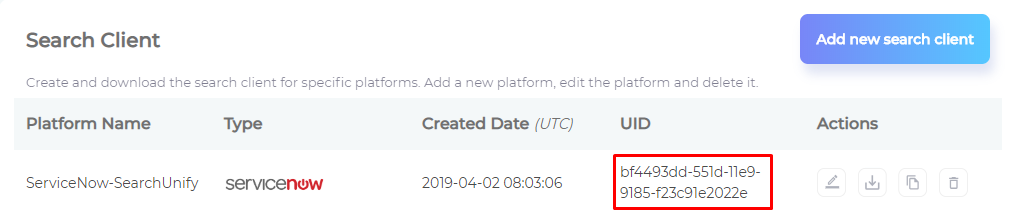
Note down the UID of the search client that you have just created. It will be used later.
Create an App in SearchUnify
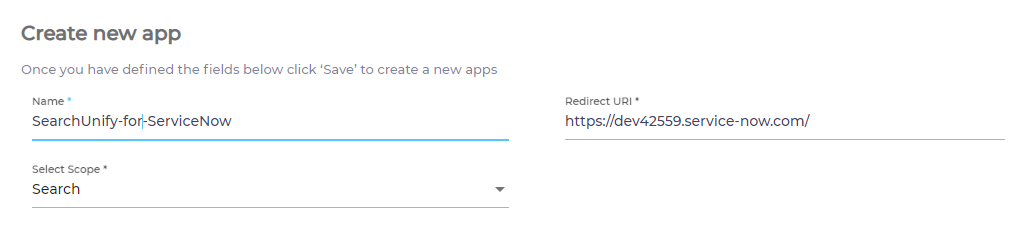
- From Apps in the main menu bar, click Create New App.
- Give your app a name.
- Enter your ServiceNow instance web address appended by
api/x_312362_c_a_su/sugetcodein Redirect URL.
EXAMPLE.https://dev42559.service-now.com will change to https://dev42559.service-now.com/api/x_312362_c_a_su/sugetcode.
- Set the scope to Search and press Save.
Note down the Client ID and Client Secret of the app that you have just created. They will be used later.

Install SearchUnify in ServiceNow
- Log into ServiceNow.
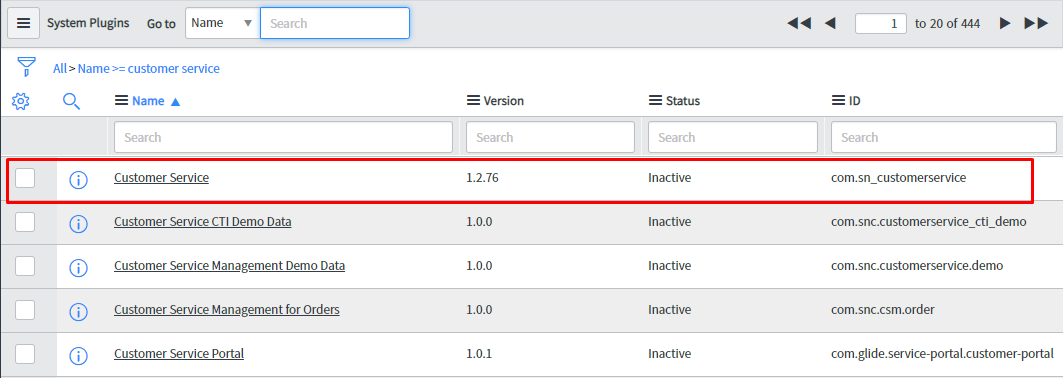
- Using Filter Navigator, find Plugins.
- Look up "customer service" in the search box.
- Check Customer Service to activate the plugin.
Create a SearchUnify App
- Find Studio from the Filter Navigator and click it.
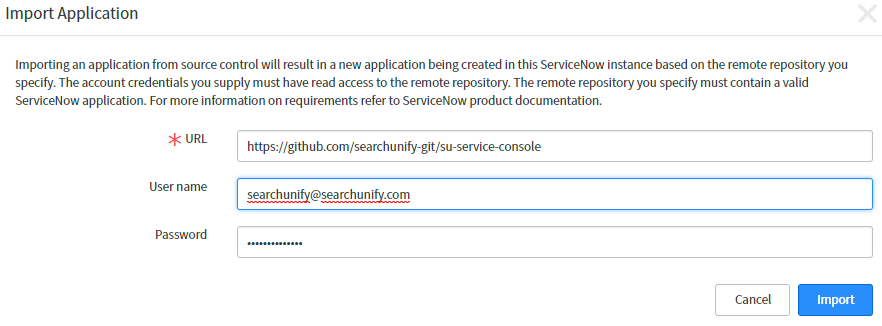
- Select Import from Source Control.
- Enter
https://github.com/searchunify-git/su-service-consolein URL. - In User name and Password, enter the credentials that your SearchUnify representative has shared with you.
- Click Import.
A app by the name of Customer Application SearchUnify will be created.
Configure the SearchUnify App
- Look up "SearchUnify Console" in Filter Navigator.
- Click Configure.
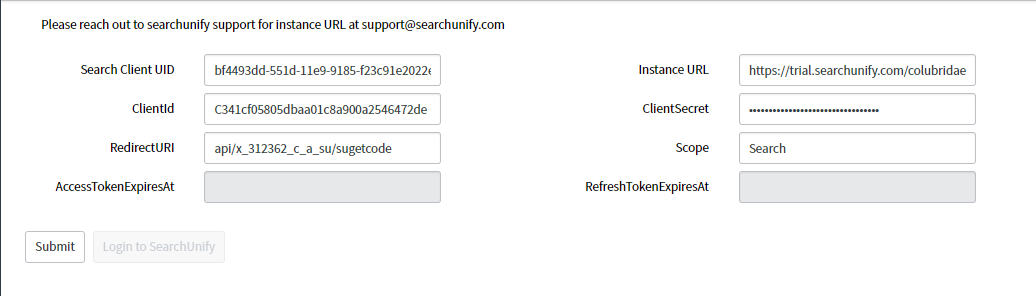
- Enter Search Client UID, Client ID, Client Secret, and Instance URL and press Submit. (The Instant URL is the web address of your SearchUnify dashboard.)
- Press Log in with SearchUnify and then Allow.
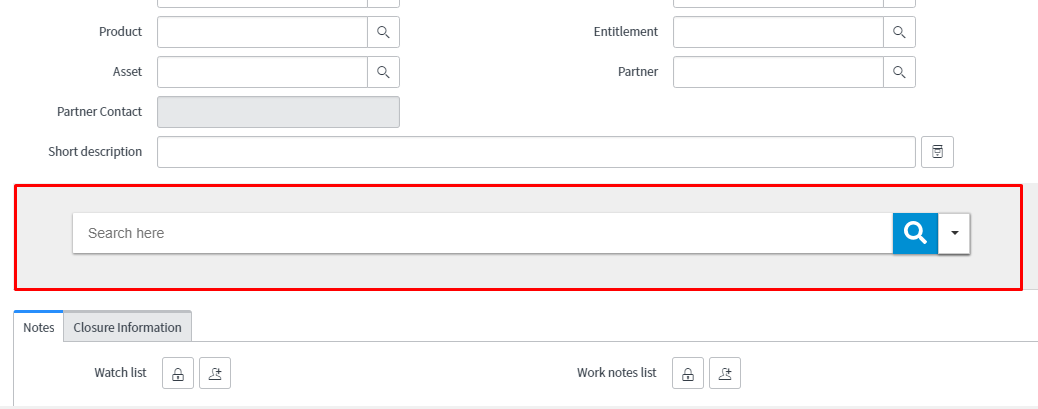
- Open a case in ServiceNow.
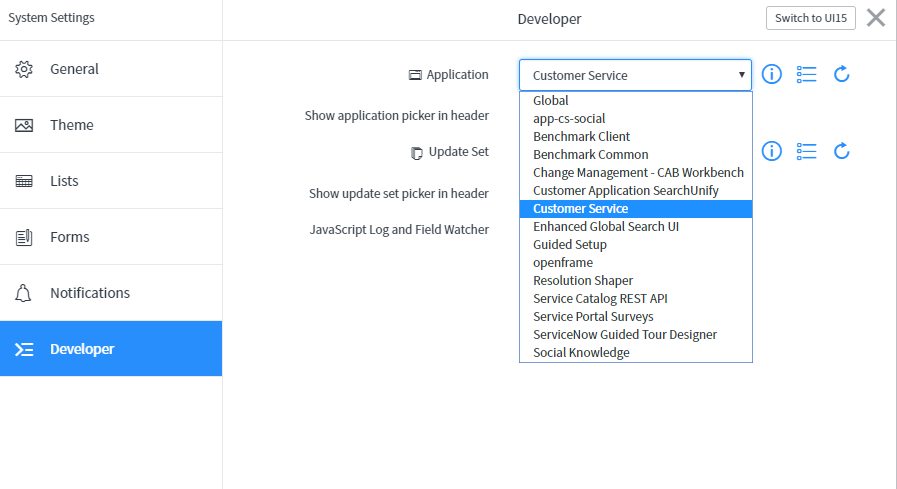
- Click
 , navigate to Developer, and select Customer Service from the Application dropdown.
- From
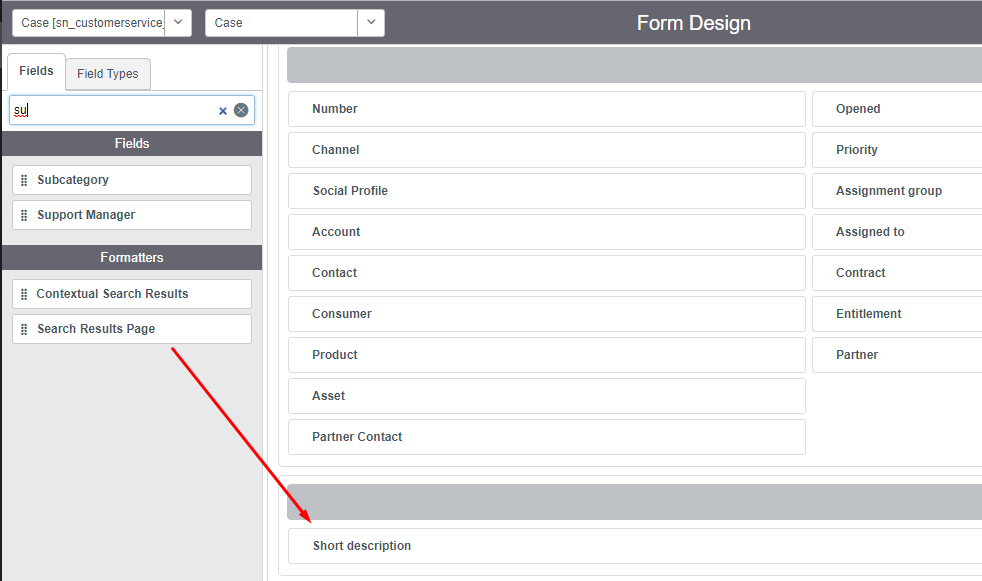
 , click From Design in Configure.
 - Drag Search Results Page in Formatters to the Short Description section.
- Save.
You can reload the case details page to use search.