Basic Configuration for AI Case Quality Auditor
This article walks you through the process of connecting the AI Case Quality Auditor agent with an LLM and configuring the agent.
Adding an Agent
-
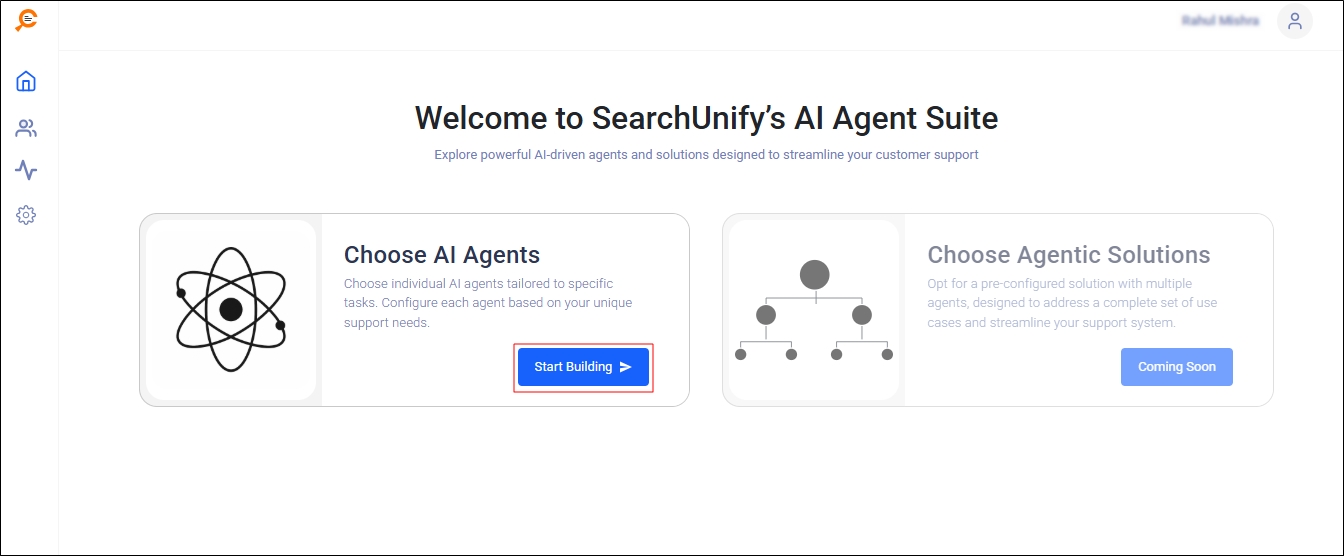
Log in to SearchUnify AI Agent Suite.
-
Click Start Building.
-
From the Agent Catalog, select AI Case Quality Auditor. The status will change to Added. Scroll down and click Continue.
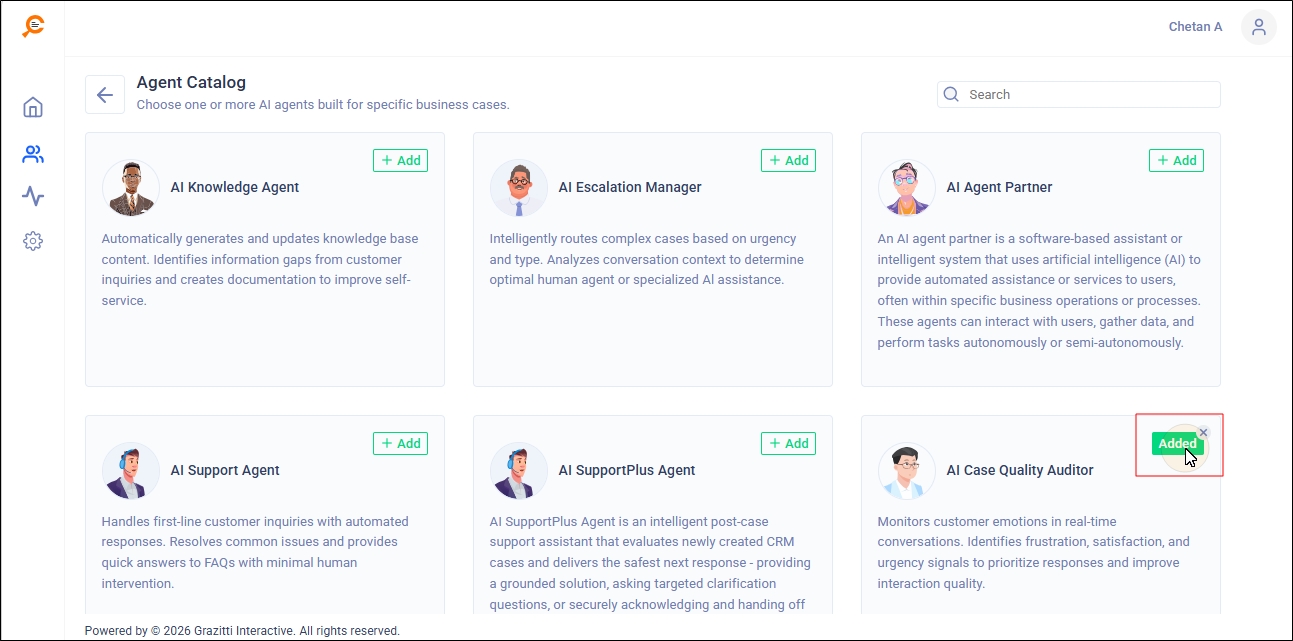
-
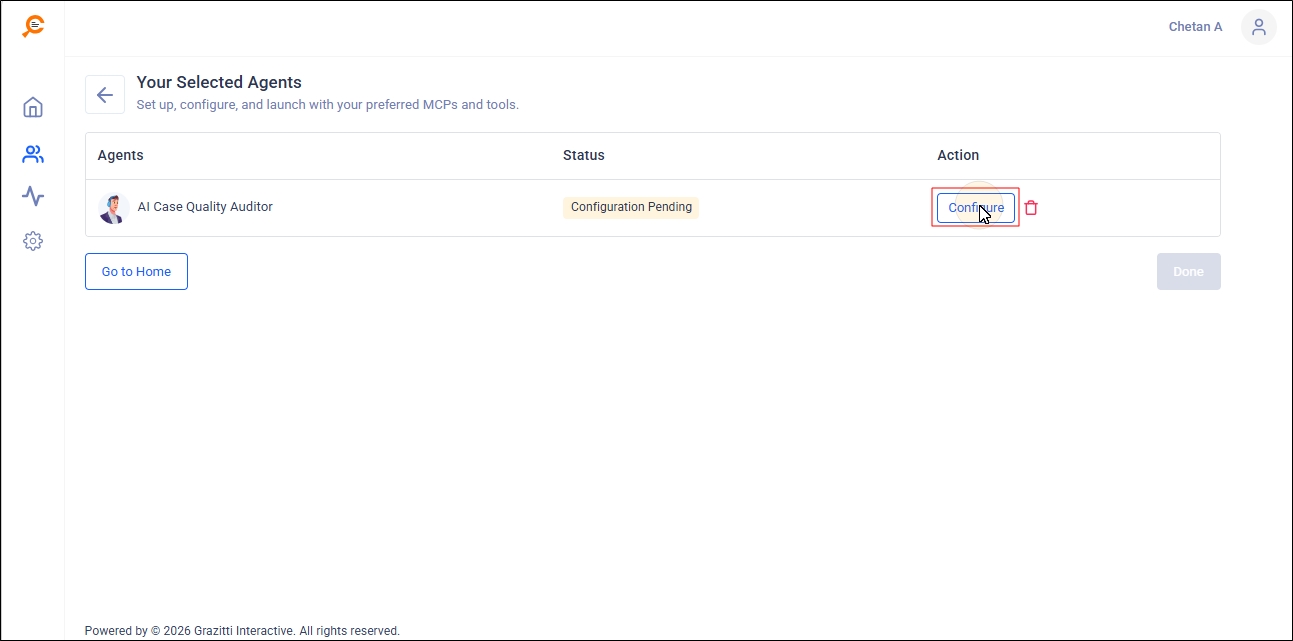
You will land on the Your Selected Agents screen. Click Configure to set up the AI Case Quality Auditor.
Basic Configuration
In this section, you will name the agent, connect it to an LLM, modify the prompt, and select an avatar for the agent. The last two configurations are optional.
-
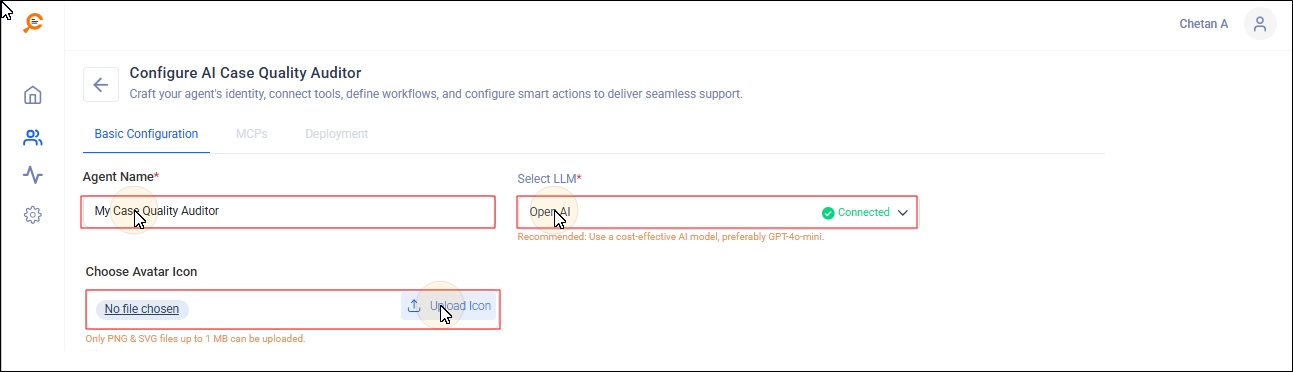
Enter the following details in the Basic Configuration section:
-
Agent Name - A name to identify the agent and its role.
-
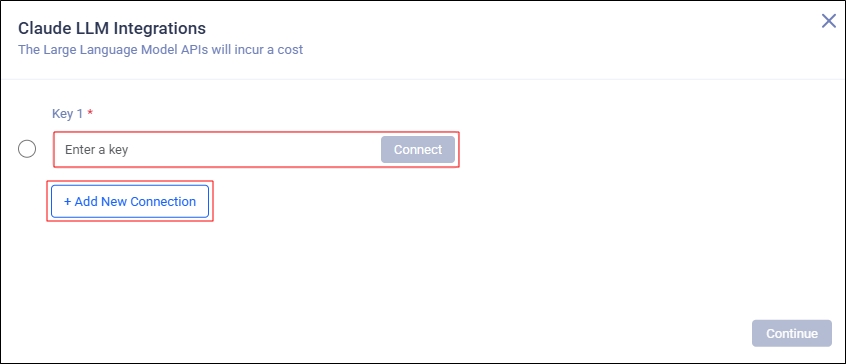
Select LLM - Select an LLM service.
If the selected LLM service is not connected, you will be asked to configure it by inserting a key or clicking Add New Connection.
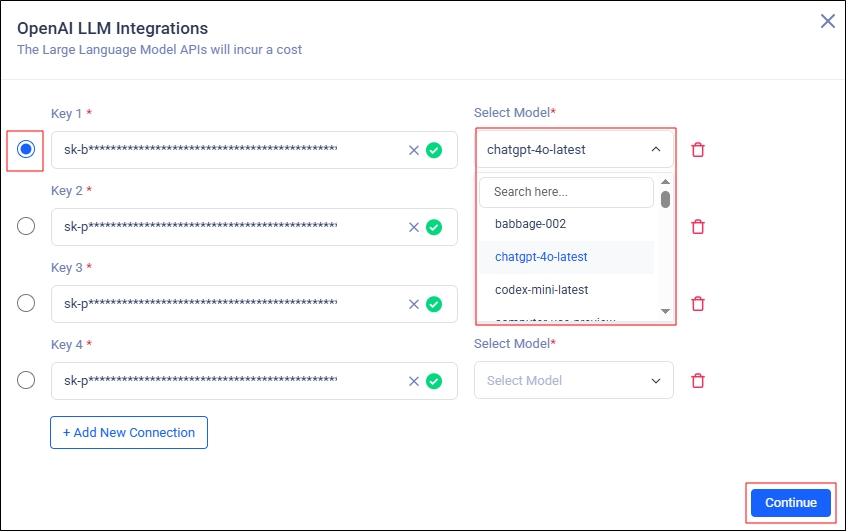
If the selected LLM service is connected, select a connection, pick a model, and click Continue.
-
Choose Avatar Icon - Pick an avatar for your agent. This field is optional.
-
Advanced Configuration
The Advanced Configuration section offers two configurations:
-
Parameter Weightage Configuration
-
Score Threshold Settings
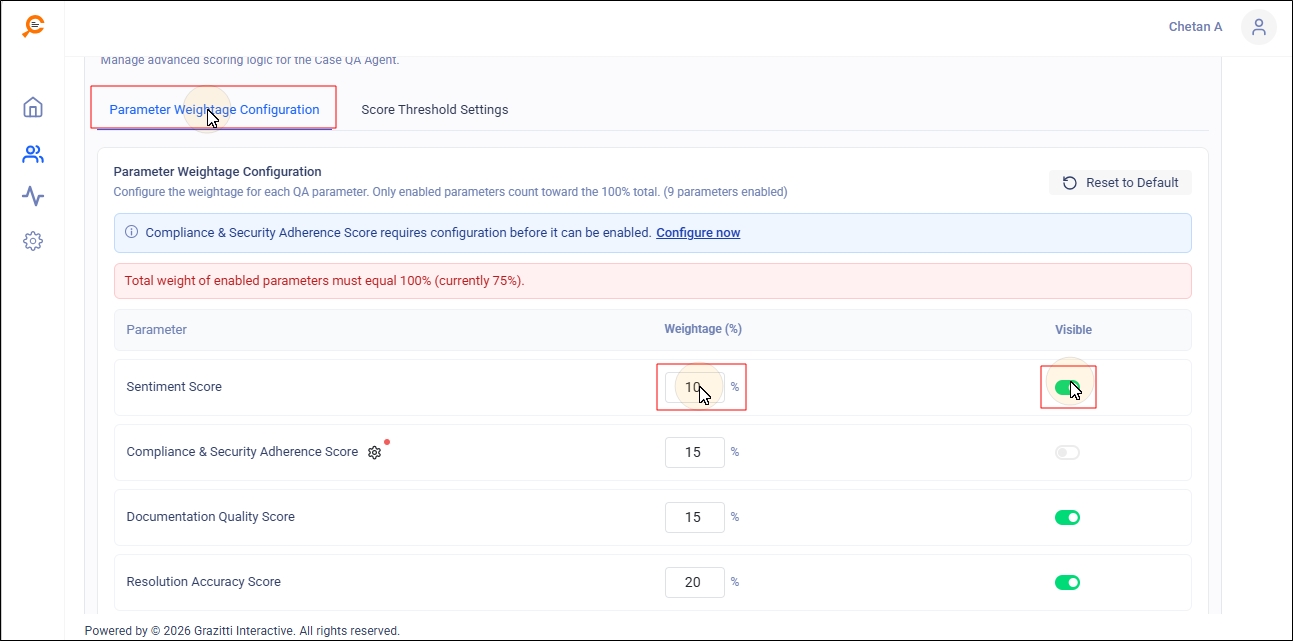
Parameter Weightage Configuration
The Case Quality Score is based on ten parameters. In Parameter Weightage Configuration, set how much each parameter contributes to the final case quality score. For example, legal teams may emphasize the Compliance & Security Adherence Score, but support teams may focus on the Resolution Accuracy and Response Quality scores. Based on your requirements, first select the parameters you need (you may choose fewer than the ten available). Then assign a value to each selected parameter.
-
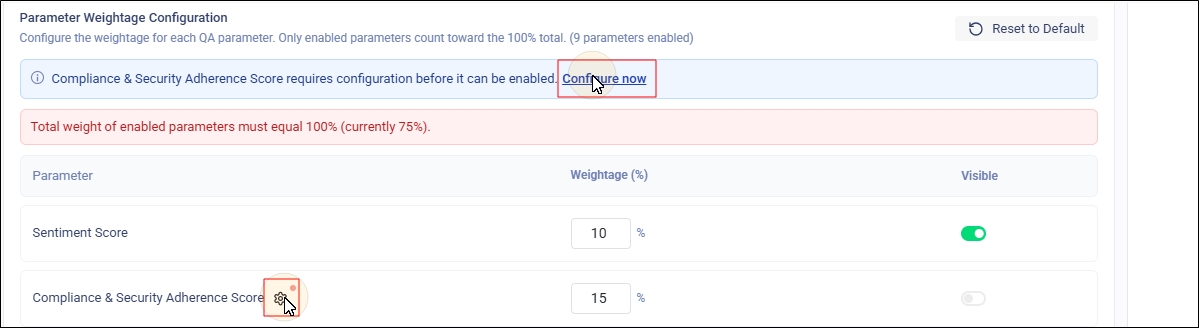
To select a parameter, toggle it on in the Visible column.
The only exception is the Compliance & Security Adherence Score parameter. To configure it, upload your organization's compliance and security policy documents (required) by clicking either Settings or Configure now.
-
To assign a value to a selected parameter, enter a number between 0 and 100% in the Weightage column. The sum of all values must be 100%.
The available parameters are:
-
Compliance & Security Adherence Score
-
Customer Engagement Score
-
Documentation Quality Score
-
Issue Comprehension Score
-
Resolution Accuracy Score
-
Resolution SLA Score
-
Response Quality Score
-
Response SLA Score
-
Sentiment Score
-
Technical Analysis Score
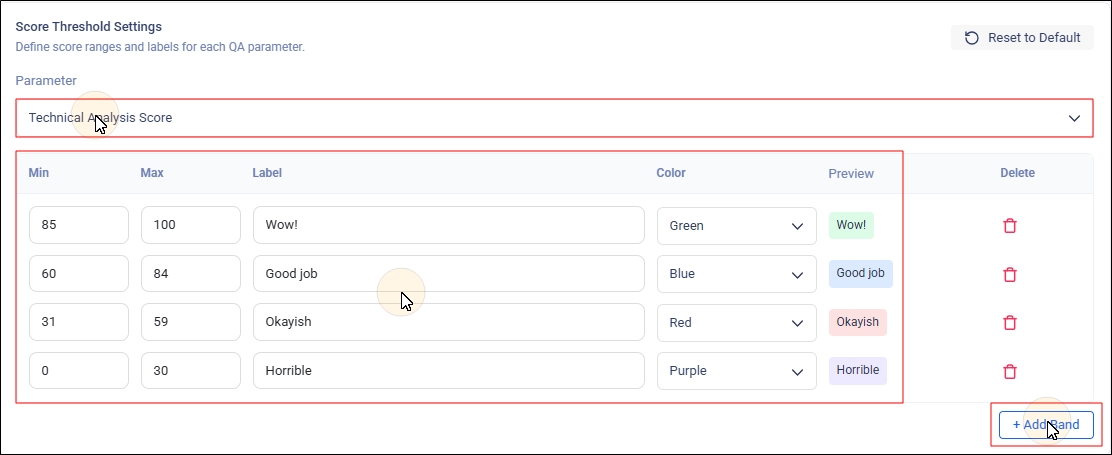
Score Threshold Settings
What should the Response Quality Score be to meet your organization's standards? What about the Technical Analysis Score? When is a score considered below standard? These numbers vary by organization and sometimes by team. Score Threshold Settings lets you define score ranges for your standards. By default, each parameter has three labels and ranges.
| Range | Label | ||
|
|||
|
Exceeds Standard | ||
|
Meets Standard |
||
|
Below Standard |
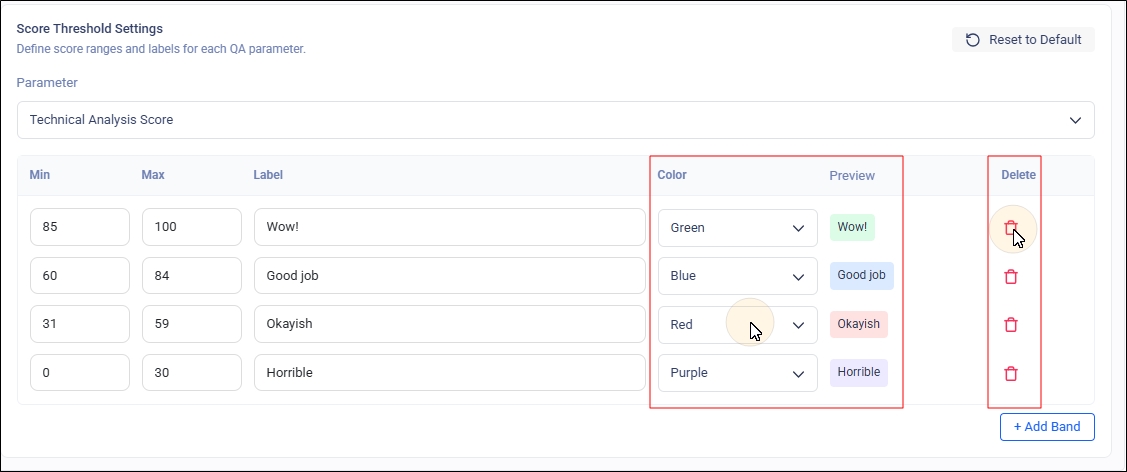
For example, if the Technical Analysis parameter's case quality score is in the 85–100 range, that parameter is rated Exceeds Standard (see image).
For personalized configuration, change the ranges and labels for each parameter:
-
Select a parameter from the Parameter dropdown.
-
Click Add Band.
-
In the new row, enter a range and label; edit the ranges and labels in existing rows as needed.
-
Use the Color dropdown to assign a color to each range; the Preview column updates to show the selected color. You can make ranges broad or very granular — the image in step five shows four ranges instead of the default three. You can create as many as your team needs (for example, 10 or 15). To avoid reinterpreting ranges later, give each range a memorable label and color.
For example: with ranges 75–80 (label/color = Good) and 70–75 (label/color = At Risk), someone viewing scores of 78 and 72 will immediately know that 78 is good and 72 is already risky.
-
Use the Delete button to remove a range.