

Adding an Agent and Basic Configuration
In this section you will name your agent, connect it to an LLM and give instructions to complement the in-built instructions.
Note: If you are adding AI Case Quality Auditor, then refer to Basic Configuration for AI Case Quality Auditor for instructions.
Adding an Agent
-
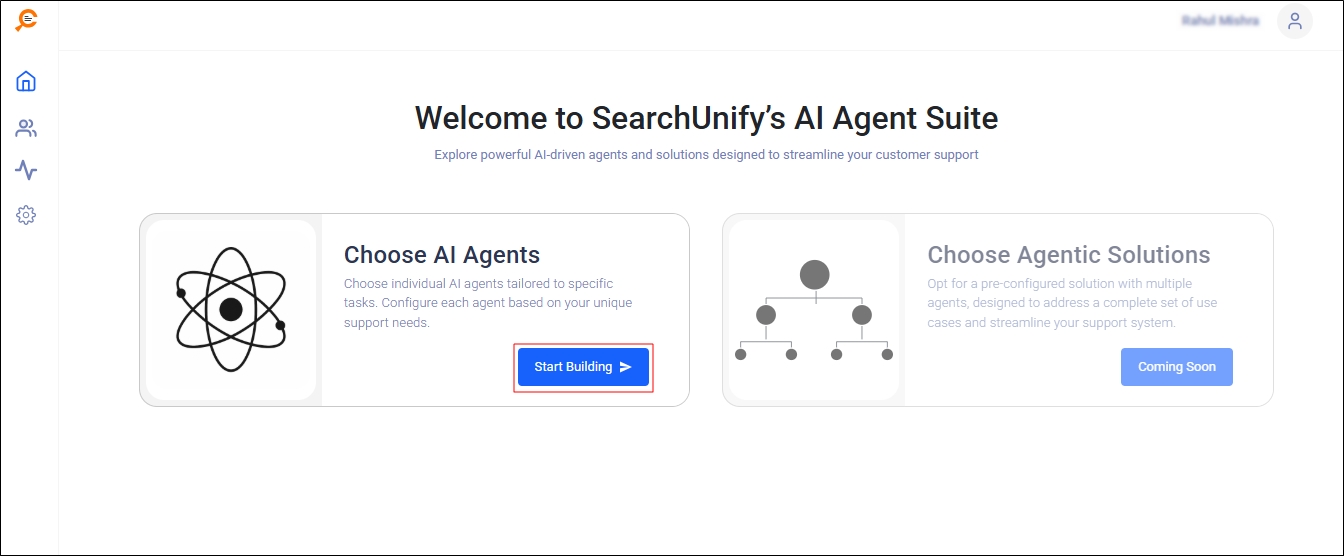
Log in to SearchUnify AI Agent Suite.
-
Click Start Building.
-
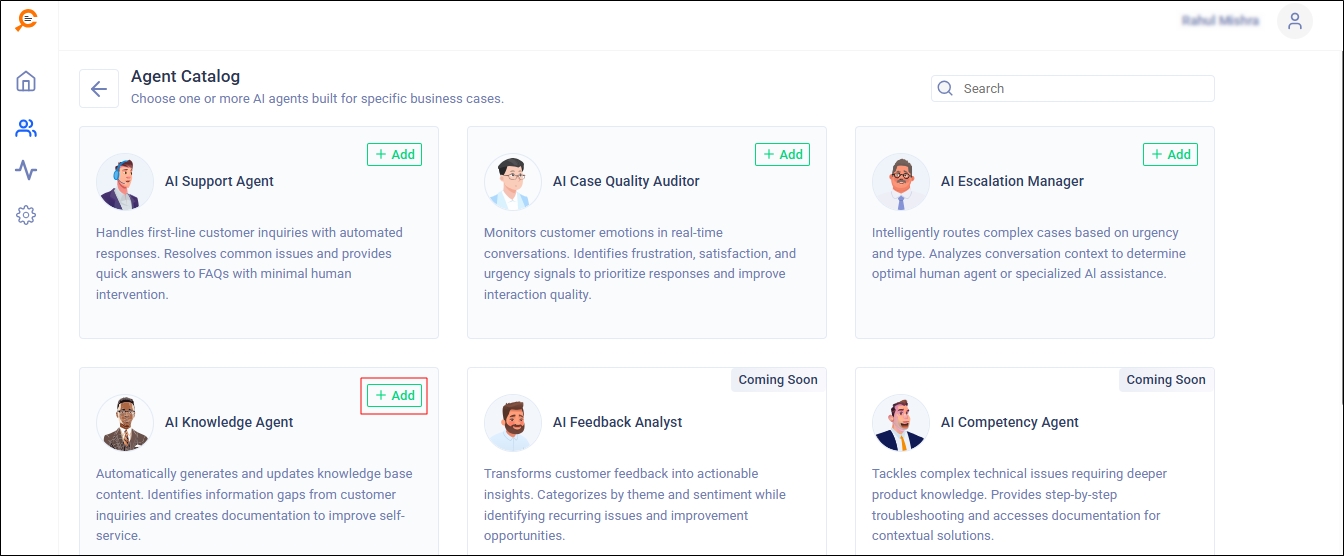
From the Agent Catalog, select an agent. Only for illustration AI Knowledge Agent has been selected in the next image. However, you can select AI Case Quality Auditor, AI Support Agent, or another agent.
-
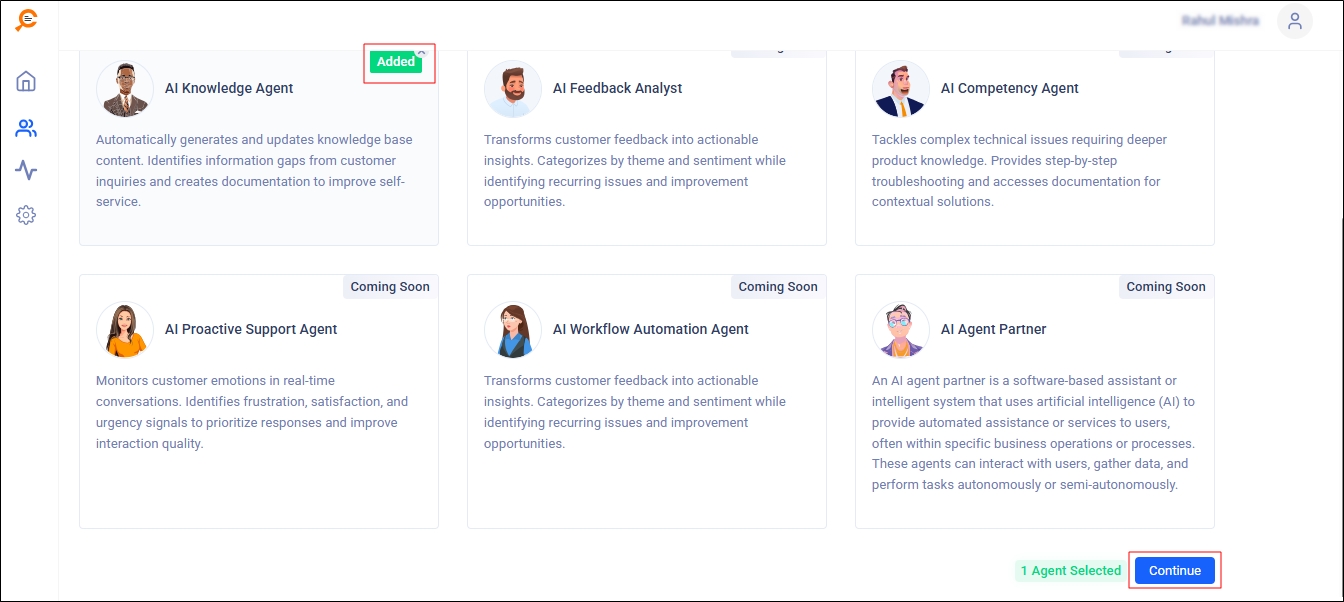
The status will change to Added. Scroll down and click Continue.
-
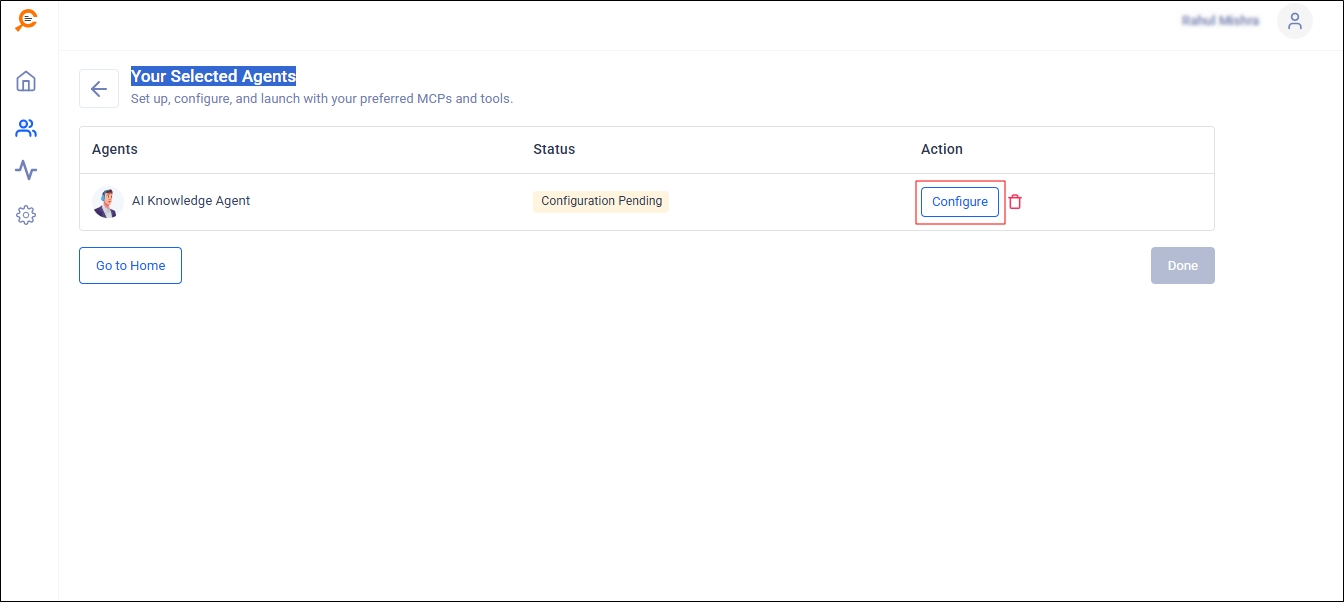
You will land on the Your Selected Agents screen. You have selected only one agent. Click Configure to set it up.
Basic Configuration
The Agent is connected to an LLM and you can edit the agent prompt in this section.
-
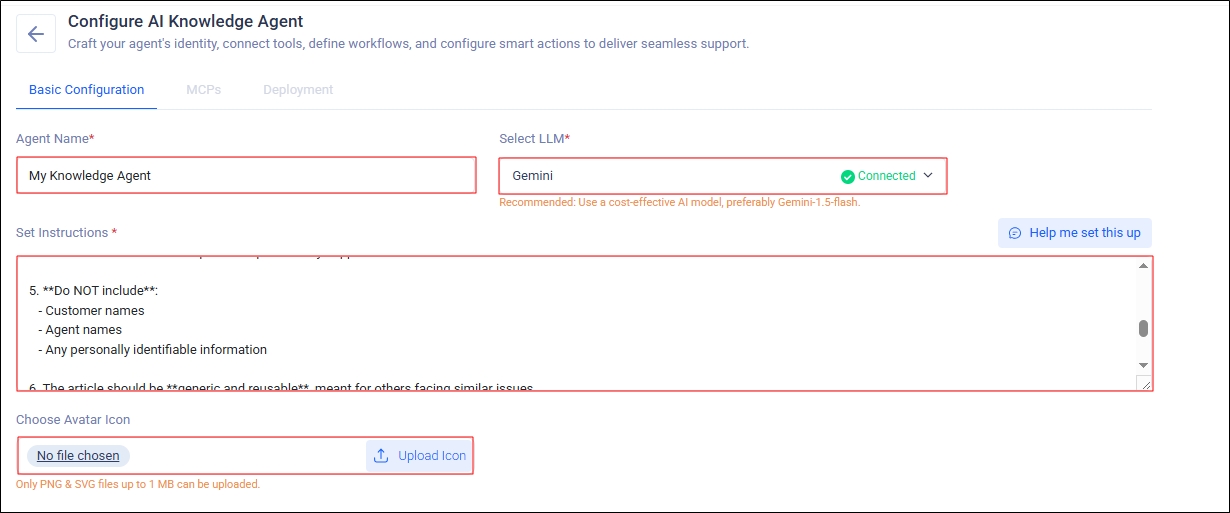
Enter the following details in the Basic Configuration section:
-
Agent Name - A name to identify the agent and its role.
-
Select LLM - Select an LLM service.
If the selected LLM service is not connected, you will be asked to configure it by inserting a key or clicking Add a New Connection.
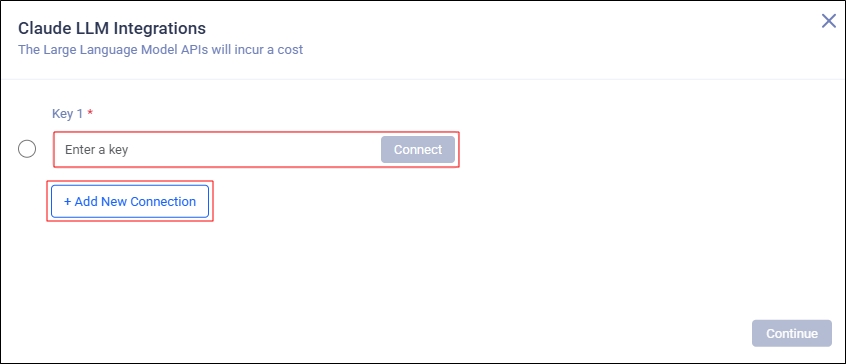
If the selected LLM service is connected, select a connection, pick a model, and click Continue.
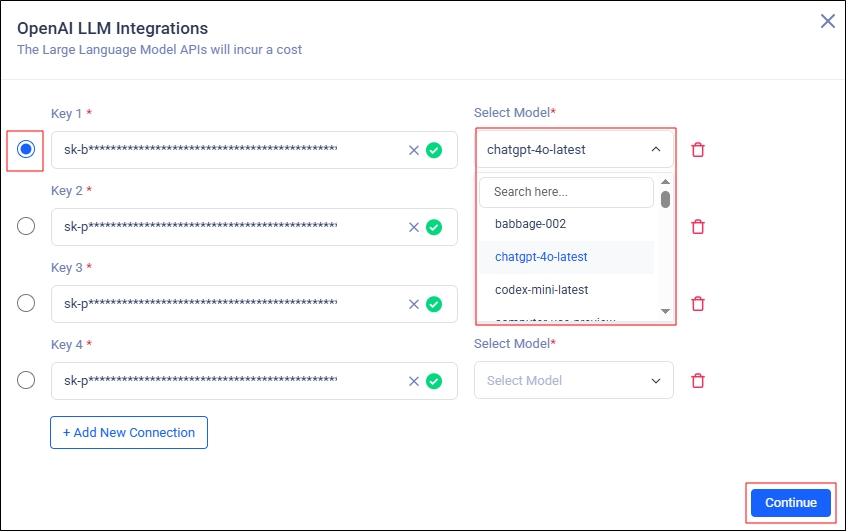
-
Set Instructions - Give instructions to your agent. This field is optional because the basic set of instructions is in-built into each agent.
-
Choose Avatar Icon - Pick an avatar for your agent. This field is optional.
-
-
Click Save & Next.
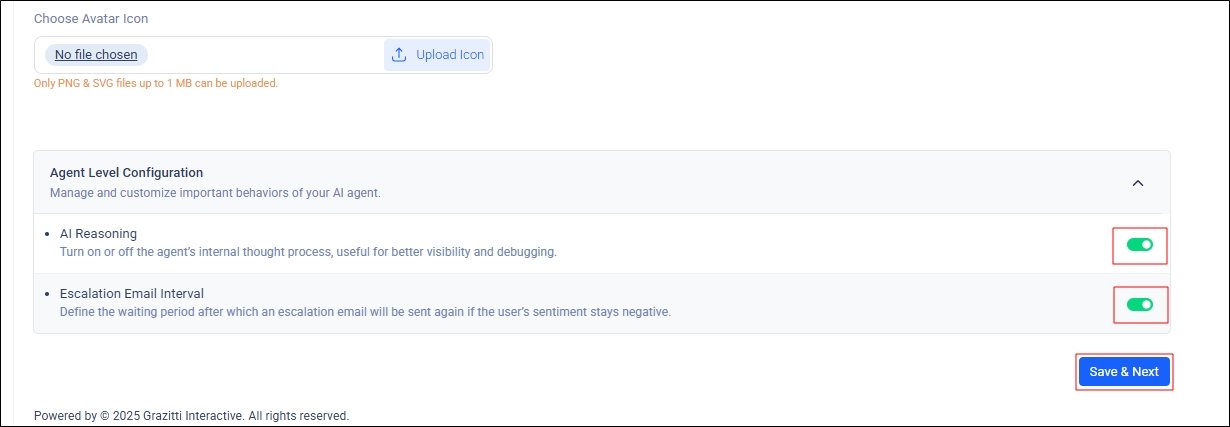
Now move to the next section, Configuring MCPs.