

Deploying AI Support Agent: Installing SearchUnify AI Support Agent in Salesforce Community
This article walks you through installing the SearchUnify AI Support Agent in your Salesforce Community to enhance self-service with the SearchUnify Agentic Suite.
Prerequisites
-
An active Salesforce account with Communities enabled
-
Create Remote Sites, Trusted URLs, and CORS Configuration. Refer here to learn how.
Installation Steps
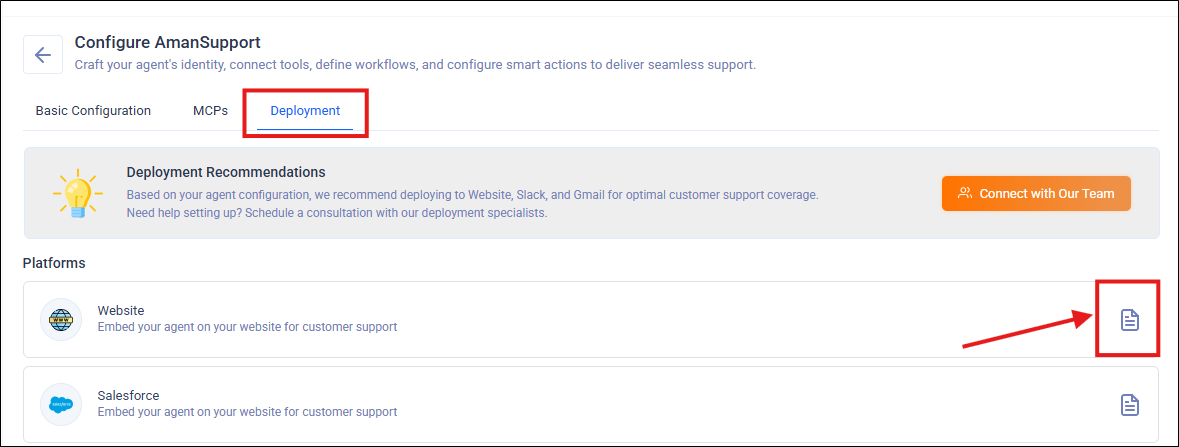
Follow the instructions given in the Steps to Deploy section under the Deployment tab.
Step 1: Install the SU AgentSuite Package
-
Open the package installation link:
https://login.salesforce.com/packaging/installPackage.apexp?p0=04tP50000003yFlIAI
-
Select Install for All Users and proceed to install the package.
Step 2: Grant Apex Class Access and User Object Field Permissions
-
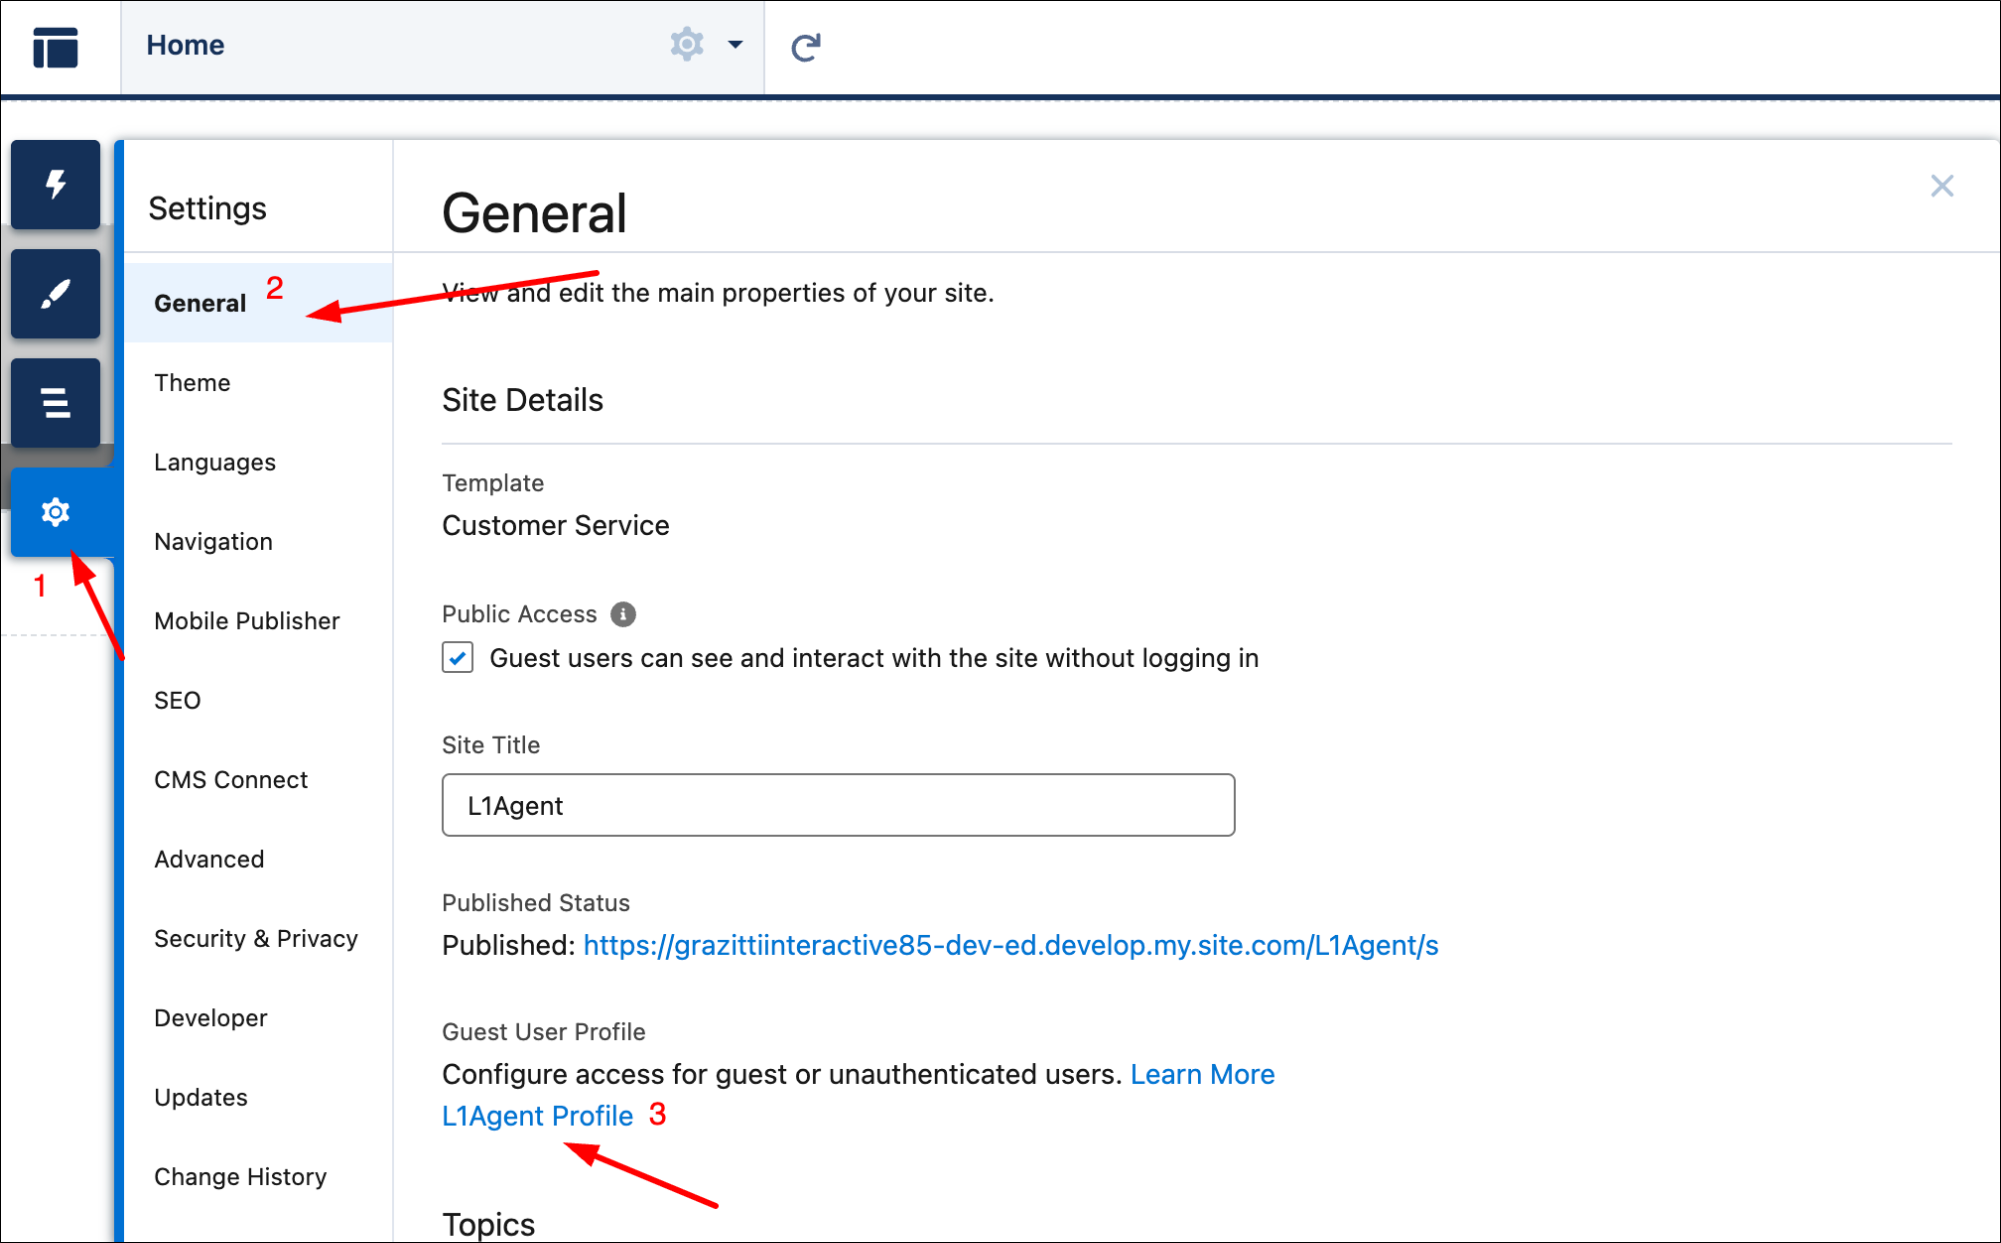
From Setup, use Quick Find to open All Sites.
-
Open the Builder for the target community → click the gear icon → General → open the user’s Profile settings.
-
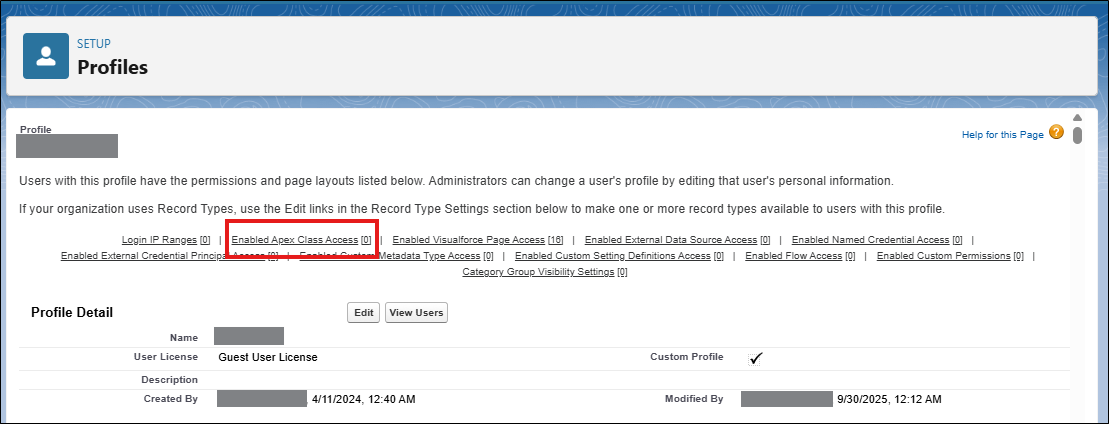
Click Enabled Apex Class Access.
-
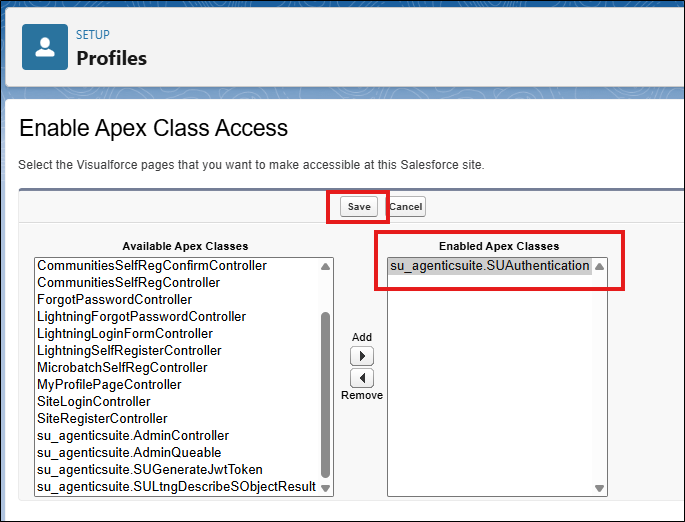
Click Edit.

Move su_agenticsuite.SUAuthentication from Available Apex Classes to Enabled Apex Classes. Save the settings.
-
Scroll to the Field-Level Security.
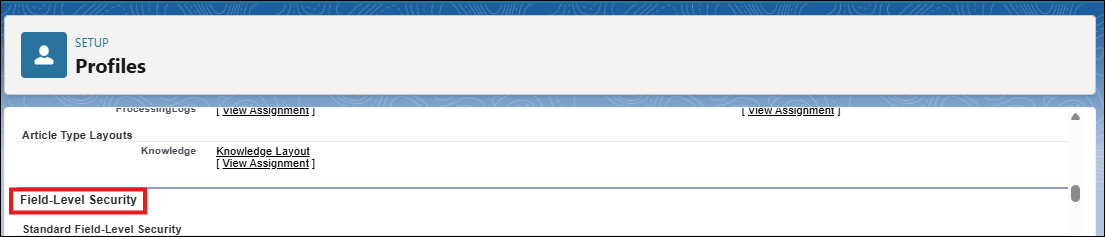
-
Find the User object and Press View.

-
Click Edit.
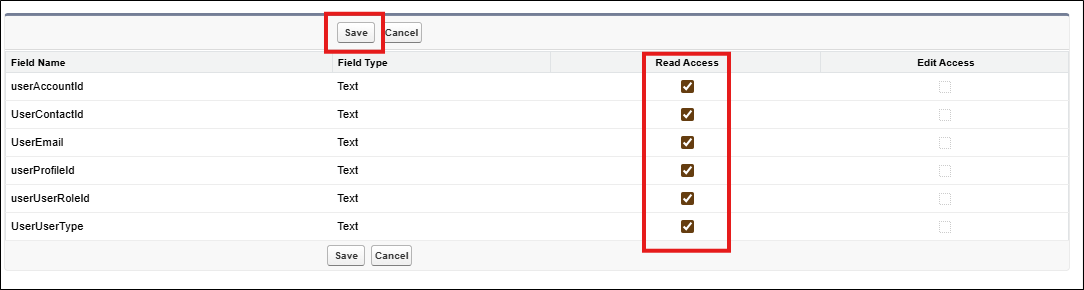
-
Grant Read Access to the following fields, then Save:
UserContactId
UserEmail
UserProfileId
UserUserRoleId
UserUserType
UserAccountId
Step 3: Access SearchUnify Configuration
-
Open the App Launcher → click View All.
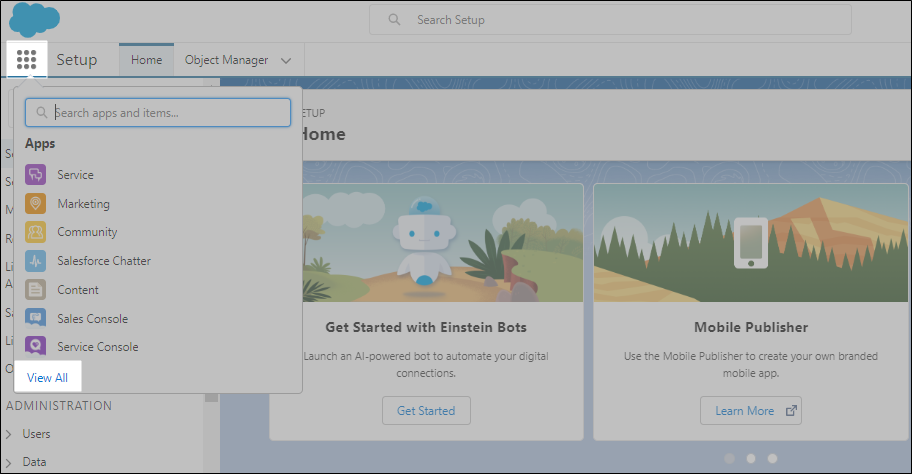
-
Find SearchUnify Agentic Suite Configuration and open it.
Step 4: Configure Search Platform
-
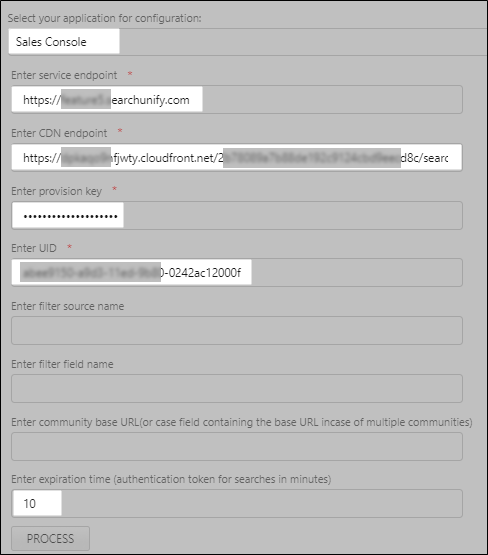
Under Choose search platform, select Lightning.
-
Fill in the required fields:
-
Select your application for configuration: The agent client will be installed in the selected Community application.
-
Service Endpoint: Enter your unique SearchUnify Agentic Suite Instance URL here.
-
CDN Endpoint: The CDN Endpoint is available in the Steps to Deploy section of your Agent.
-
Provision Key: Obtain this from your SearchUnify Agentic Suite representative.
-
UID: The UID is available in the Steps to Deploy section of your Agent.
-
Expiration Time: Authentication token duration (in minutes). Enter any integer; 120 is recommended.
-
-
Click Process: Processing can take up to a few minutes. Upon successful processing, proceed with inserting the SearchUnify component to the case details page
Spot the success message to confirm a successful configuration
Step 5: Insert SearchUnify Component to Community Page
-
Open your community in Builder mode (From Setup → All Sites → Builder).
-
Open the target page and add the component: drag sU_AS_SupportAgent into the page’s content section.
-
Publish the site after you have dropped the component on the page of your Salesforce Community.
Usage
Accessing the AI Support Agent
-
Navigate to your Salesforce Community page where you added the component.
-
The AI Support Agent will be visible and ready to use on the configured pages.