

Install a Search Client in Salesforce Communities (Lightning)
This article explains the process of replacing default Salesforce component, Search Results, with a SearchUnify-powered Search on your Salesforce Lightning Communities. SearchUnify's native app fetches results from your org and external sources, such as your organization's YouTube channels, Slack discussions, and GitHub repositories right into your Salesforce-powered community.
Prerequisites
The SearchUnifySF connected app should be installed in your Salesforce instance. Refer to Use Salesforce As a Content Source
Comparison of Search Results Component and SearchUnify Package
When users are confronted with thousands of posts and articles, most choose to run a search. As a Salesforce admin, you can improve user experience by replacing the default Search Results component with a powerful SearchUnify package. This table summarizes the key differences between the both.
| Search Results (Component) | SearchUnify Package | |
| Default Component | Yes | No |
| Native Support | Yes | Yes |
| Global (Org) Search | No |
Yes |
| Objects Supported | Articles, Discussions | Articles, Discussions, and all other standard and custom objects |
| Results from External Sources | No | Yes |
Create a Salesforce Lightning Search Client
- Ensure that Salesforce Communities are enabled. Skip this step if you already have a community.
- Create a Salesforce Lightning search client.
- Configure the Salesforce Lightning search client.
Install SearchUnify Package
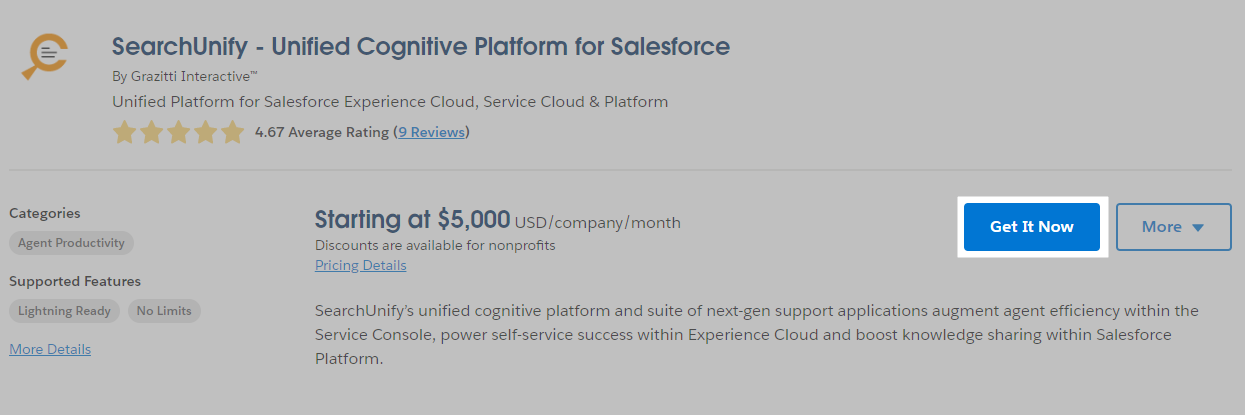
- Visit Salesforce AppExchange and you will land on the SearchUnify - Unified Cognitive Platform for Salesforce app listing page. Click Get It Now.
- If prompted, log in with your Salesforce admin credentials.

- It's advisable to install an app on Sandbox, instead of Production.
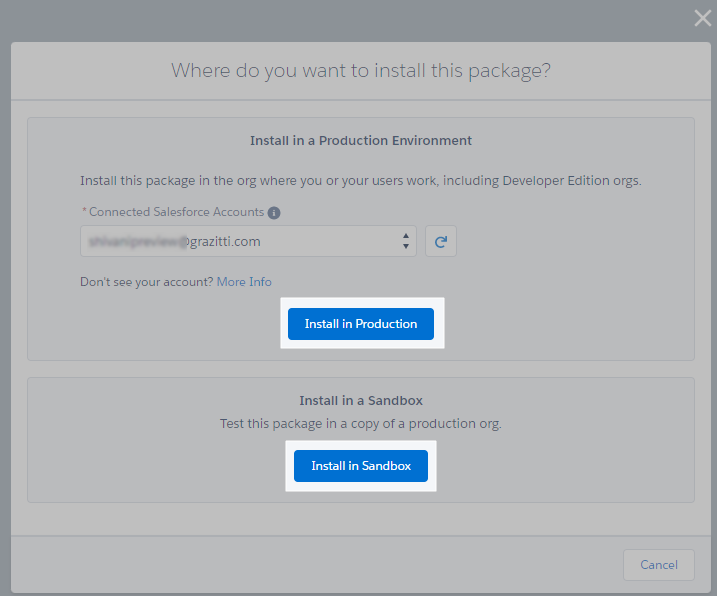
- Install the app for All Users. A warning might come up. Overlook it and proceed with installation. In the end, an Installation Successful message will greet you.

Connect Salesforce Org with SearchUnify Instance
Process SearchUnify Package
The data flow between SearchUnify and your Salesforce org is managed through Remote Sites. Create two remote sites. The instructions are on Create Remote Sites in Salesforce.
Create Two Trusted URLs
You need to add your CDN endpoint and Service endpoint to Trusted URLs.
-
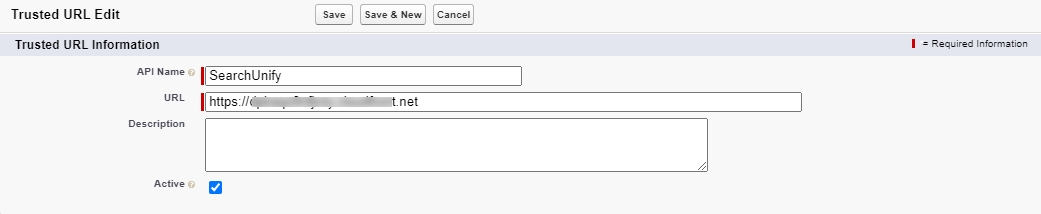
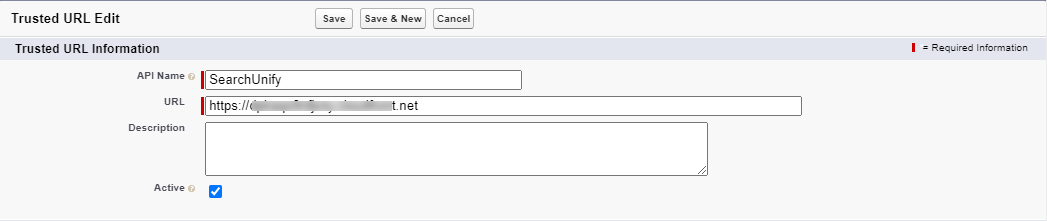
On the Setup page, use Quick Find Box to search Trusted URLs and click on it. Click New Trusted URL to create a new URL.

-
Enter a name into API Name field and use your CDN Endpoint given in the readme.txt file into the URL field. Make sure you use the CDN endpoint up to .net only (as shown in the image below).
-
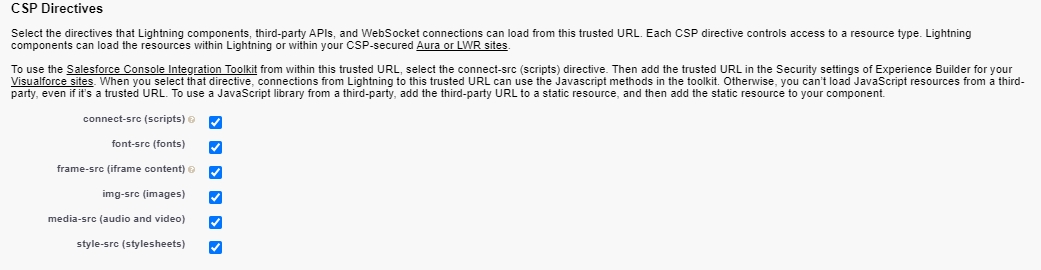
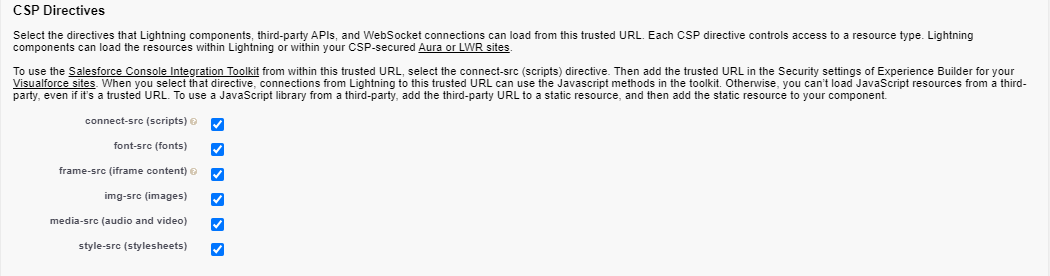
Make sure to select all the CSP Directives options and click Save.
-
Similarly, create another Trusted URL using your Service Endpoint (your SearchUnify instance URL).
Add a CORS
If you use SearchUnify Cloud Edition, you have to add your CDN endpoint to CORS.
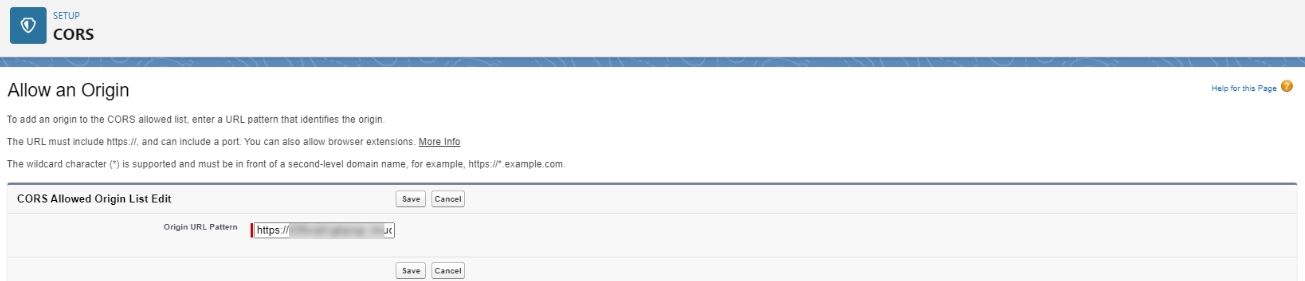
-
On the Setup page, use Quick Find Box to search CORS and click on it. Click New to create a cross-origin resource sharing URL.

-
Add your CDN Endpoint to Origin URL Pattern and press Save. Make sure you use the CDN endpoint up to .net only.


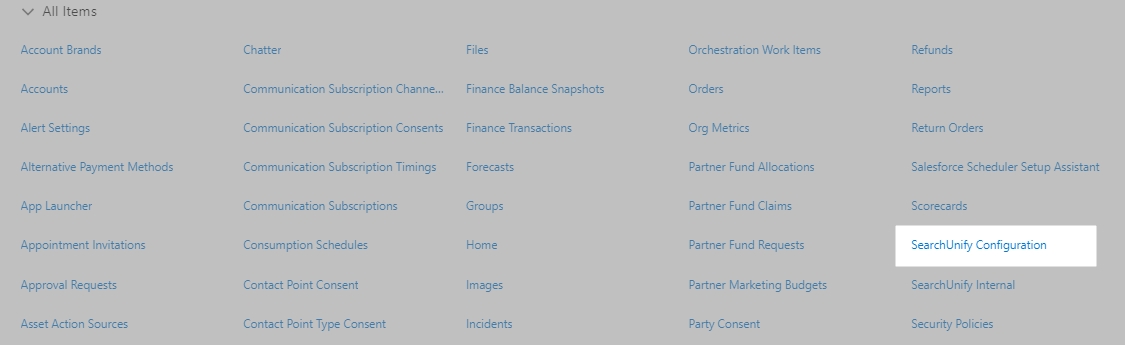
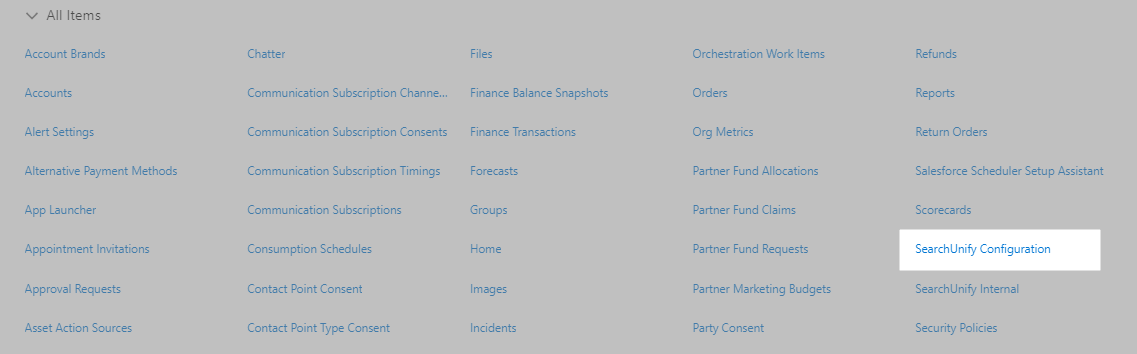
- Click Salesforce App Launcher and then View All.
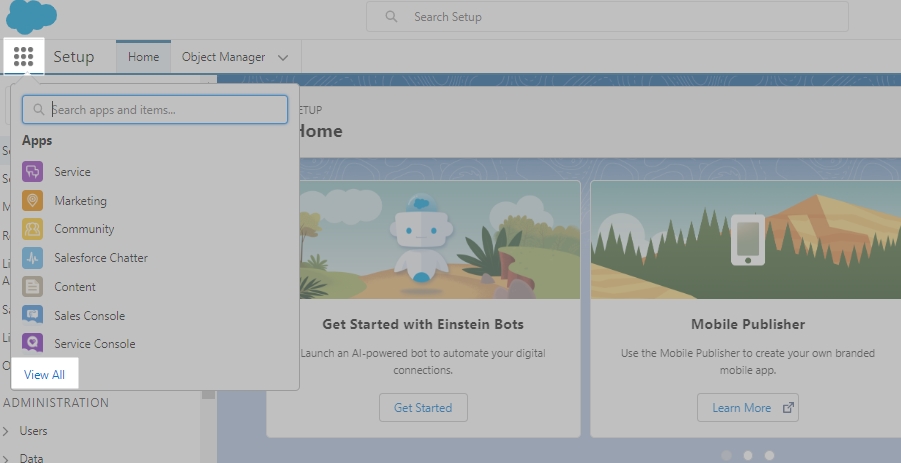
- Find SearchUnify Configuration and click it open.
-
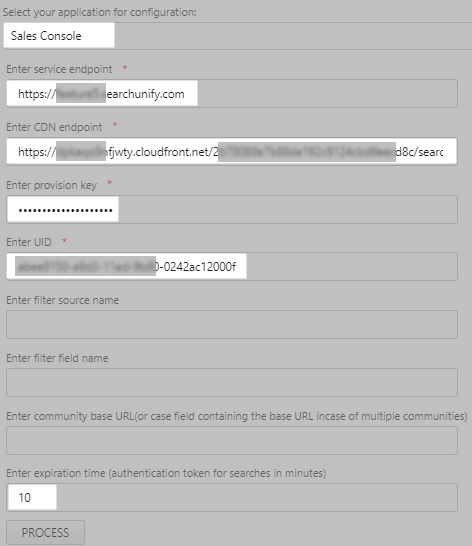
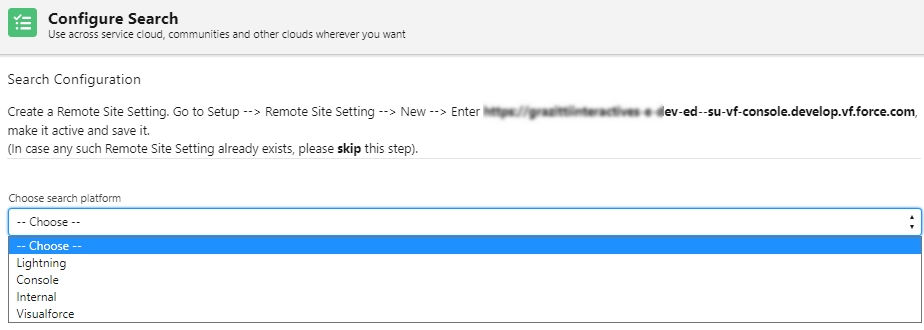
Select the installation location for the search in Choose search platform.
- Turn on CDN Support if you use the Cloud Edition. Turning on CDN Support improves speed but it also requires two extra settings:
During search client processing, you need a CDN endpoint which can be found in the readme file
For successful processing, you will have to create three remote sites instead of two. The website to be inserted in Remote Site URL can be found in the readme file

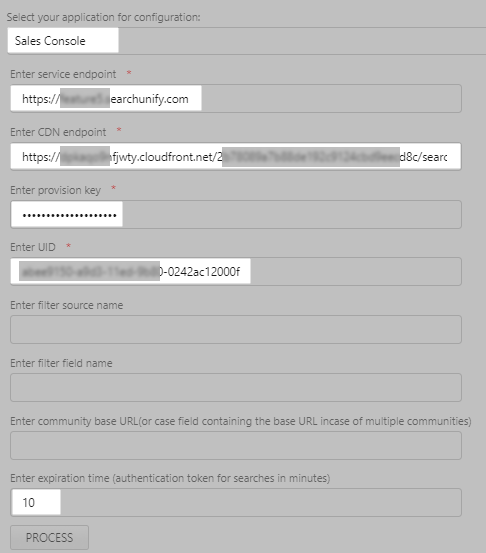
- Enter the details and click Process.
- Select your application for Configuration. The search client will be installed in the chosen application on Console, Community, or Visualforce. The field is absent when Internal is picked.
- Enter Service Endpoint. It is your SearchUnify instance URL.
- Enter CDN endpoint. The endpoint is in readme.
- Enter Provision Key. You can get it from your SearchUnify representative.
- Enter UID. It is your search client ID.
- Enter expiration time (authentication token for searches in minutes). Enter any integer. The suggested value is 120.

Processing can take up to a few minutes. Upon a successful processing, proceed with inserting the SearchUnify component to the case details page.
Insert SearchUnify Search Component to a Community Page
- Open your community in the Builder mode. (From Setup, go to All Sites through Quick Find Box, and click Builder.)
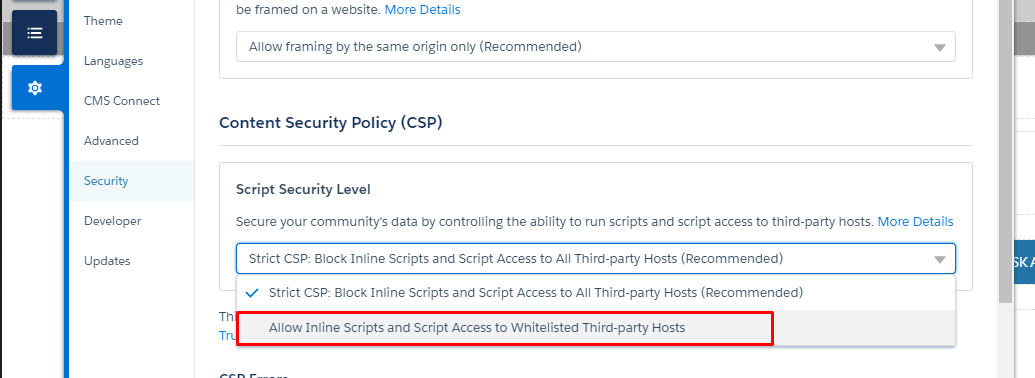
- Move to Security & Privacy from
 .
. - Select Allow Inline Scripts and Script Access to Whitelisted Third-party Hosts from the Script Security Level dropdown.
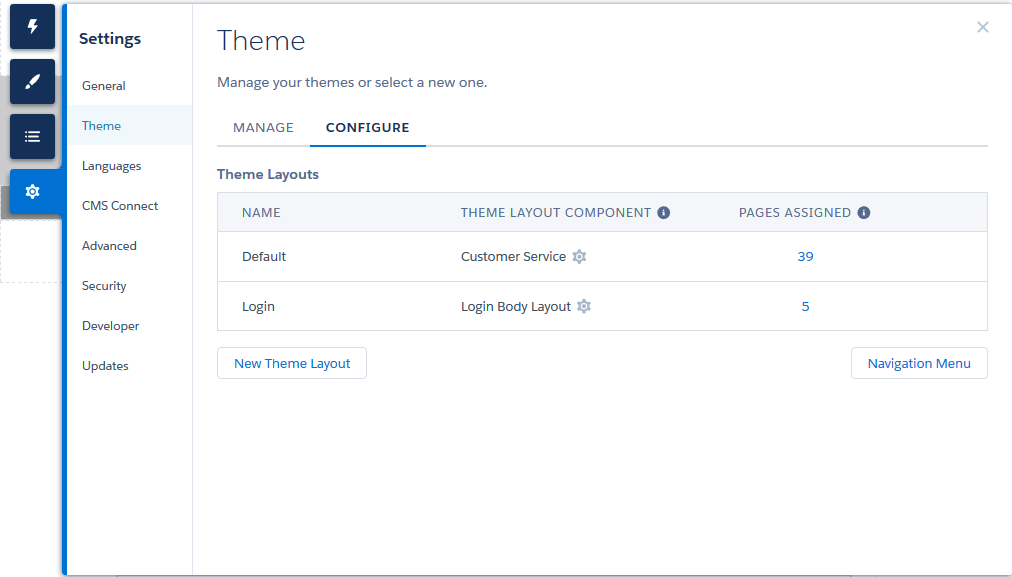
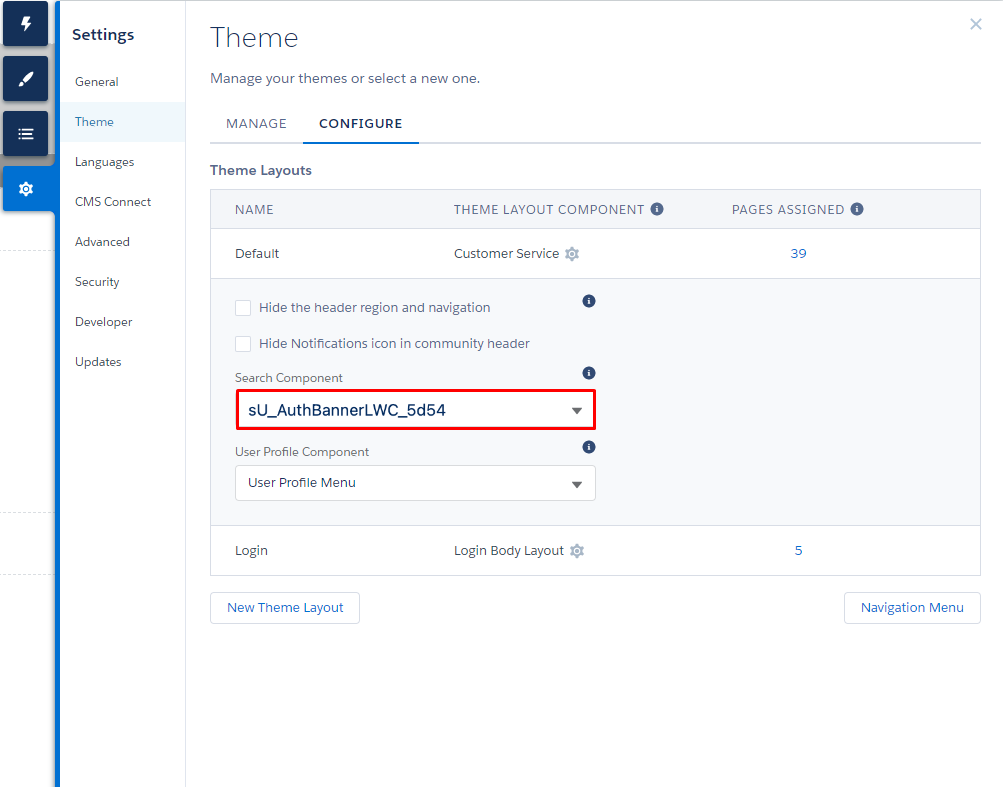
- Click from the sidebar, select Theme, and then select Configure.
- Click
 , d from the Search Component drop-down select SUAuthBanner_1234 (where 1234 are the first four digits of your UID).
 Don't See the Packages?
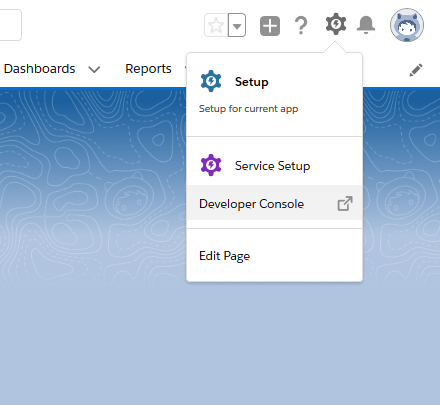
- Launch your Developer Console.
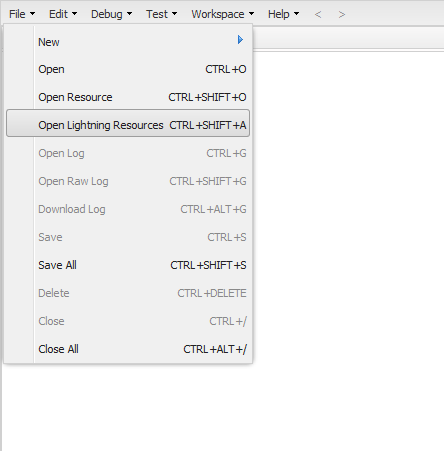
- In the window that pops up, click Open Lightning Resources from the File menu.
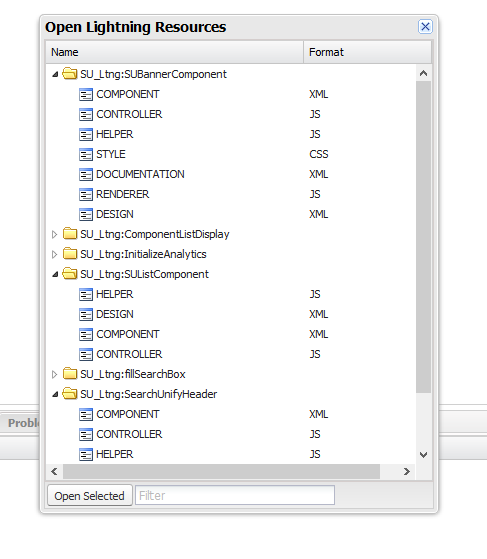
- Expand each resource to view its subfolders and activate the packages. Then, proceed to Configuration in step 6.
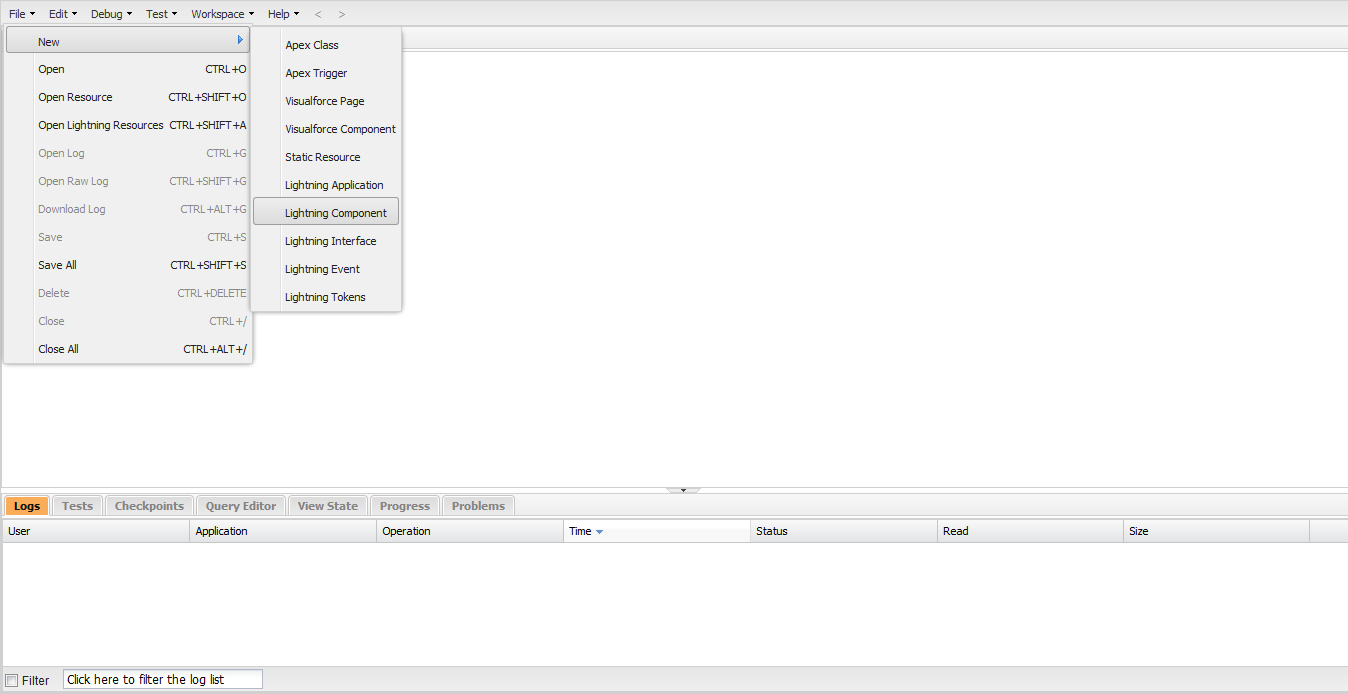
NOTE. In case you cannot find subfolders in a resource, delete the resource and create a Lightning Component of the same name and check again. To create a new Lightning Component, click New from File and then Lightning Component.
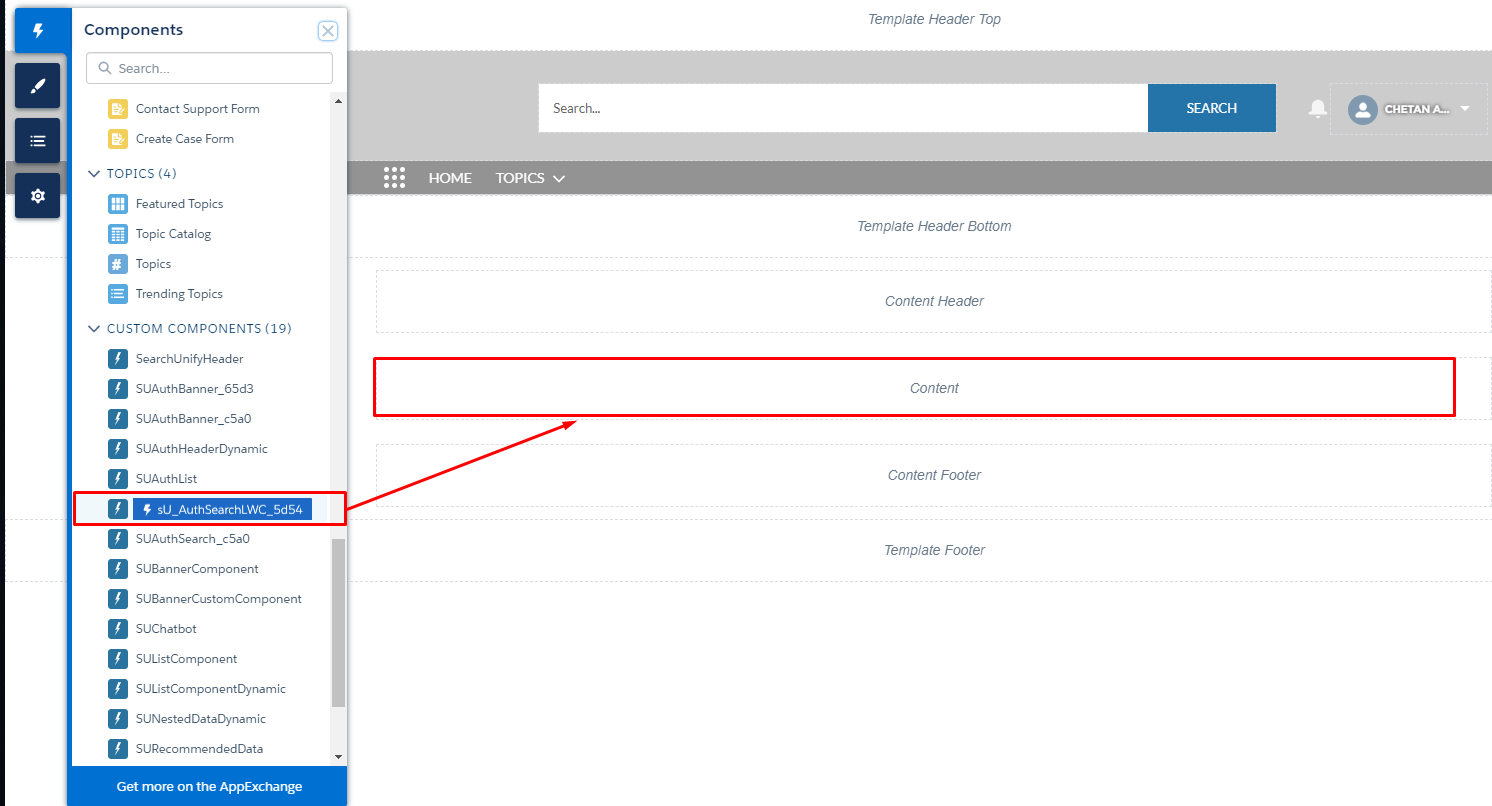
- Launch your Developer Console.
- Go to Components. Drag SUAuthSearch_1234 (where 1234 are the first four digits of your UID) to the Content section of the page selected or created.
You have successfully installed SearchUnify on Salesforce Communities.
Recommendations Component
Recommendations is a SearchUnify component which suggest search results on select pages. The admin can ask the SearchUnify team to configure the pages where the widget will display. The details on the component can be found in the Recommendations section on Basic Search Client Configurations.
Once you have activated Recommendations from search client configurations, return to your Salesforce org, open Community Builder and drag sU_AuthRecommendations_1234 (where 1234 are the first four digits of your UID) to the pages where the widget will be displayed.
Page Rating
To gather user feedback on your Salesforce community, use Page Rating. The instructions to set up the widget are in Gather User Feedback with Page Rating