

Using Agent Helper in Salesforce
This doc provides detailed information on how Agent Helper looks like in your Salesforce instance, the different aspects of it, and how to use it.
To use Agent Helper in your Salesforce Service Console, you need to have SearchUnify search client installed. If you haven't installed the search client yet, refer to the following doc on how to install Salesforce Service Console search client:
Install a Search Client in Salesforce Console
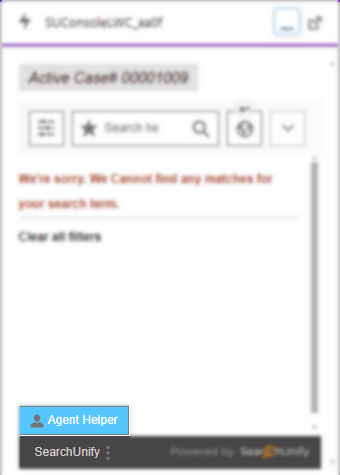
To launch the agent launcher app, click on the three dots icon on the SearchUnify element on your case details page and select Agent Helper.

Upon launching the app, the first thing the app does for you is create an AI-generated first response. The details of all of its elements are as below:
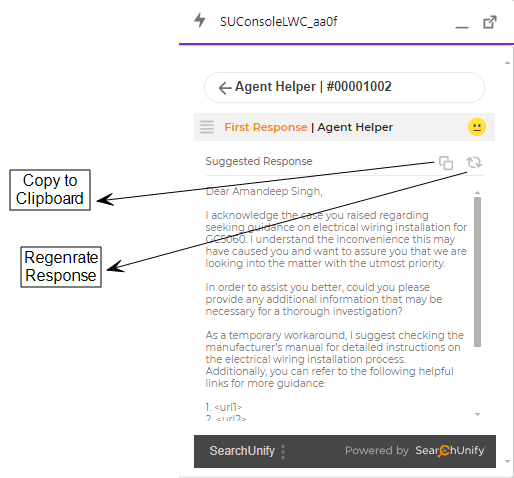
First Response
For SearchUnify v24.Q1 and newer versions, the app will create a first response draft based on the case title, description, comments, etc. The draft will also contain the links of possible help articles that can be useful for the customers.
NOTE. This only works when you have integrated an LLM within SearchUnify. Related doc: Configure LLM Integrations
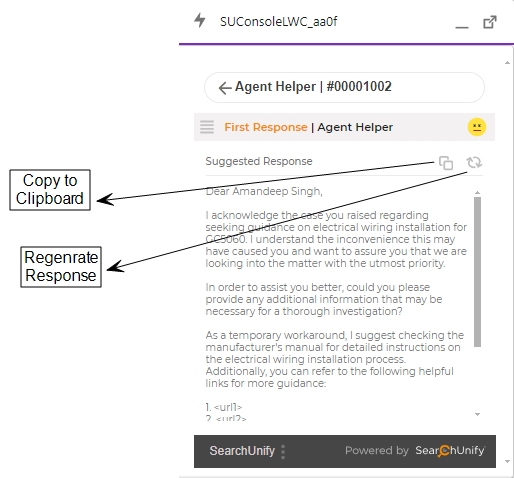
This saves your support agents' time that goes into drafting the email manually. With the first response generated for them, they just have to review the draft, edit it if required, copy it to clipboard, and use it to respond to the customer. If the generated response is unsatisfactory, they can regenerate the response as well.
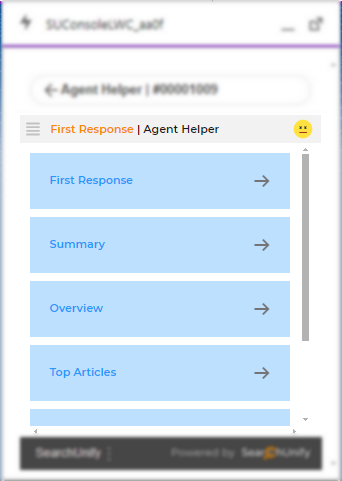
Click ![]() to see more Agent Helper options.
to see more Agent Helper options.

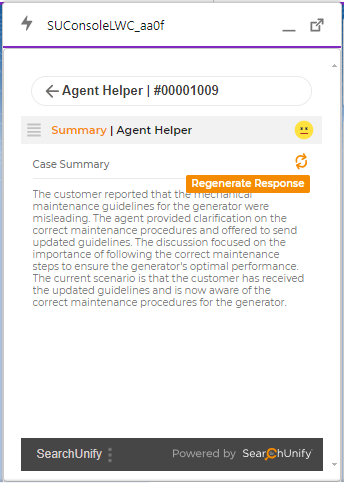
Summary
For SearchUnify v24.Q1 and newer versions, the app will summarize the case and create an LLM-powered summary to help your agents to quickly review of the case and its progress.
NOTE. This only works when you have integrated an LLM within SearchUnify. Related doc: Configure LLM Integrations

Click Regenerate Response if you feel that the generated summary is unsatisfactory.
Overview
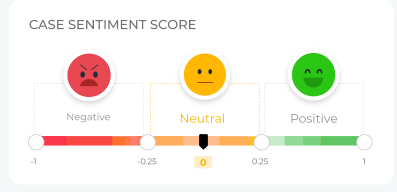
Case Sentiment Score shows customer sentiment at the time of contacting support. The report picks up cues on whether a customer is cheerful, dissatisfied, or nonchalant during an interaction and tags the customers sentiment:
-
Positive. The customer is appreciative of support.
-
Negative. The customer is likely to escalate the case.
-
Neutral. The customer doesn't express either positive or negative sentiment.
The applications of this report are numerous. The core benefit is that you can prioritize cases. A case with a negative customer sentiment usually requires immediate attention to prevent an escalation, whereas cases with neutral and positive customer sentiment can be resolved within stipulated limits.

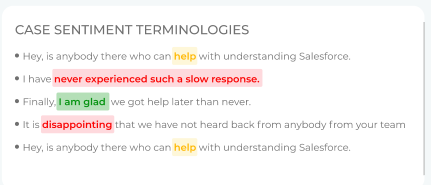
The rationale behind customer sentiment is visible through Case Sentiment Terminologies, another report next to Case Sentiment Score. The new report highlights the words and phrases which carry customer sentiment. For example, "glad" is associated with a Positive sentiment but "disappointed" suggests a negative customer sentiment.
Top Articles
This report contains knowledge base articles that you can share with a customer to solve the case at hand. For example, if a case is about a JavaScript snippet which breaks webpages and a writer has already written an article describing how to fix the issue in your organization's knowledge base, you can find the solution in Top Articles. There is no need to launch a search client and look up.
The articles are listed by relevance, with the most pertinent article occupying the top row. Each row has four columns. Clicking in the first column opens the article in a new Salesforce tab. The article title is in the second column. Long titles are truncated to 180 characters, but you can always view the complete title by hovering over the title. In the third column is the author's name and the fourth column lists the number of times the article in question has been shared or linked with cases.

In the third column, besides the author's name is are a profile picture and a green or gray light. The light indicates the author's status. Active Salesforce users are considered Active while the suspended users are considered as is Inactive.

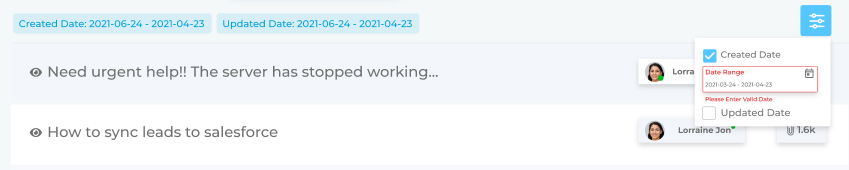
Clicking either the title or the author name expands the row and you can see article and author details, such as (1) Agent profile image, (2) Agent name, (3) Agent role, (4) Agent account status, (5) Article creation date, (6) Last update date, (7) Article attach count, and (8) Preview.

Date Range allows you to pull articles created or updated within the specified period. Click  and apply Create Date and Update Date. The applied filters are placed on top of the articles' list.
Top Related Cases
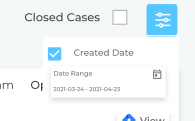
This report contains cases similar to the one you have at hand. For example, if a case is about a JavaScript snippet which breaks webpages, you can find both open and closed cases about that erratic JavaScript snippet in Top Related Cases. There is no need to launch a search client and look up. For most users, Closed Cases is an extremely useful feature. Check to find closed related cases. A solution to your current case is likely to be there.
For further filtering, use  which lets you filter cases by Case Creation date.

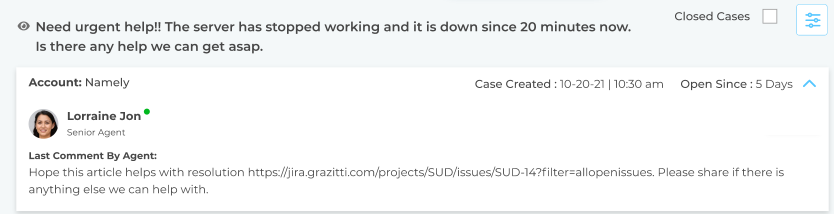
In the default state, the cases are listed by relevancy. The most similar cases are presented first. Each row in Top Related Cases has four columns. The first column consists of an . Click it to open the case in a new Salesforce tab. The second column is the case title. The third column has tells you the Account, the name of the customer company.

Clicking on a row expands it and new details about a case appear. The details include: (1) Case title, (2) Account name, (3) Case creation date and time, (4) Open date and time; if open, (5) Closed date and time; if closed, (6) Agent assigned, (7) Agent role, (8) Agent profile image, (9) Agent account status, (10) Agent’s last comment, and (11) Preview.

You can use the expand function to quickly find out if a case is helpful to you currently.
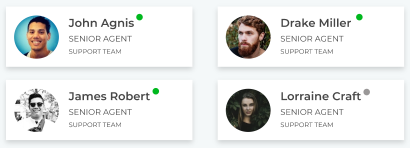
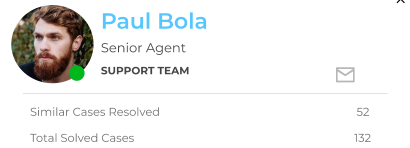
Top Experts
In the fourth tab you can find the most active problem solvers and the people who have worked on cases similar to your own. The most relevant experts are near the top-left corner. Each expert has its profile, role, team, and platform (Salesforce) listed.
To learn about the number of cases an expert has helped solving, click the agent's name. The expanded tile contains the agent's (1) Full name, (2) Team, (3) Designation, (4) Link to Salesforce profile, (5) Account status (active or inactive), (6) Number of similar cases resolved, (7) Number of total cases resolved, and (8) Email. The count is based on the closed cases where the agent in question is assigned an expert. The email can be used to contact an agent.
Another method to seek expert help is using Case Swarming via Slack. Read more about it on Agent Helper-Slack Integration: Solve Cases Faster with Case Swarming.