

Index RSS Feeds
The easiest way to search through RSS feeds content is to link the feeds to SearchUnify RSS Crawler. Once linked, SearchUnify indexes the content as soon as it appears. You can limit indexing to the latest batch or keep all content in the index. Up to twelve content fields are supported, including links, descriptions, and titles.
PERMISSIONS
SearchUnify ignores user permissions during searches. All indexed files can be searched by all users.
Establish a Connection
-
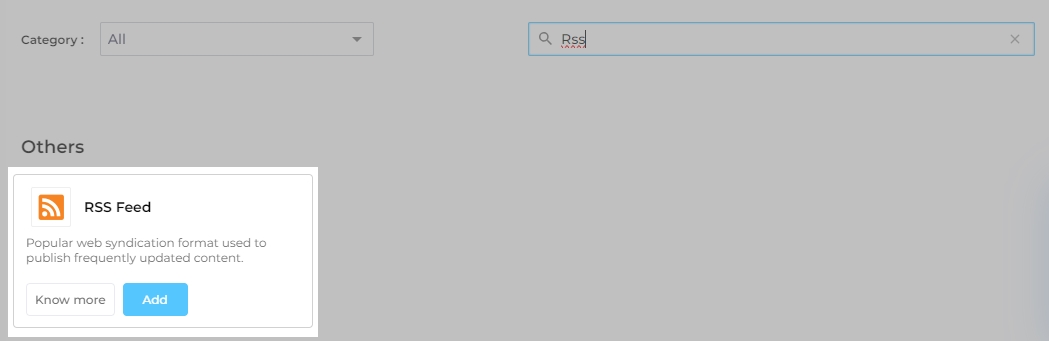
Navigate to Content Sources and click Add New Content Sources.

-
Find RSS through the search box and click Add.
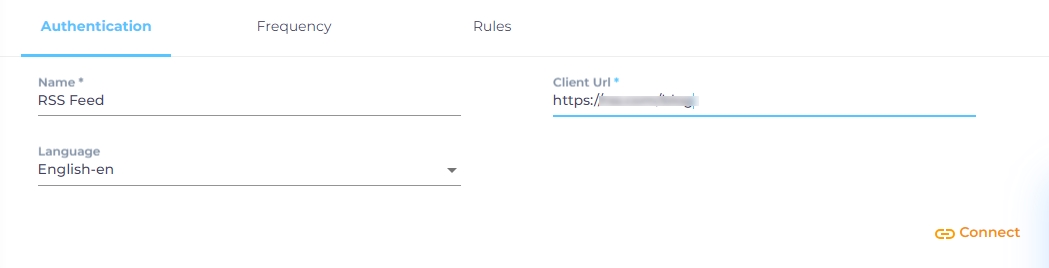
- Under the Authentication tab, enter the following details and click Connect:
- Name. Give your content source a name.
-
Client URL. Each RSS feed has a URL usually ending in .rss or .xml. Enter the URL of your RSS feed here.
-
Language. Select the content language. You can select multiple languages if your RSS feed content is in more than one language. English is selected by default.
Set up Crawl Frequency
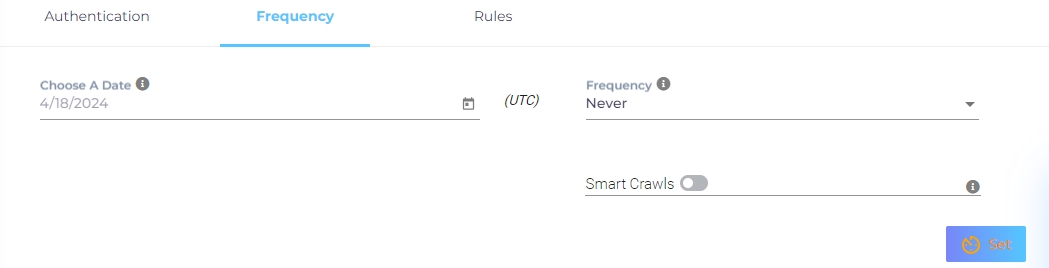
For this content source, the Choose a Date feature is grayed out. That's because during each crawl all the data is indexed from scratch. You can select the crawl frequency after configuring the content source. For now, click Set.
Smart Crawls can be used while setting up a frequency crawl, which will be done at the end of this article. When Smart Crawls is inactive, then during each frequency crawl the previously-indexed data is removed from index and a fresh index is generated with up-to-date data. When it's turned on, then the previously-indexed data remains unaffected and appends new data on top of the existing indexed data.
For now, ignore Smart Crawls, keep the Frequency to never, and click Set.
Rules
Define the RSS content fields to be indexed. items is the sole object supported as of now. Click on the ![]() icon to view the list of all the pre-configured fields.
icon to view the list of all the pre-configured fields.
NOTE.
Only admins are advised to edit or delete the fields.
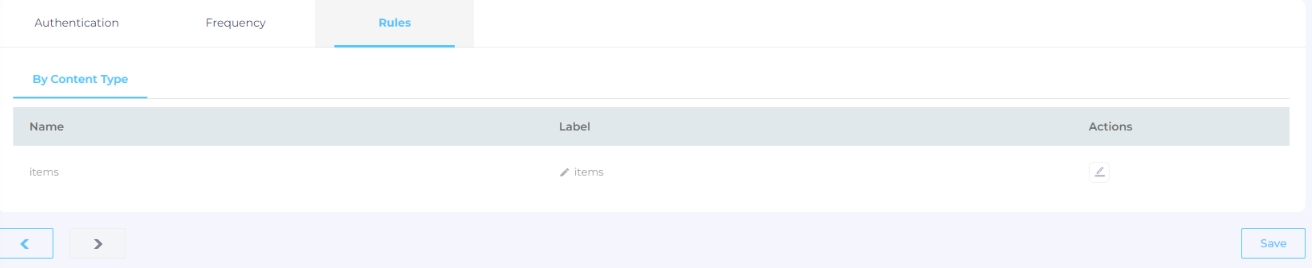
Save the Settings.
After the First Crawl
Return to the Content Sources screen and click ![]() in Actions. The number of indexed documents is updated after the crawl is complete. You can view crawl progress by clicking
in Actions. The number of indexed documents is updated after the crawl is complete. You can view crawl progress by clicking ![]() (View Crawl Logs) in Actions.
(View Crawl Logs) in Actions.
Once the first crawl is complete, click ![]() in Actions to open the content source for editing, and set a crawl frequency.
in Actions to open the content source for editing, and set a crawl frequency.
-
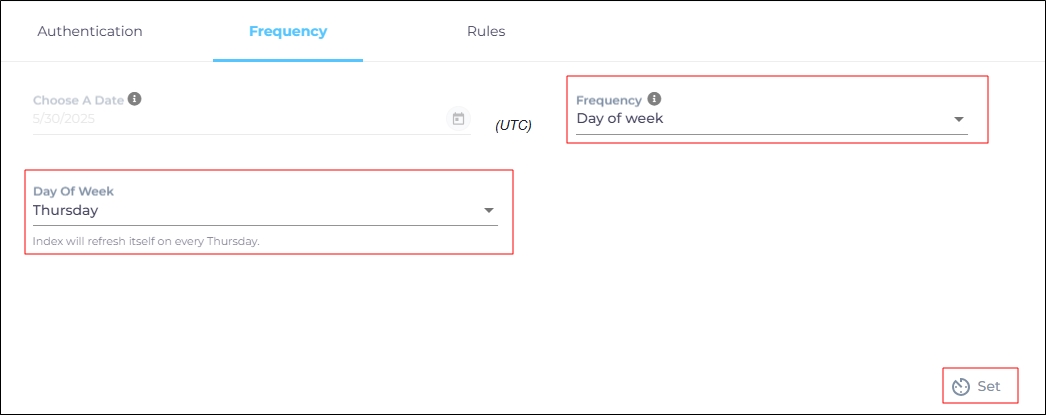
For this content source, the Choose a Date feature is grayed out. That's because during each crawl all the data is indexed from scratch. You can select the crawl frequency after configuring the content source. The following options are available for the Frequency field:
-
When Never is selected, the content source is not crawled until an admin opts for a manual crawl on the Content Sources screen.
-
When Minutes is selected, a new dropdown appears where the admin can choose between three values: 15, 20, and 30. Picking 20 means that the content source crawling starts every 20 minutes.
-
When Hours is selected, a new dropdown is displayed where the admin can choose between eight values between 1, 2, 3, 4, 6, 8, 12, and 24. Selecting 8 initiates content crawling every 8 hours.
-
When Daily is selected, a new dropdown is displayed where the admin can pick a value between 0 and 23. If 15 is selected, the content source crawling starts at 3:00 p.m. (1500 hours) each day.
-
When Day of Week is selected, a new dropdown is displayed where the admin can pick a day of the week. If Tuesday is chosen, then content source crawling starts at 0000 hours on every Tuesday.
-
When Day of Month is selected, a new dropdown appears where the admin can select a value between 1 and 30. If 20 is chosen, then content source crawling starts on the 20th of each month.
It is recommended to pick a date between the 1st and 28th of the month. If 30 is chosen, then the crawler may throw an error in February. The error will be “Chosen date will not work for this month.”
-
When Yearly is selected, the content source crawling starts at midnight on 1 January each year.
-
-
Click Set to save the crawl frequency settings.
-
Click Save.