

Machine Learning Workbench: Content Annotation
Content Annotation helps identify and tag entities, concepts, and key information within text.
In Machine Learning Workbench > Content Annotation, you can enter a passage and analyze how well the entities defined in Taxonomy align with the text.
Alternatively, you can define your own entity values in real time. In the next image, three entity values (logic, fallacy, and ad hominem) have been assigned to the text. Clicking Run Annotation generates the most relevant entity values for the given text.
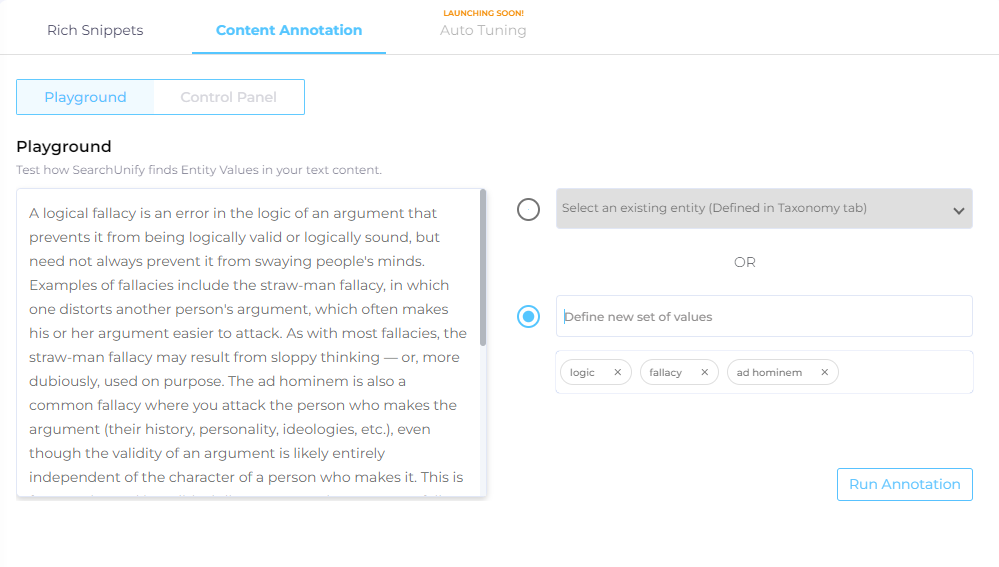
Fig. A snapshot of the Content Annotation Playground with three user-defined entity values.
Selecting Run Again returns you to the Content Annotation Playground, where you can update the text or modify entity values.
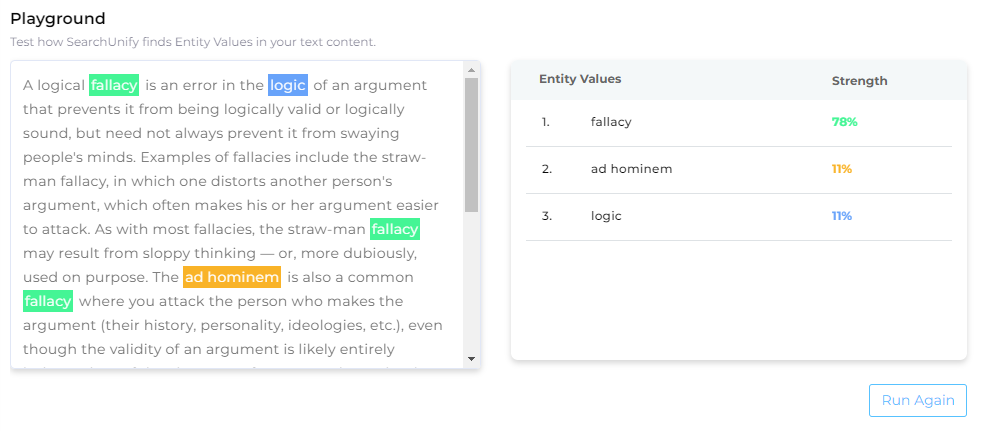
Fig. A snapshot of the Content Annotation Playground.
Control Panel
The Control Panel allows you to manage content annotation requests submitted through Content Sources > Content Annotation. Here, you can:
-
View entity values in annotation requests
-
Accept entity values in annotation requests
-
Set a threshold so that only values meeting or exceeding the threshold appear for review
Review Annotation Requests
-
Select an annotation request from Select Annotation Request. This will populate the List of Records with annotated documents.
-
Optional. Refine the list using:
-
Select Field – Filters the list to show only documents containing the selected field.
-
Keyword – Finds only records that contain a specific term.
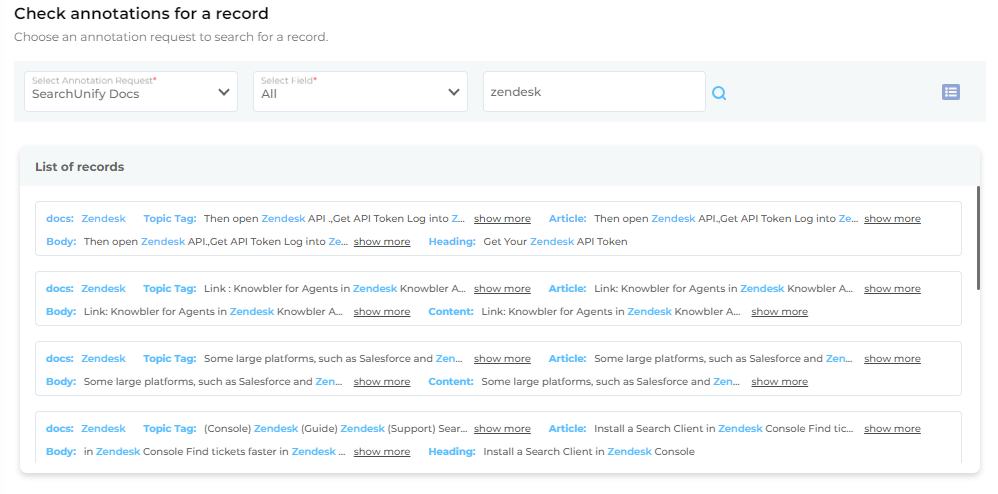
Fig. In this snapshot, only the records that contain the keyword "Zendesk" have been included.
-
-
Click on a record to view its annotated entity values:
-
Actual Tagged Entity Value – Displays the entities that annotate the record.
-
Entity Values – Shows the relevance of each entity that annotates the record. Relevance is measured in the Strength column—the higher the strength, the more relevant the entity.
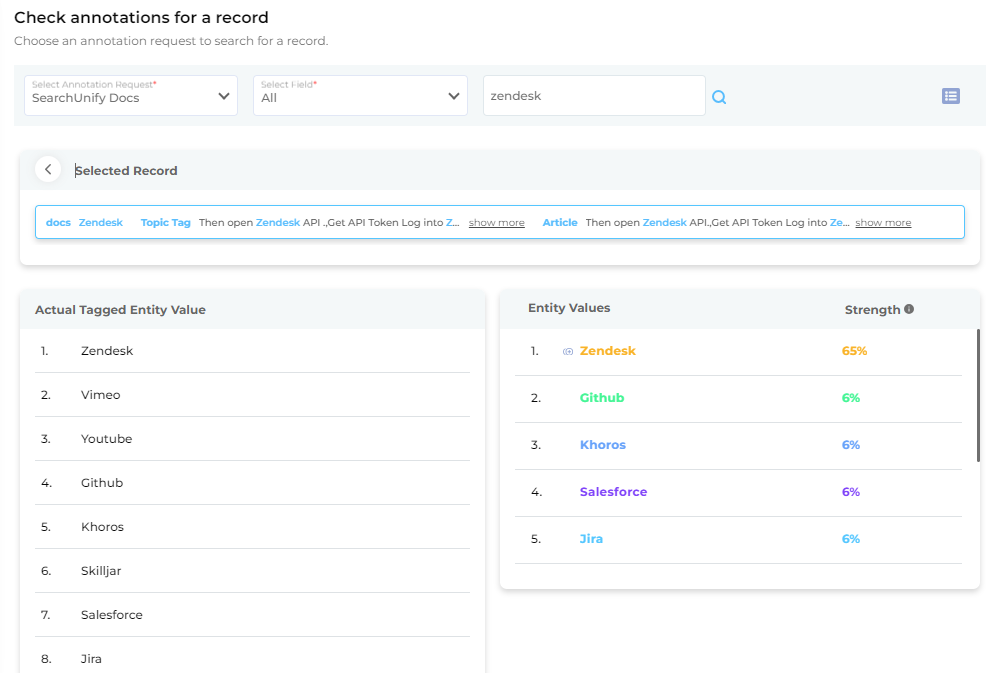
Fig. A snapshot of a selected record in Content Annotation.
-
-
You can set a minimum relevancy threshold for entity values using the orange slider in Annotation Rules. Two rules are available:
-
Threshold Rule – Only entities that meet or exceed the threshold value are used for annotation. Check this option to enable it.
-
Strongest Entity Rule – Only the most relevant entity is used for annotation. Check this option to enable it.
An entity that matches either of these rules is selected for annotation.
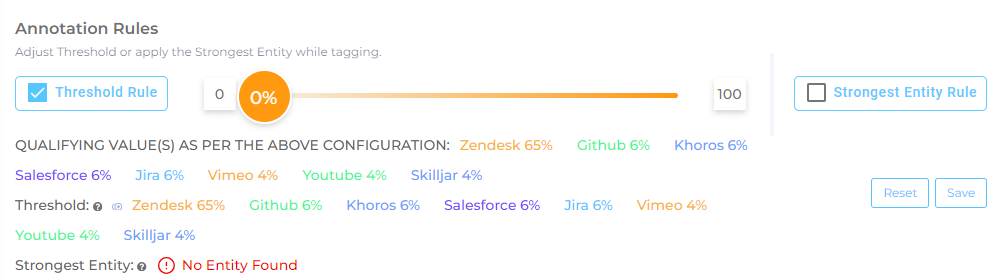
Fig. A snapshot of the Annotations Rule dialog.
-
-
The small button on the far right of the panel opens the Annotation Re-Submission History.

Fig. A snapshot of the Content Annotation Control Panel.
-
Click this button to view details about annotation requests, including:
-
Requester – The person who submitted the annotation request.
-
Timestamp – The date and time of the request.
-
Current Status – The annotation’s progress, which can be:
-
Successful – The annotation was accepted.
-
Pending – The annotation is under review.
-
Discarded – The annotation was rejected.
-
Error – The annotation is incorrect.
-
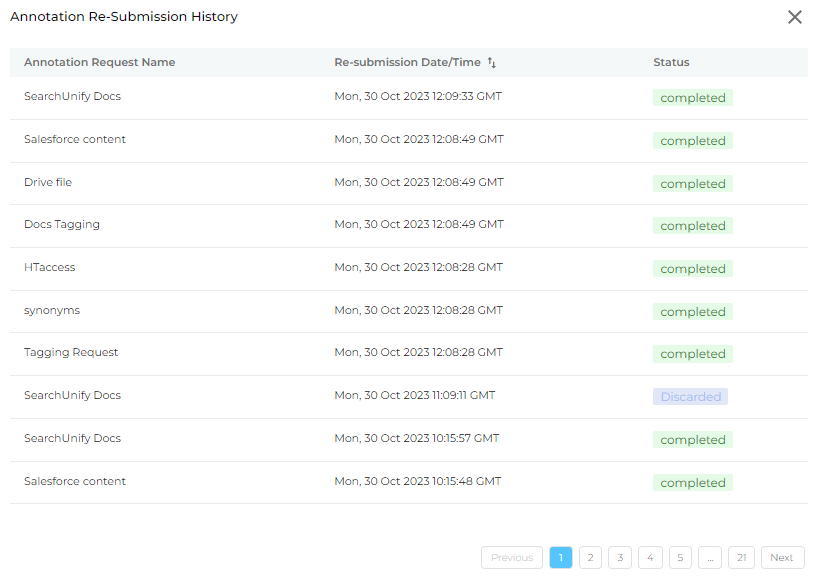
Fig. A snapshot of the Annotation Re-Submission History snapshot.
-
Related Documents