Create an app in Azure IdP
Azure is a popular Identity Provider. Its database is used to identify principals (users) before they can log in. This article shows how to create an app Azure Okta and use the app to configure an SAML 2.0 SSO Sign-in mechanism on your SearchUnify search clients.
Prerequisites
Obtain a security certificate from the SearchUnify team. The certificate is stored in a file with the extension .pem.
Create an App
-
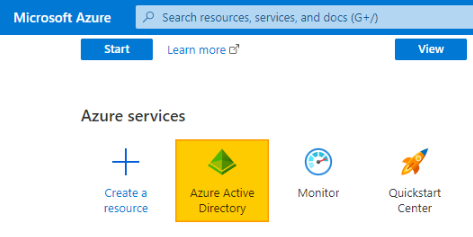
Log into Azure and select Azure Active Directory from the list of Azure services.
-
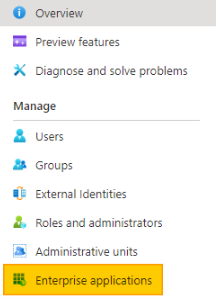
Open Enterprise Applications.
-
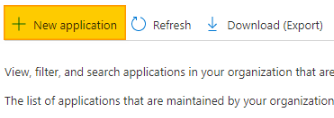
Click New Application.
-
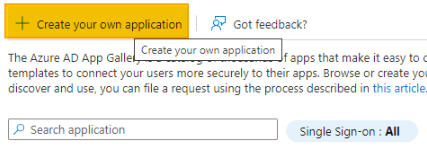
Click Create your own application.
-
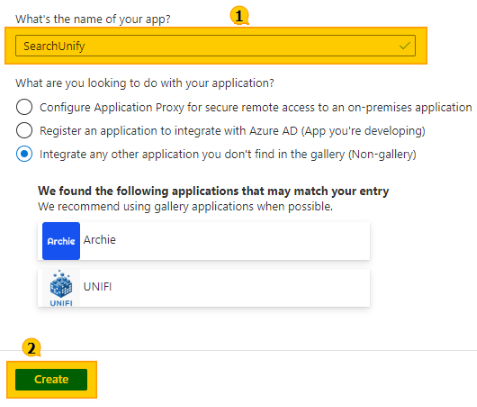
Given your application a name. Click Create to create a new app.
-
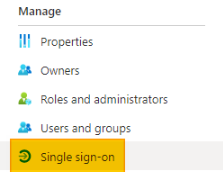
Inside the app, navigate to Single sign-on.
-
Choose SAML.

-
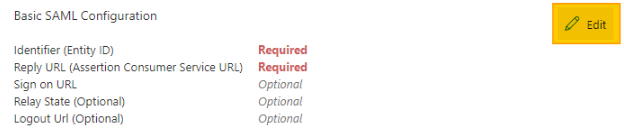
Click Edit in the Basic SAML Configuration section.
-
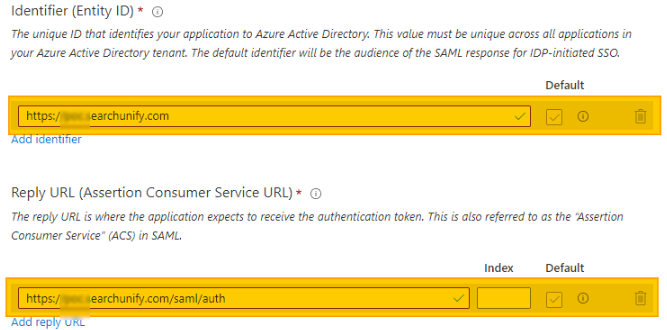
Insert your SearchUnify instance URL in Add Identifier and your SearchUnify instance URL followed by /saml/auth in Add reply URL.
-
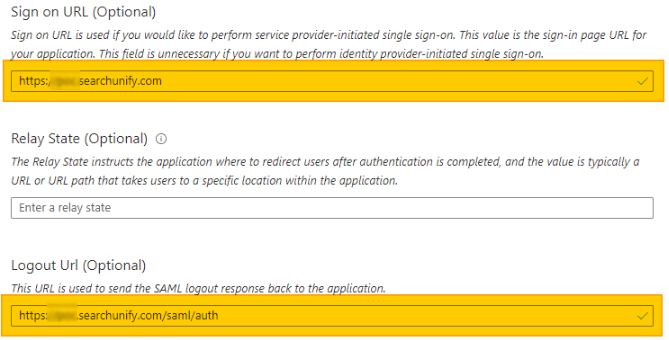
Insert your SearchUnify instance URL in Sign on URL and your SearchUnify instance URL followed by /saml/auth in Logout URL.
-
Click Save.
-
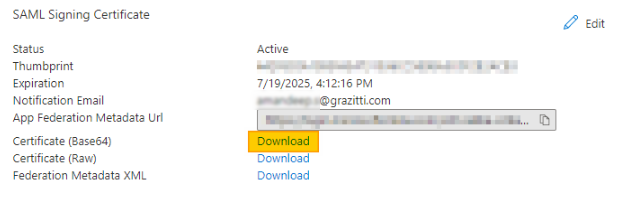
Scroll down to the SAML Signing Certificate and download the Certificate (Base64).
-
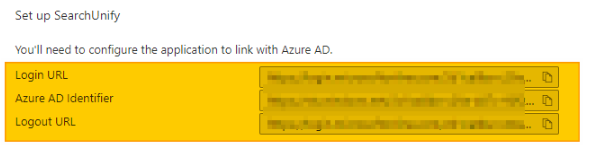
Scroll down further to Set up *Your App Name*, and save Login URL, Logout URL, and Azure AD Identifier. Each detail is required to configure SSO Sign in SearchUnify. The instructions are on SAML 2.0: Log Into SearchUnify with an Identity Provider.