

Intent Tuning
Intent Tuning is used to boost documents for search user intents. Let’s try to understand it with an example.
Example:
Search queries, such as [cannot log in], [login failed], and [login issues], share a common theme, which can be called “Login Issues”. This theme represents an intent, while each individual search query within the theme is referred to as an utterance.
When a document is boosted for an intent, it’s automatically boosted for all its associated utterances.
Selecting a Search Client
Manual Tuning is applied individually to each search client. Changes made to one search client do not affect the order of results in other search clients.
-
Navigate to Search Tuning > Manual. Select a search client where manual tuning for tuning.
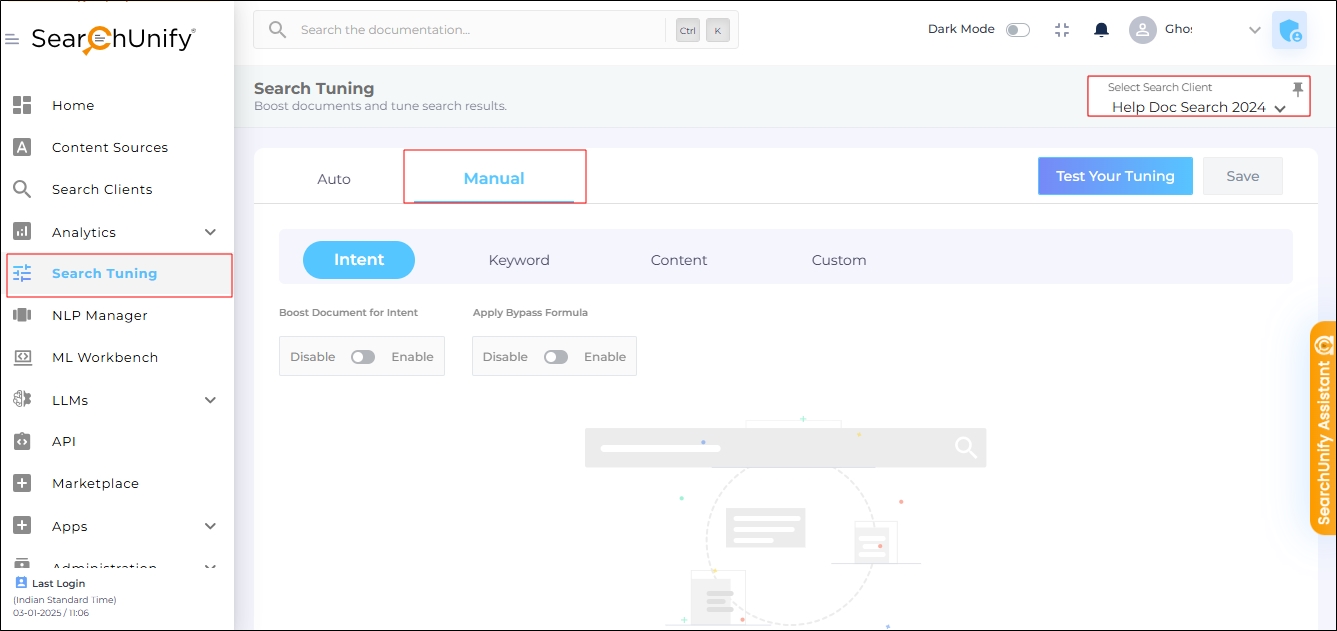
Fig. A snapshot of the Manual Tuning tab in Search Tuning.
NOTE.
You can bookmark a search client by clicking the bookmark icon in the Select Search Client dropdown. Once bookmarked, the search client will be automatically selected the next time you access Manual Tuning.
Boosting Documents for Intents
-
Turn on Boost Document for Intent. This step is essential to use Intent Tuning.
-
Run a search to find a document for boosting. If the desired document is not appearing in the search results, this could be due to other results being boosted or tuned. To temporarily disable boosting or tuning, enable the Apply Bypass Formula option.
-
Scroll down to locate the desired document in the search results. Click Add Intent.
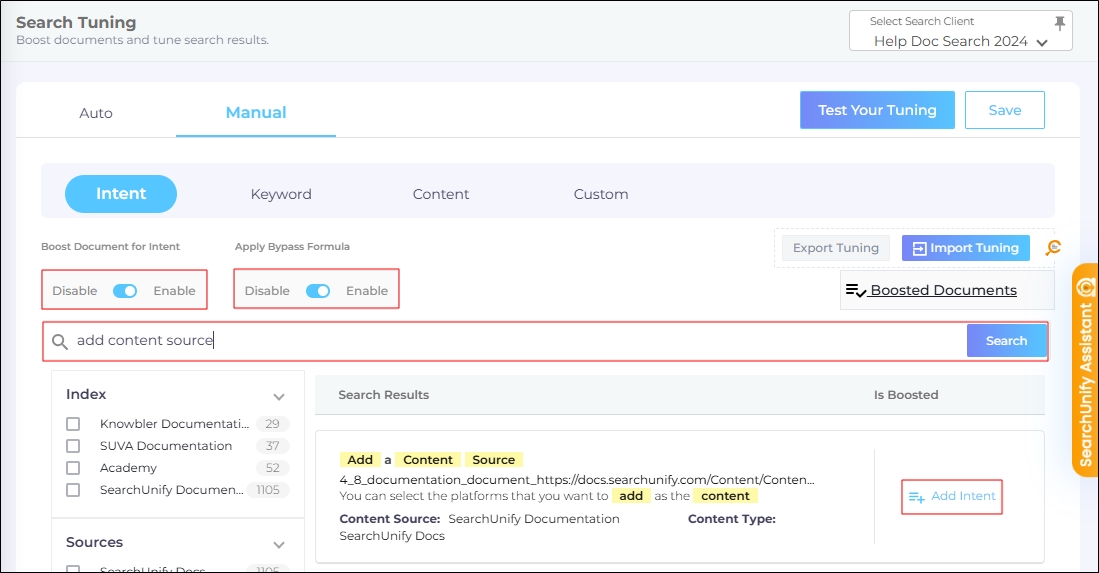
Fig. A snapshot of the Intent Tuning tab in Manual Tuning.
-
From the Select Intent dropdown, choose the appropriate intent or intents. The intents available in the dropdown are managed in NLP Manager > Intents.
Important: Select only those intents which have at least five utterances.
-
Click Add to boost the document for all the utterances in the selected intent.
-
Use the slider in the Rank column to assign a position for the document for each selected intent.
-
Check the box in the Bypass All Filters column to ensure intent tuning is applied regardless of user-applied filters. Without this option, a boosted document may not appear in its assigned position if filters are used by the end-user. When a query matches the selected intent, enabling this option ensures the boosted document always appears at the specified position set in the Rank slider.
-
OPTIONAL. To remove boosting for an intent, using the Delete button in the Action column.
-
Click Save to apply the changes.
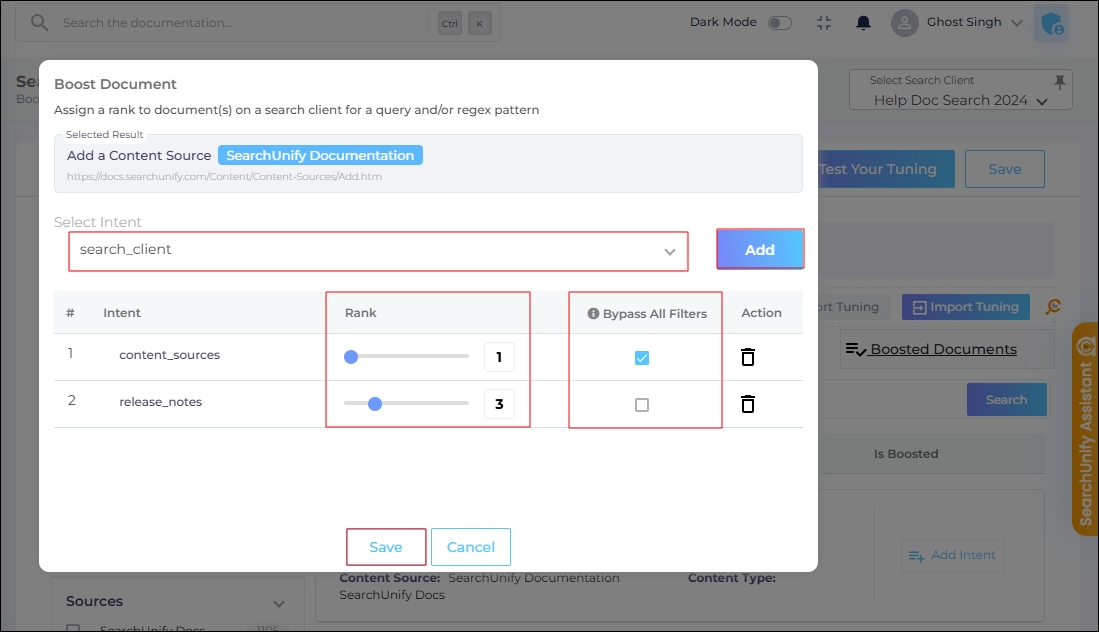
Fig. A snapshot of the Boost Document dialog. The "Add a Content Source" document has been boosted for the intents "content_sources" (rank 1) and "release_notes" (rank 3).
Viewing Intent-Boosted Documents
-
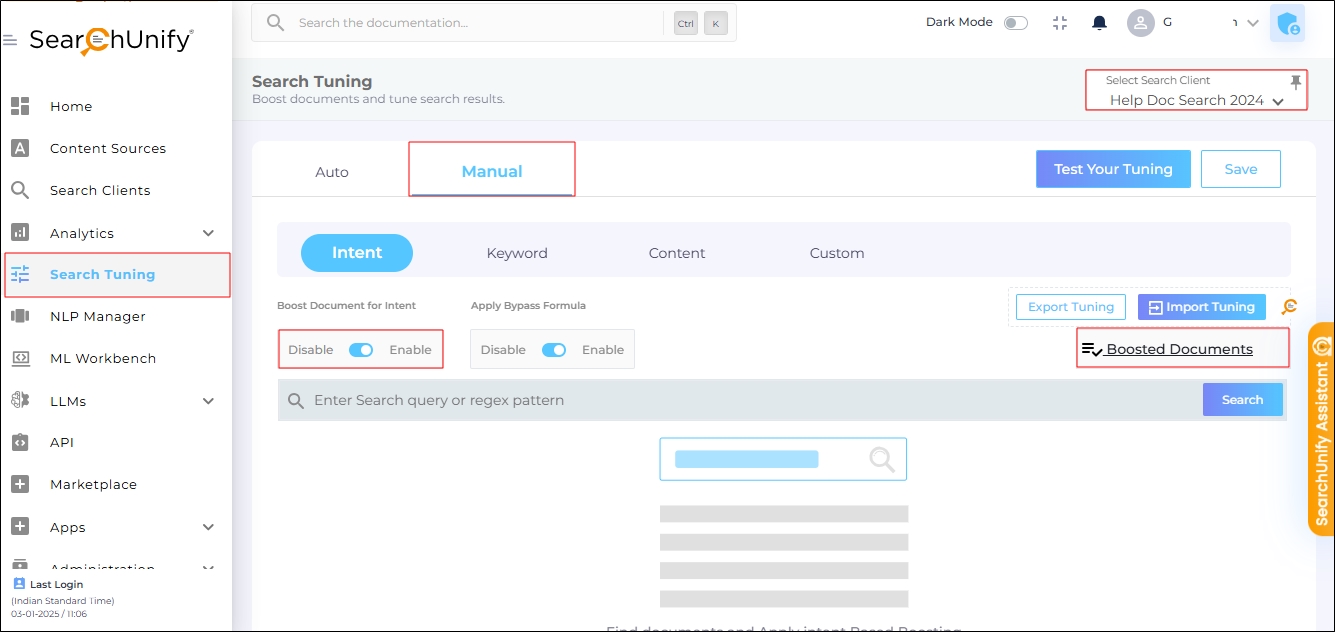
Navigate to Search Tuning > Manual. Select a search client where intent boosting has been applied.
-
Turn on Boost Document for Intent. This step is essential to use Intent Tuning.
-
Click Boosted Documents to view a list of the intent-boosted documents.
Boosted Documents
The Boosted Documents feature allows you to manage documents that have been boosted for specific intents. Below is an explanation of the key columns in the feature:
-
Sr. No. Displays the sequential number of the boosted document.
-
Intent (Search). Indicates the intent for which the document is boosted.
-
Document (Search). Shows the title of the boosted document along with its content source and type.
Click Add to boost the document for a new intent. Select only those intents which have at least five utterances. Boosting a document for a new intent does not remove its boosting for the current intent.
This column is searchable for easier navigation.
-
Bypass All Filters. Check the box in the Bypass All Filters column to ensure intent tuning is applied regardless of user-applied filters
-
Rank. Displays the position set using the Rank slider. The boosted document will appear at this position in the search results when a matching intent is detected.
-
Action. Use the delete button to remove boosting from the document.
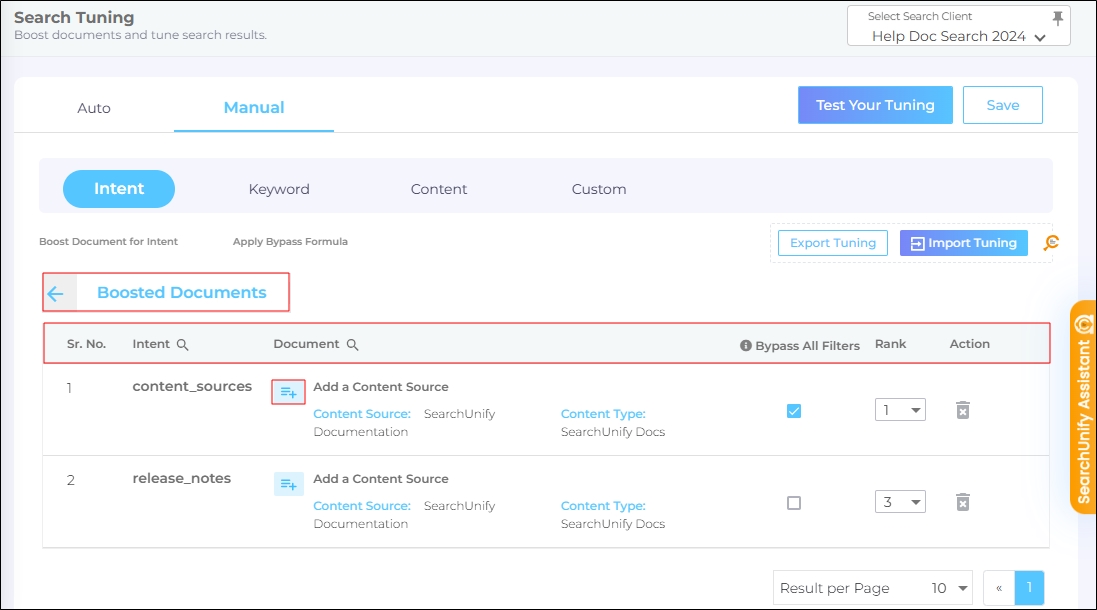
Fig. A snapshot of the Boosted Documents dialog in Intent Tuning.