

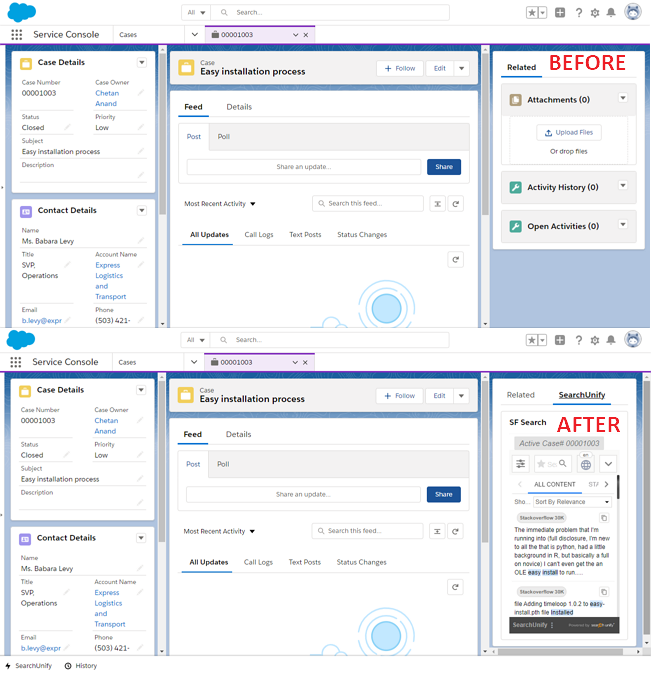
Move Search Client to Right Sidebar in Salesforce Lightning
Upon installation, the search client for Salesforce Console gets added to the utility bar. It is possible to move it into the right sidebar for easier access. This article explains the process.
Prerequisites
Move Search Client to Right Sidebar
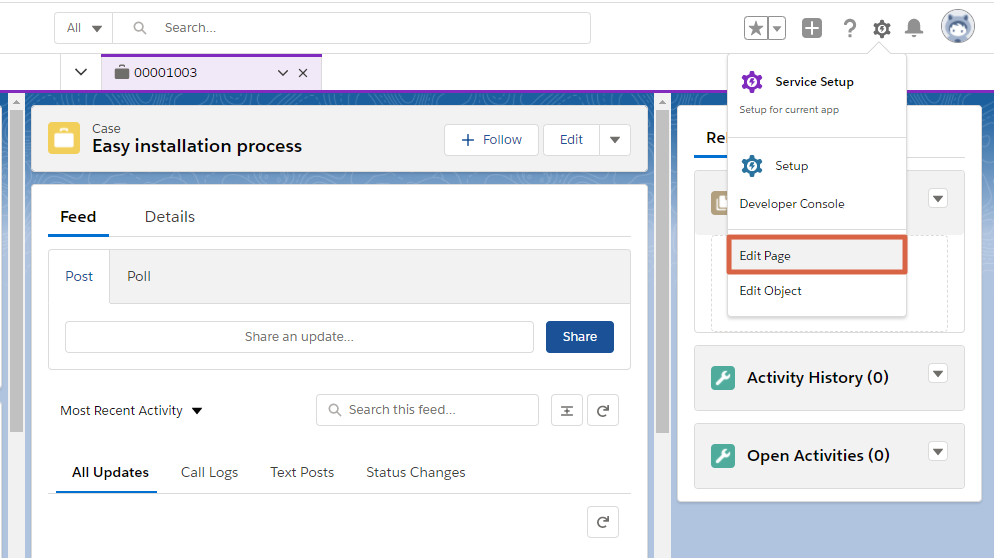
- From
 , click Edit Page.
- In Lightning App Builder, click Related.
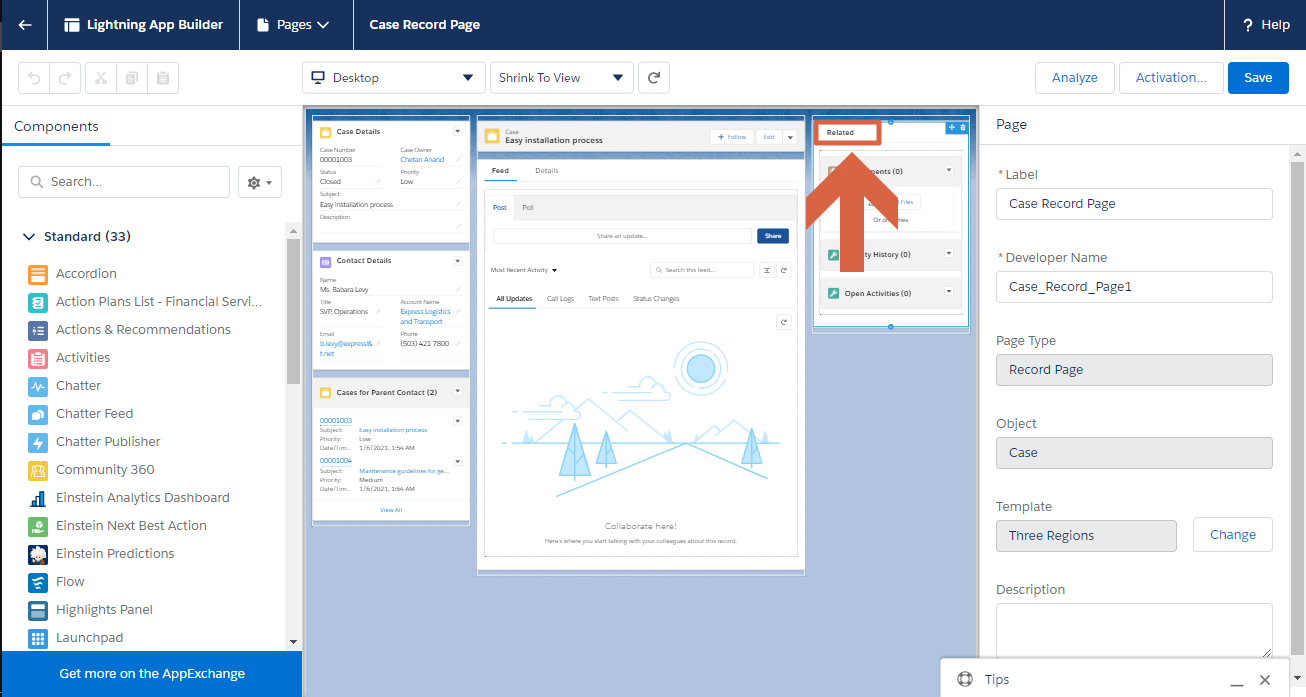
- Click Add Tab.

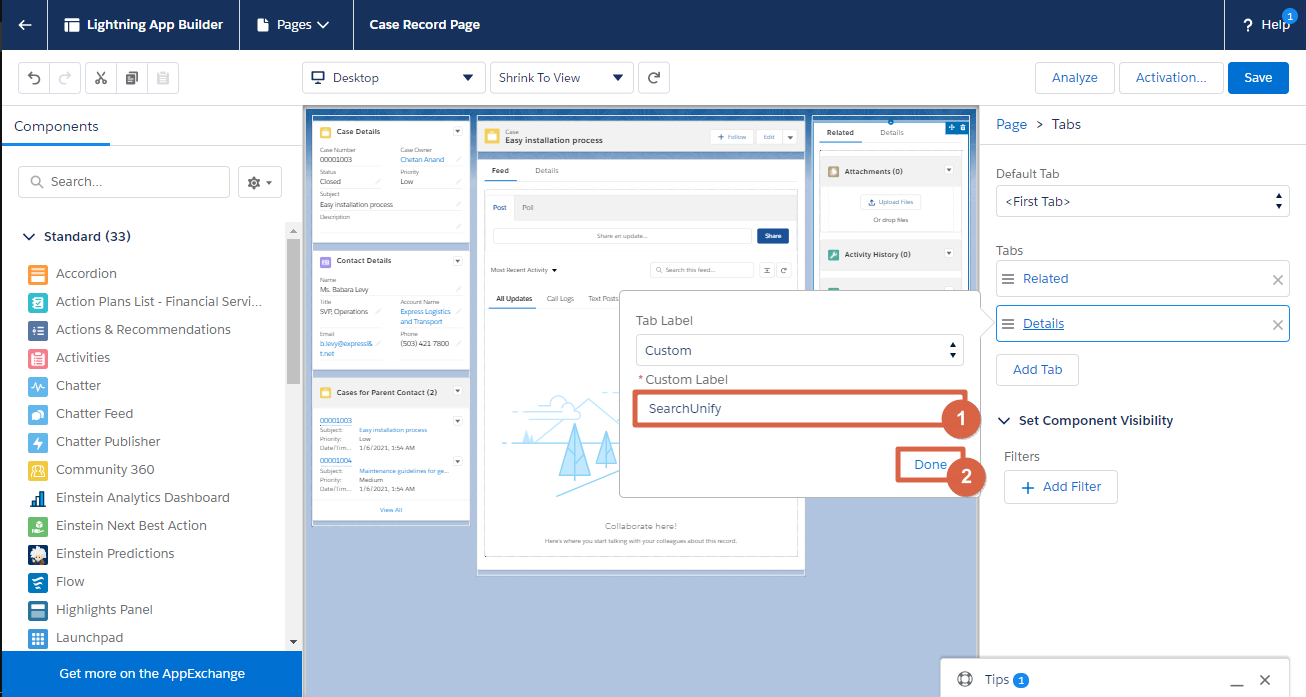
- A new tab with the name Details will appear. Click Details, then click Details again in Tab Label and select Custom from the dropdown.
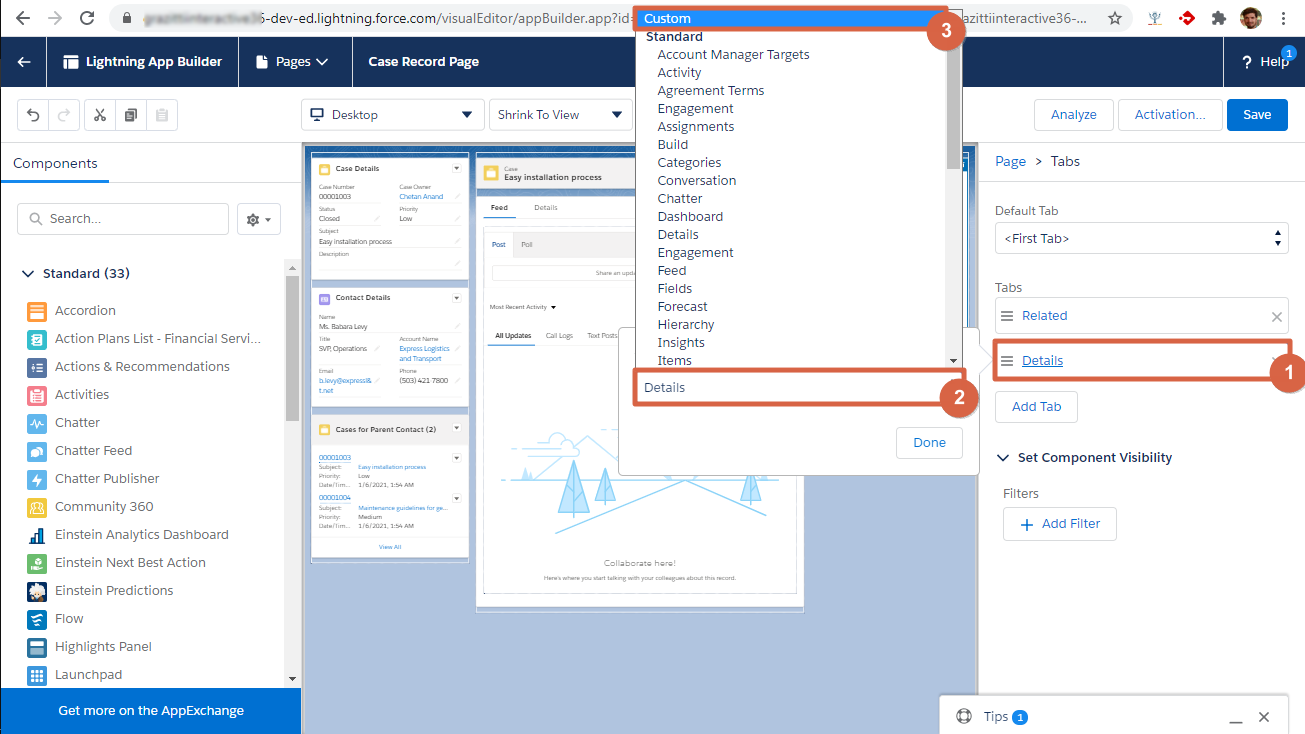
- Enter a name in Custom Label and click Save. In the next image, the name chosen is {{SearchUnify}} but you can give the tab any name.
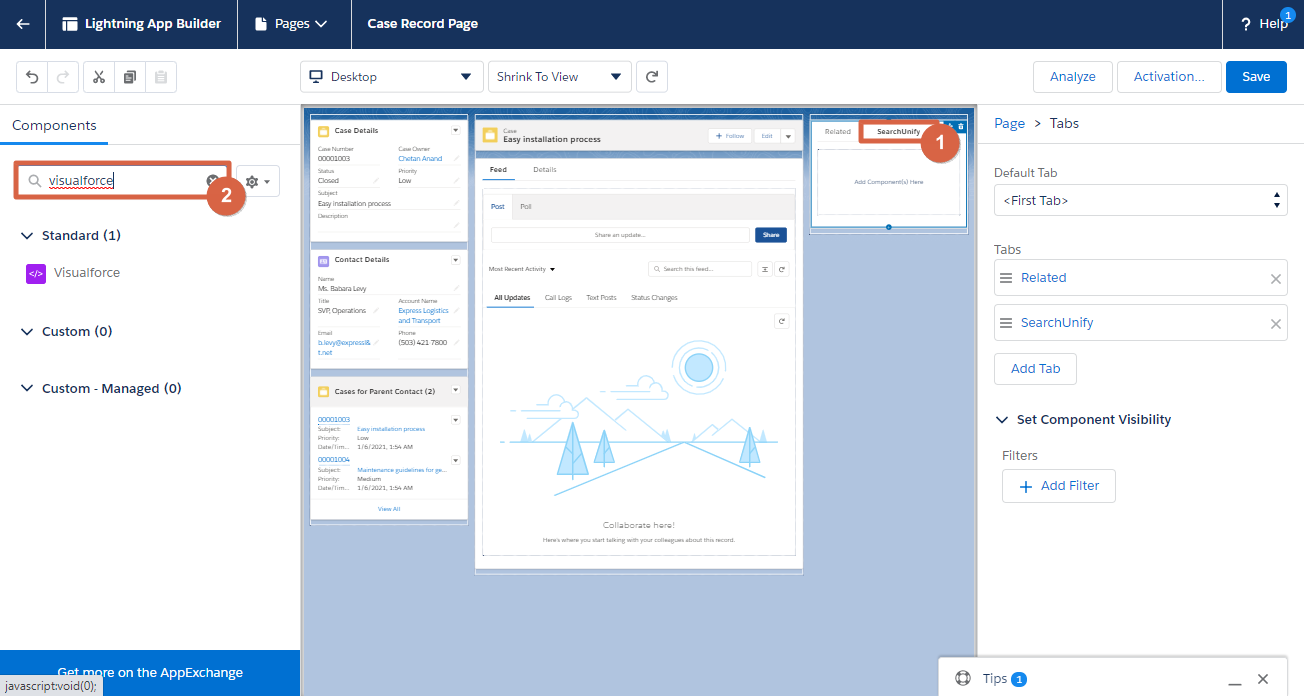
- Click {{SearchUnify}} and find Visualforce in Components.
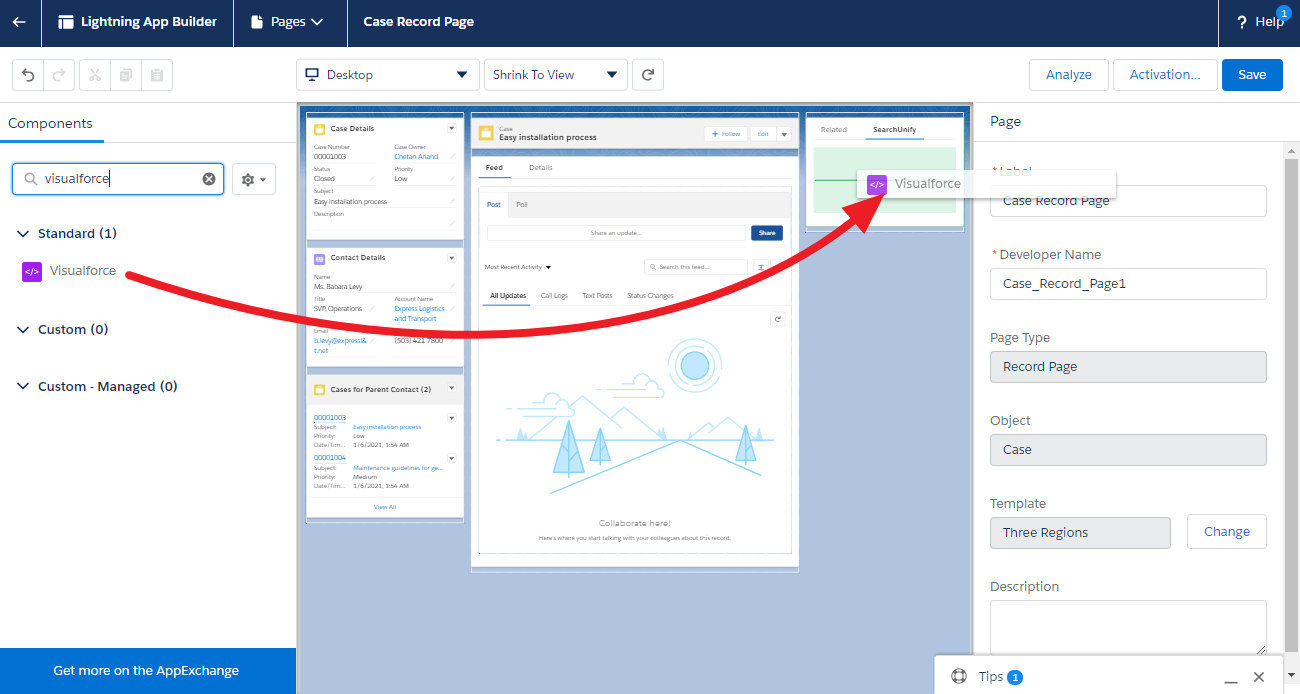
- Drag Visualforce to {{SearchUnify}}.
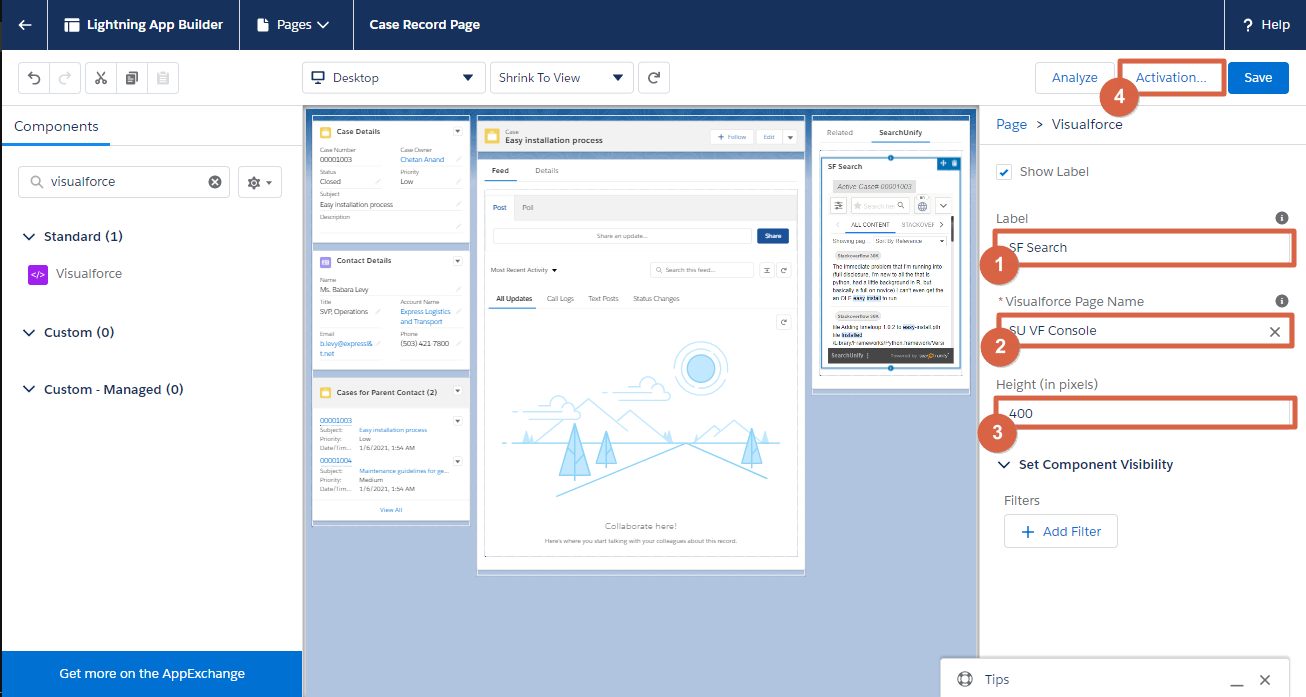
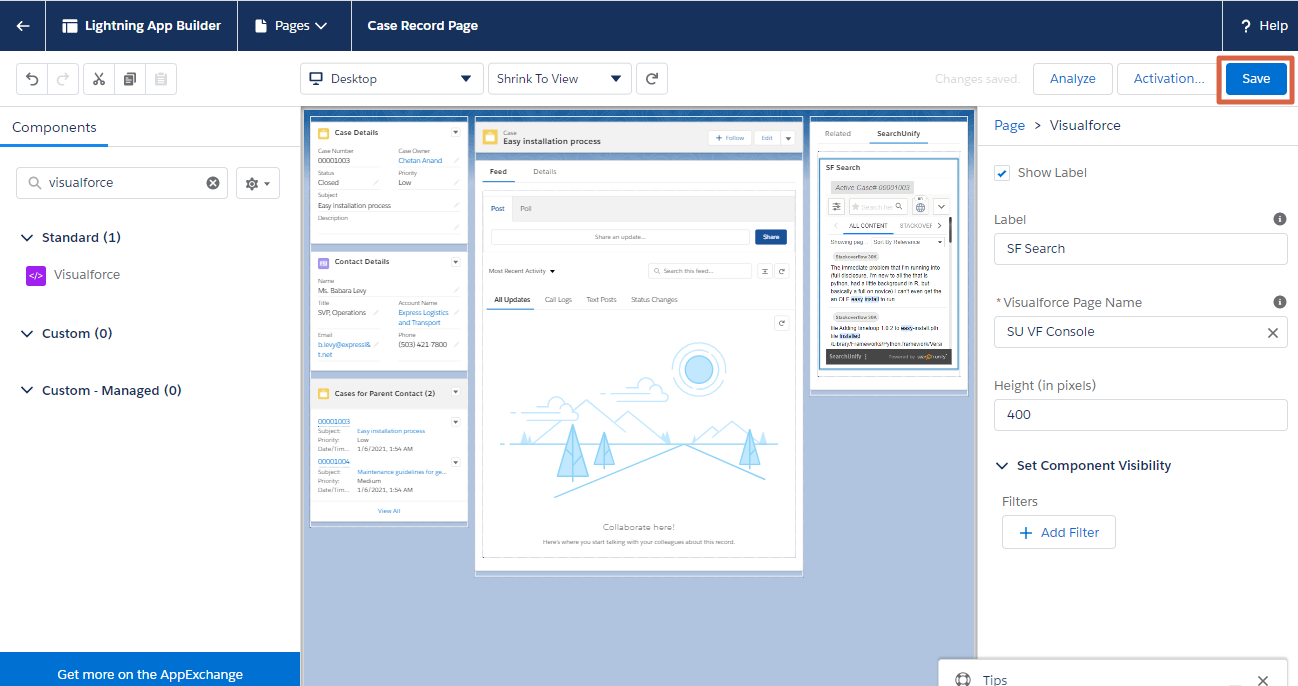
- In the rightmost column, name the component in Label, select SU VF Console in Visualforce Page Name, and set Height. In the image, the Label chosen is {{SF Search}} and the Height in {{400}}. The Label and Height in your org can be different. Then, click Activation.
- Set visibility for the Custom Record Page. In the image, the Custom Record Page is set default for the entire org, but the visibility settings for your org can be different. After the set-up, click Close.

- Click Save.
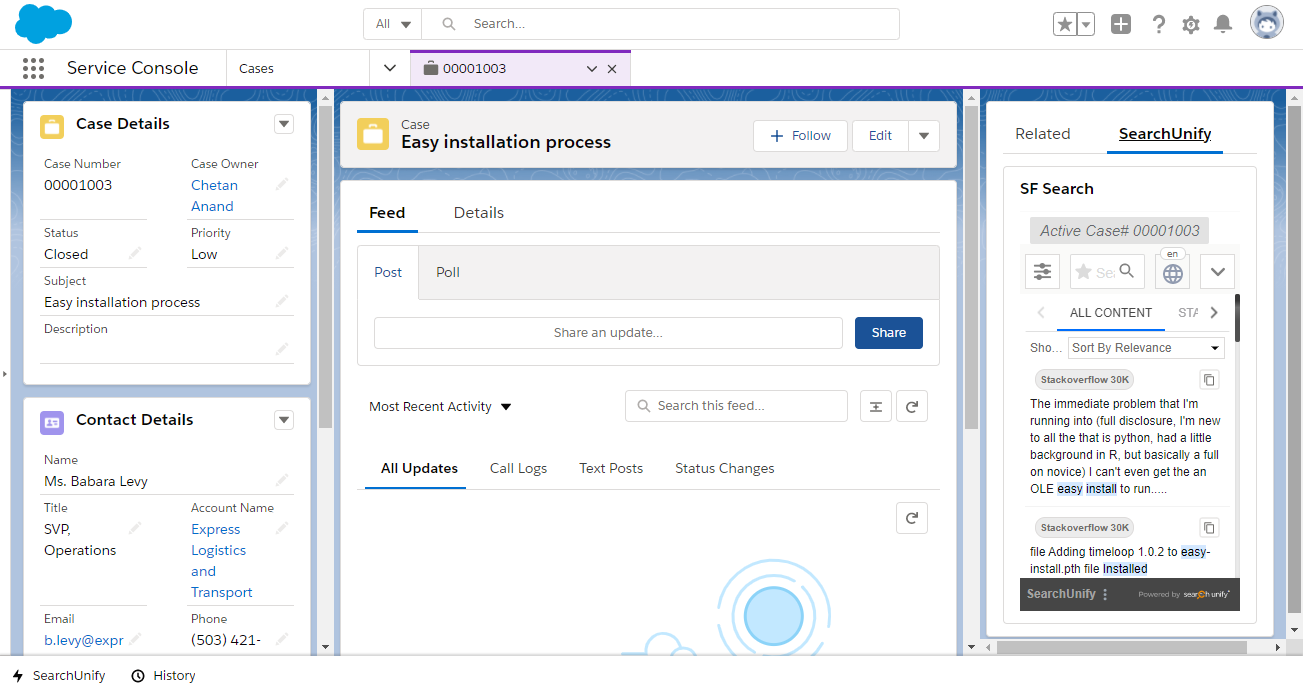
Result
Refresh the Case Page to view SearchUnify in the right sidebar.
Related