

Install a Search Client in Salesforce Communities (Visualforce)
This article shows how to set up the SearchUnify search in a Visualforce community. The installation takes only a few minutes but goes a long way in enhancing user experience.
Prerequisites
The SearchUnifySF connected app should be installed in your Salesforce instance. Refer to Use Salesforce As a Content Source
Create a Salesforce Visualforce Search Client
- Ensure that Salesforce Communities are enabled. Skip this step if you already have a community.
- Create a Salesforce Visualforce search client.
- Configure the Salesforce Visualforce search client.
Install SearchUnify Package
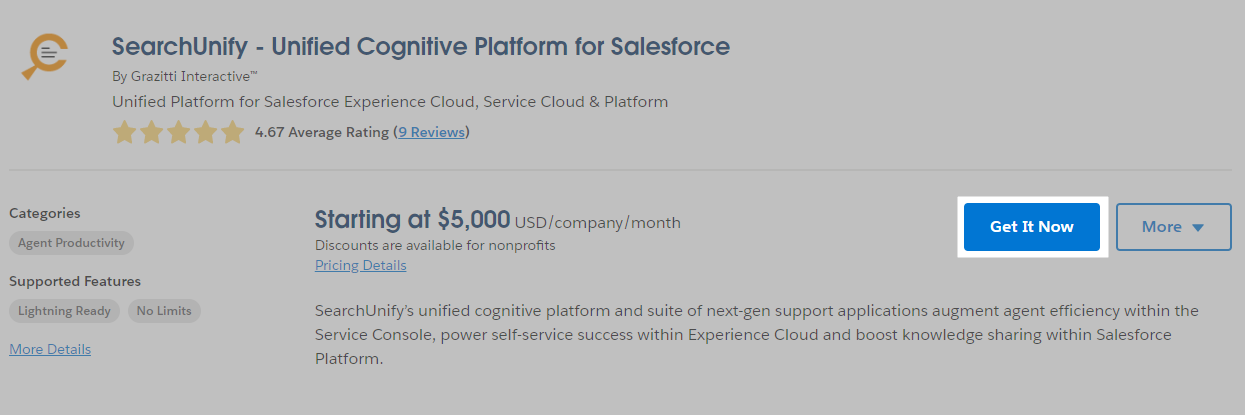
- Visit Salesforce AppExchange and you will land on the SearchUnify - Unified Cognitive Platform for Salesforce app listing page. Click Get It Now.
- If prompted, log in with your Salesforce admin credentials.

- It's advisable to install an app on Sandbox, instead of Production.
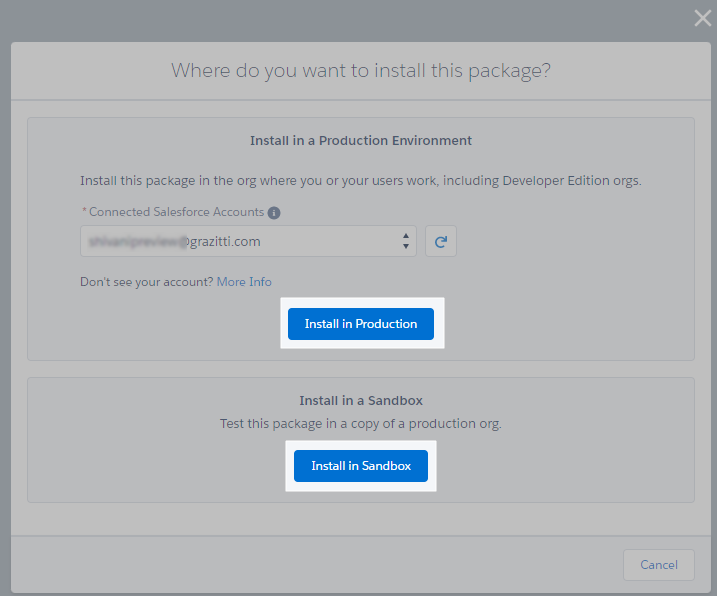
- Install the app for All Users. A warning might come up. Overlook it and proceed with installation. In the end, an Installation Successful message will greet you.

Process SearchUnify Package
Process SearchUnify Package
The data flow between SearchUnify and your Salesforce org is managed through Remote Sites. Create two remote sites. The instructions are on Create Remote Sites in Salesforce.
Create Two Trusted URLs
You need to add your CDN endpoint and Service endpoint to Trusted URLs.
-
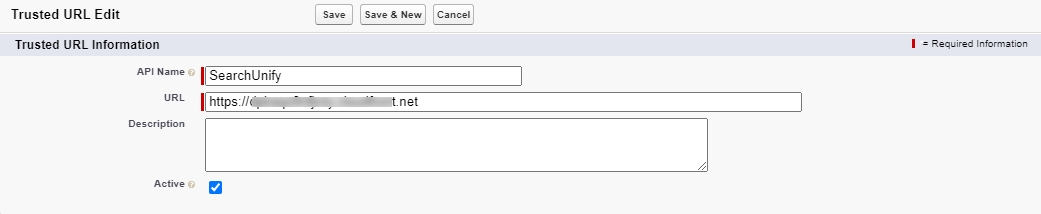
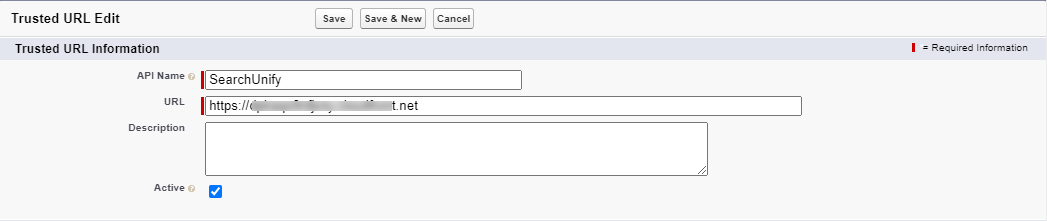
On the Setup page, use Quick Find Box to search Trusted URLs and click on it. Click New Trusted URL to create a new URL.

-
Enter a name into API Name field and use your CDN Endpoint given in the readme.txt file into the URL field. Make sure you use the CDN endpoint up to .net only (as shown in the image below).
-
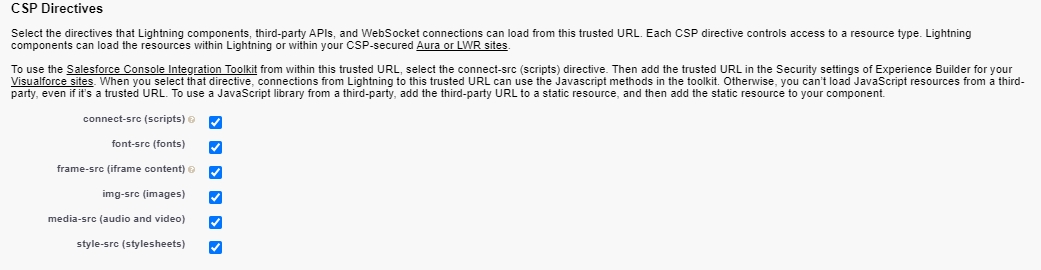
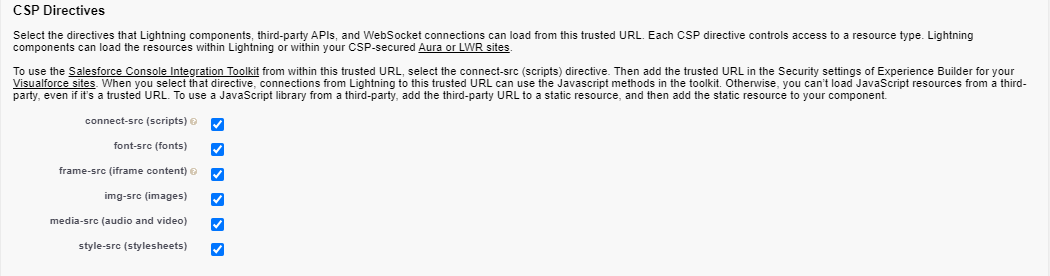
Make sure to select all the CSP Directives options and click Save.
-
Similarly, create another Trusted URL using your Service Endpoint (your SearchUnify instance URL).
Add a CORS
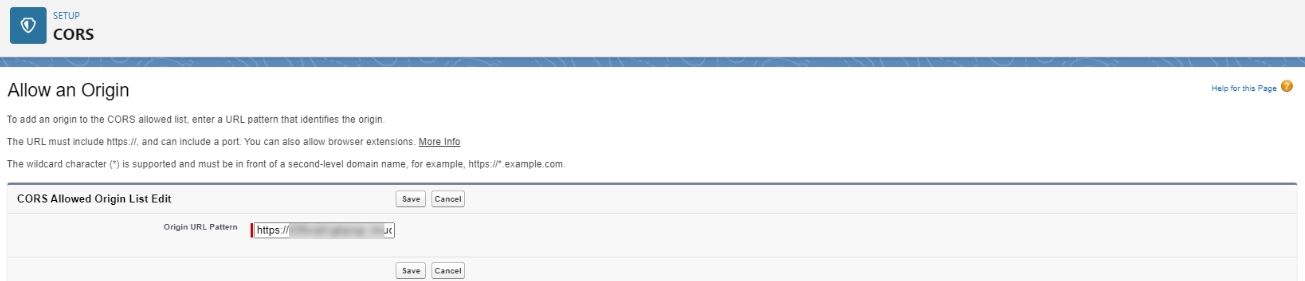
If you use SearchUnify Cloud Edition, you have to add your CDN endpoint to CORS.
-
On the Setup page, use Quick Find Box to search CORS and click on it. Click New to create a cross-origin resource sharing URL.

-
Add your CDN Endpoint to Origin URL Pattern and press Save. Make sure you use the CDN endpoint up to .net only.


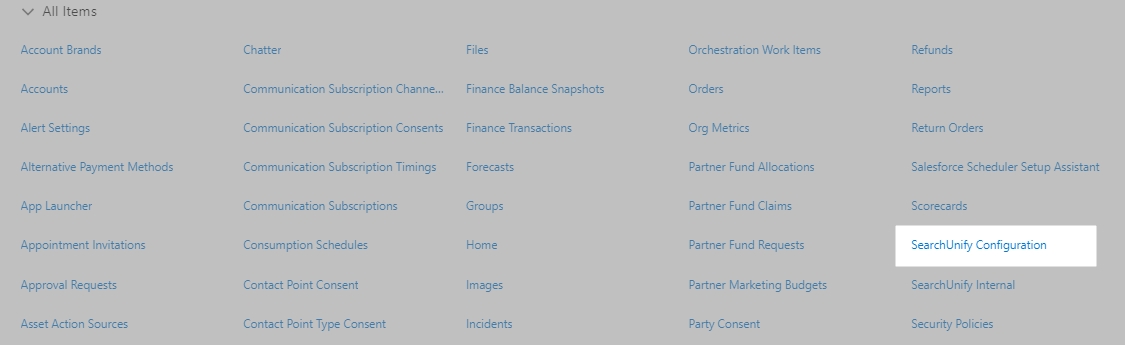
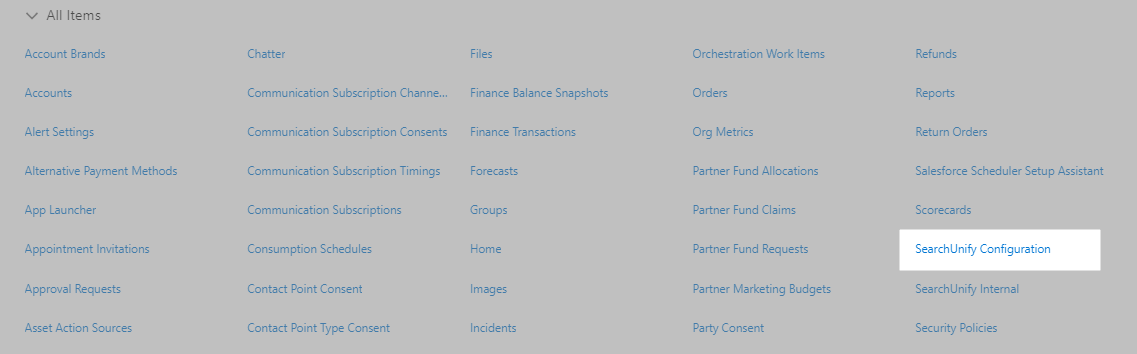
- Click Salesforce App Launcher and then View All.
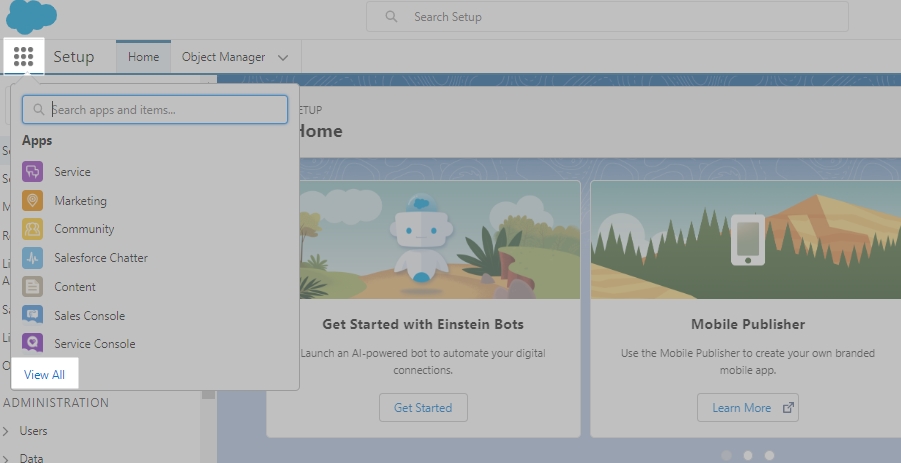
- Find SearchUnify Configuration and click it open.
-
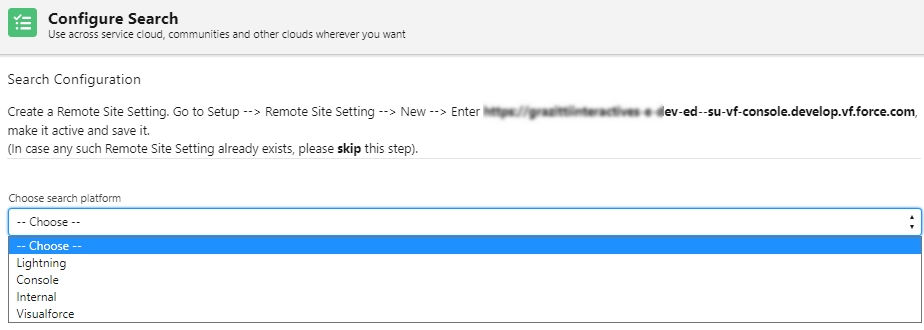
Select the installation location for the search in Choose search platform.
- Turn on CDN Support if you use the Cloud Edition. Turning on CDN Support improves speed but it also requires two extra settings:
During search client processing, you need a CDN endpoint which can be found in the readme file
For successful processing, you will have to create three remote sites instead of two. The website to be inserted in Remote Site URL can be found in the readme file

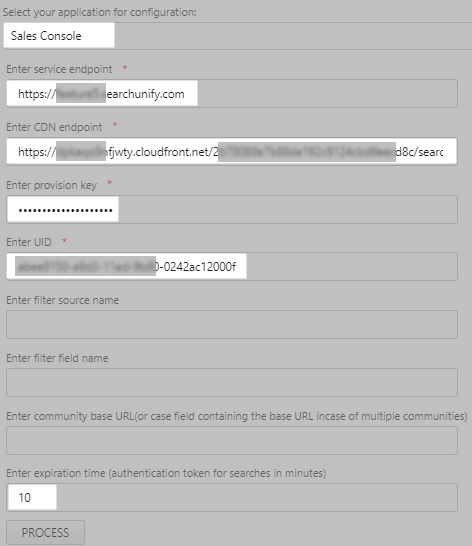
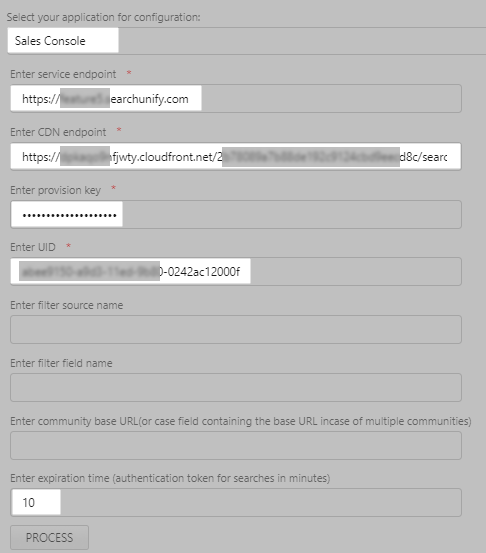
- Enter the details and click Process.
- Select your application for Configuration. The search client will be installed in the chosen application on Console, Community, or Visualforce. The field is absent when Internal is picked.
- Enter Service Endpoint. It is your SearchUnify instance URL.
- Enter CDN endpoint. The endpoint is in readme.
- Enter Provision Key. You can get it from your SearchUnify representative.
- Enter UID. It is your search client ID.
- Enter expiration time (authentication token for searches in minutes). Enter any integer. The suggested value is 120.

Processing can take up to a few minutes. Upon a successful processing, proceed with inserting the SearchUnify component to the case details page.
You have configured the search successfully. means that SearchUnify has been installed on your VF community.

Set up on Community Homepage
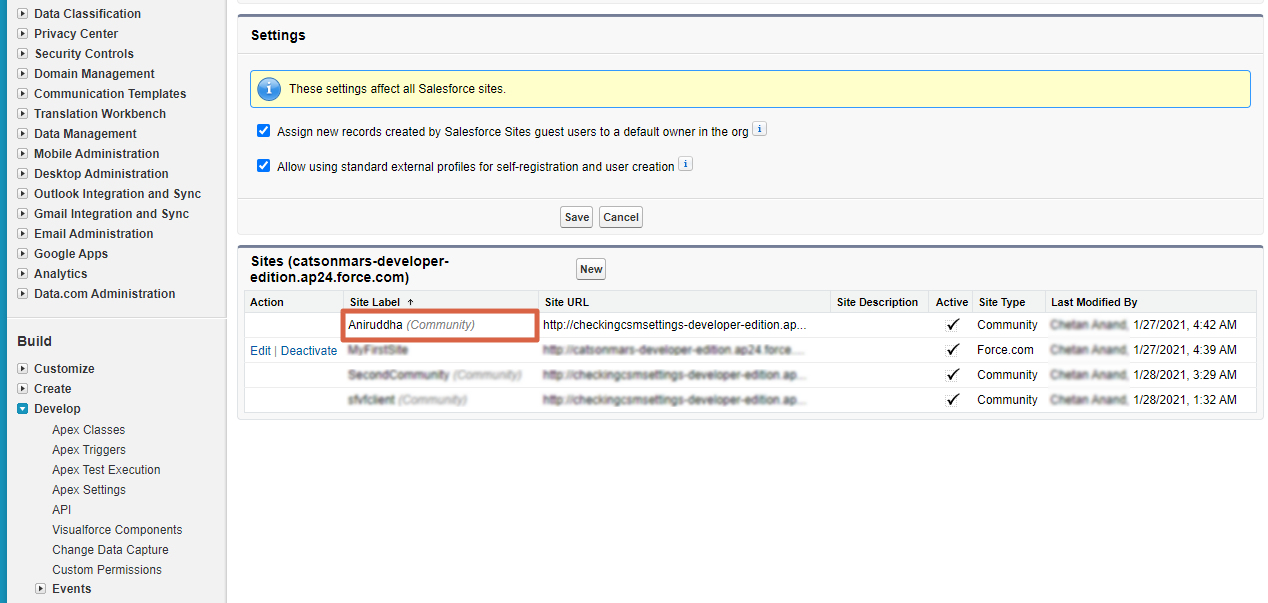
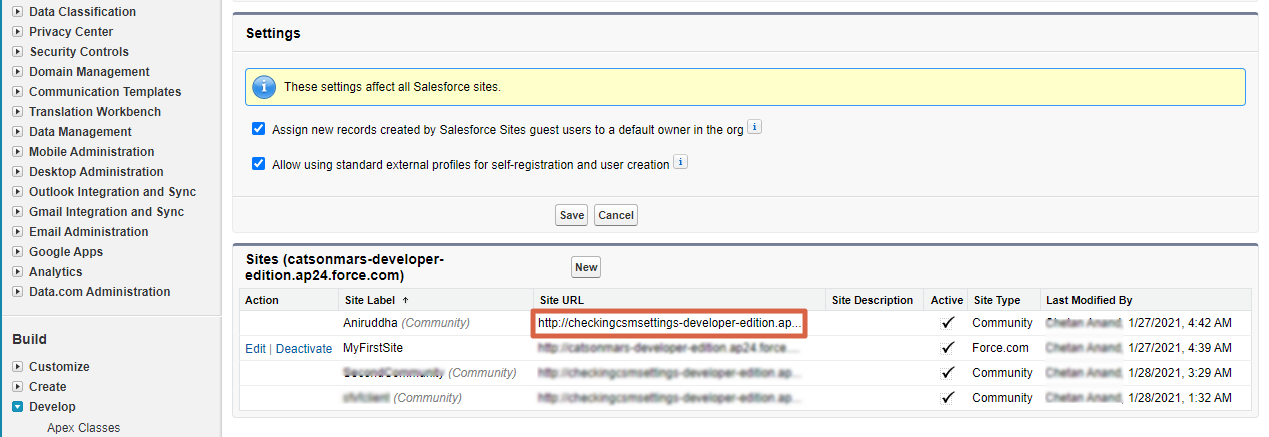
- If you are on Classic, then from Setup, go to Quick Find Box, look up "Sites" and open Sites in Build > Develop; as is shown in the next image. The path for Lightening users, from the search box, is User Interface > Sites and Domains > Sites.
- Scroll down to find your community and open it.
- Click
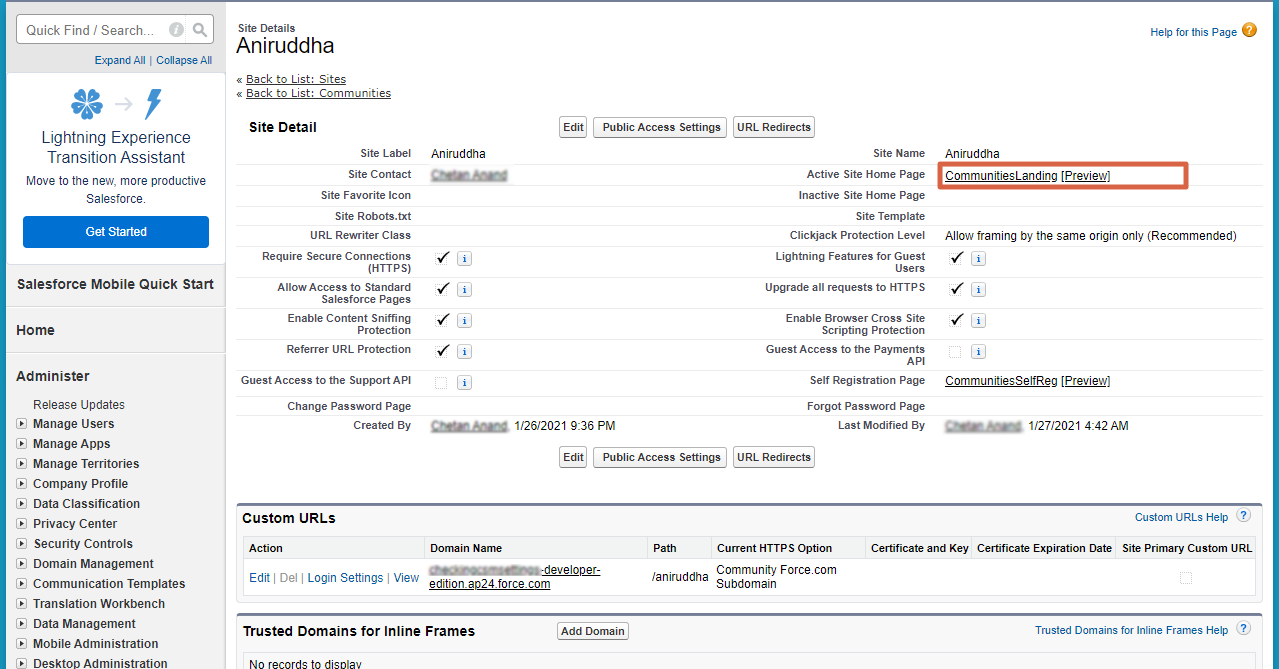
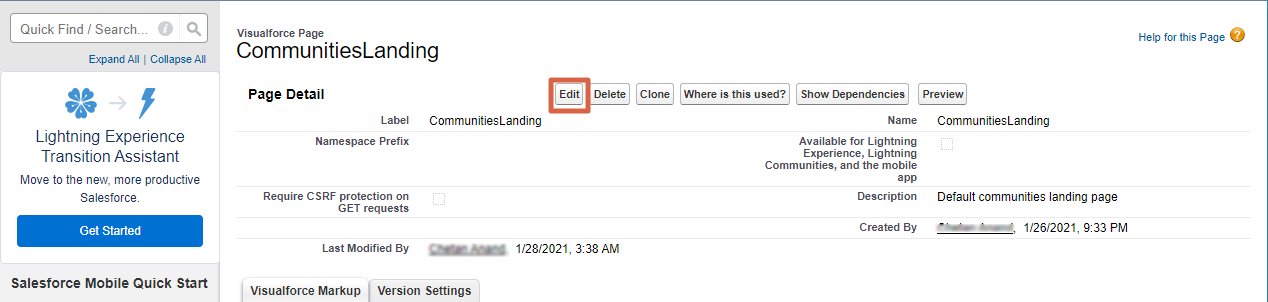
{{Home Page Name}}against Active Site Home Page. In the image, the home page name is "CommunitiesLanding". - Click Edit.
- There are two ways to set up search on the community:
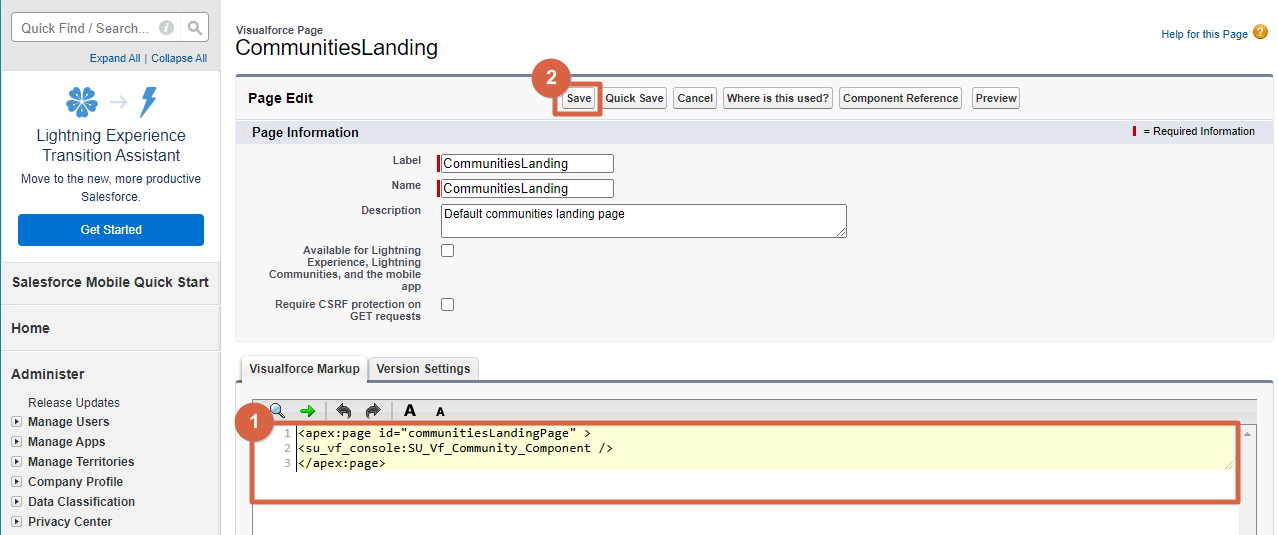
- Type I. Both the search box and search results are right on the home page. The illustration used in this article is Type I. To proceed with Type I, edit the existing code and insert
<su_vf_console:SU_Vf_Community_Component />on the page. The final code looks as in the image. - Type II. The search box is on the home page but the results are displayed on a community page specifically created to host them. If you are going with Type II, then name the page in Enter community page name (Step 4 of Process SearchUnify Package). To proceed with Type II, edit the existing code and insert
<su_vf_console:SU_Vf_Community_Searchbox />on the page. The final code looks as in the image.
- Type I. Both the search box and search results are right on the home page. The illustration used in this article is Type I. To proceed with Type I, edit the existing code and insert
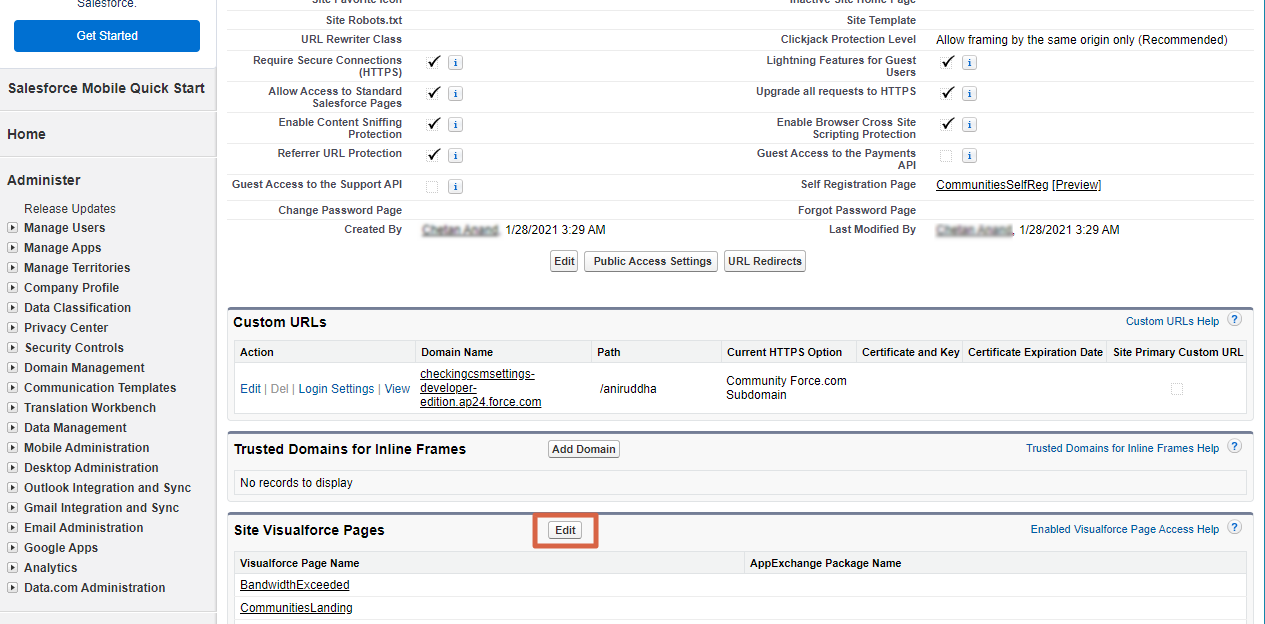
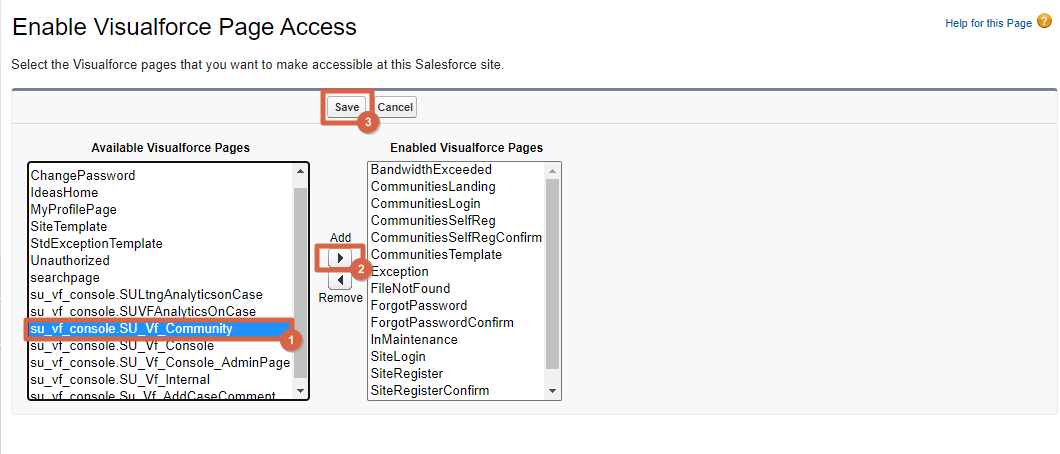
- Scroll down to Site Visualforce Pages and click Edit.
- Add
su_vf_console.SU_Vf_Communityto Enabled Visualforce Pages, and click Save. IMPORTANT. If you are not hosting the search box on the home page (Type 2 in step 5), then add the search page (Enter community page name in step 4 of Process SearchUnify Package) to Enabled Visualforce Pages as well. - From Sites (step 1), click the Site URL of your community to view SearchUnify search client on its home page.


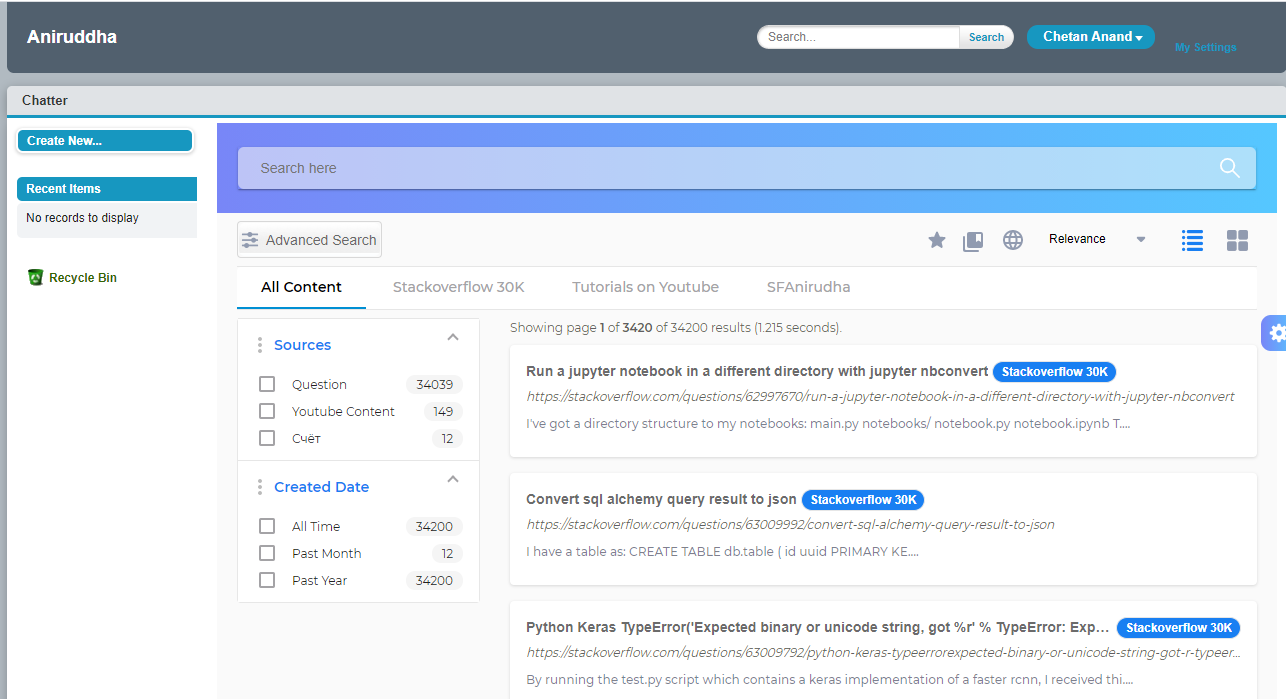
Result
The search results update when you click anywhere outside the search box, even when you are still typing.