

Install a Search Client in SharePoint
Improve user experience across your sites with a search engine purpose-built for SharePoint. The SearchUnify search client for SharePoint is capable of delivering highly-personalized search results, irrespective of where your data is stored — on SharePoint or outside it.
The SearchUnify search client for SharePoint is highly customizable. You can tune results, create brand-compatible designs, and even run keyword-specific ads.
Prerequisites
- Create an App Catalog to enable deployment.
- One SharePoint site with a document library.
Installation Overview
The installation takes place in three phases, each of which is divided into smaller steps. Altogether, the entire procedure doesn't take more than 30 minutes.

Download SharePoint Search Client
A prerequisite to downloading a SharePoint search client is to create it. If you have not already, then create a search client, connect it with content sources, and turn on analytics. Check out these articles for assistance:
- How to create a search client?
- How to connect a search client with content sources?
- How to turn on search analytics?
Once the SharePoint search client is ready, then proceed with its download.
- Go to Search Clients from main navigation.
- Find the SharePoint search client and hit
 .
.
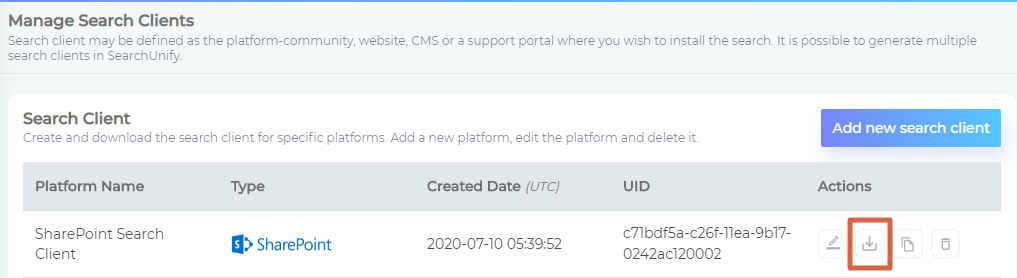
Once you click ![]() , the SharePoint search client will be downloaded as a zip folder.
, the SharePoint search client will be downloaded as a zip folder.

Prepare SharePoint Search Client
The zip folder is an app that can be installed on SharePoint. Before installation, swap the placeholders with your SharePoint website URLs in all the six files. Three files are JSON and can be found the root of the zipped folder. The remaining three files are XML—each in a folder of its own—in searchunify-app-sppkg (Windows) or searchunify-app-sppkg.zip (Linux). This section covers the details.

- Open (without extracting) the zip folder with Archive Manager or your favorite archive software, so that you can see the files.
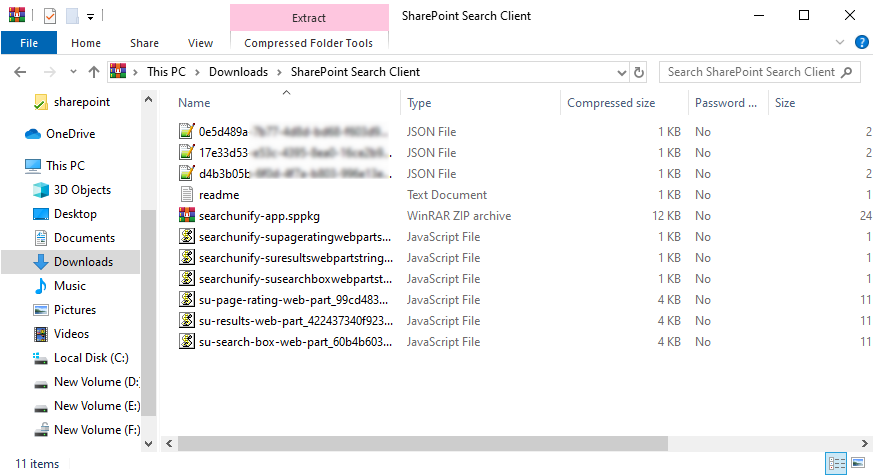
- If your archive software sorts files by name, then the topmost file will be
0e5d489a-****.json. Open it in a text editor or IDE.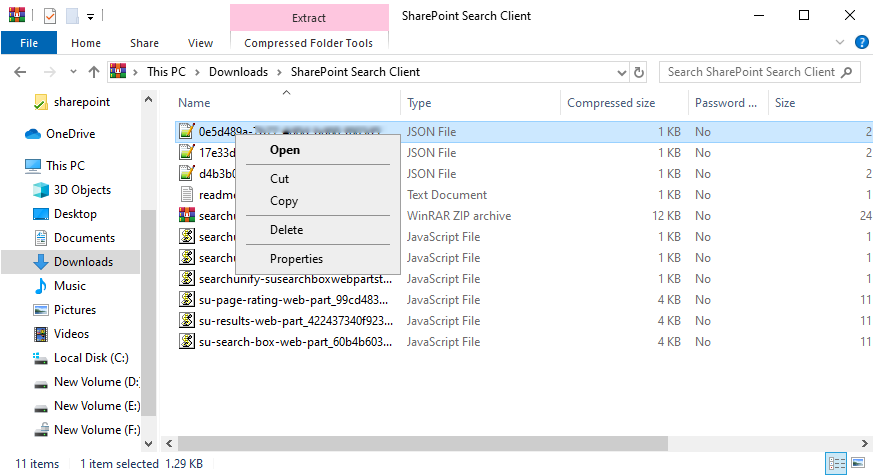
- In
0e5d489a-*****.json, find<!--YOUR WEBSITE PATH--->/and replace it with the address—with the site and document library name—of your SharePoint site.
Correct and Incorrect SharePoint Site Addresses
Incorrect:
https://websiteName.sharepoint.com/sites/Incorrect:
https://websiteName.sharepoint.com/sites/has only the site name.nombre-de-sitio-webCorrect:
https://websiteName.sharepoint.com/sites/has both the site name and the document library name.nombre-de-sitio-web/biblioteca-documentos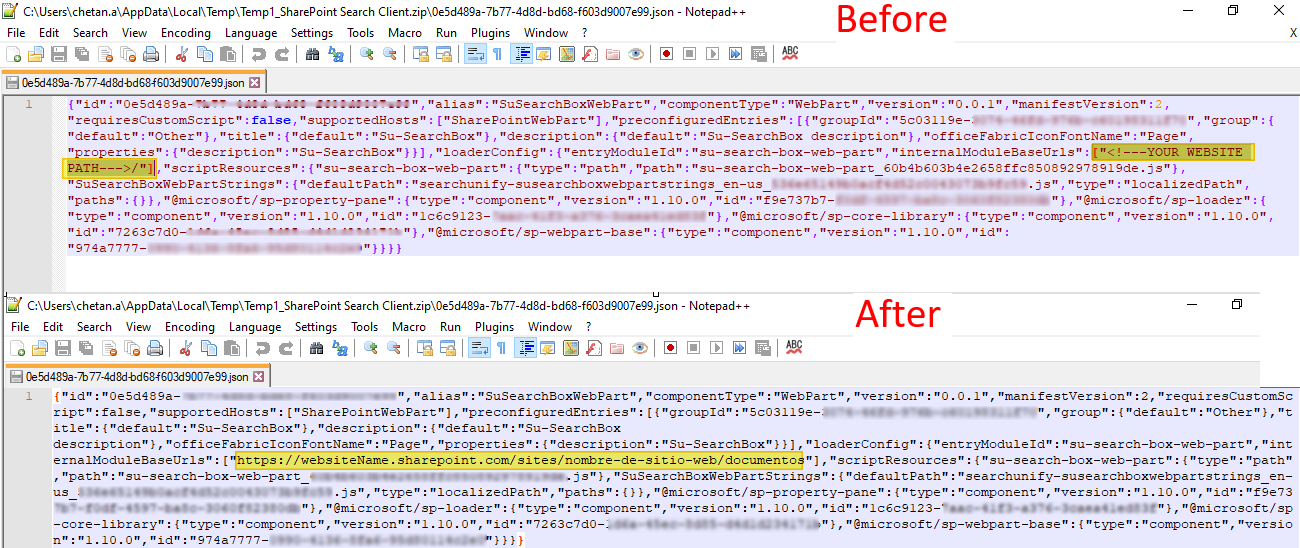
- Replace the placeholder in
17e33d53-****.jsonandd4b3b05b-****.jsonas well.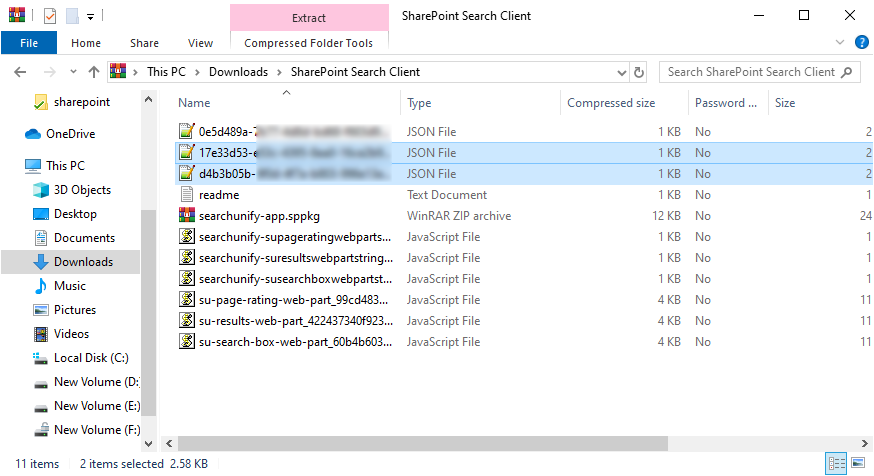
- Find
searchunify-app.sppkg(Windows) orsearchunify-app.sppkg.zip(Linux) and double click on it.
- Open the folder
0e5d489a-****, findWebPart_0e5d489a-7b77-4d8d-bd68-f603d9007e99.xml, open it and replace["<!--YOUR WEBSITE PATH--->/"]with your website's name.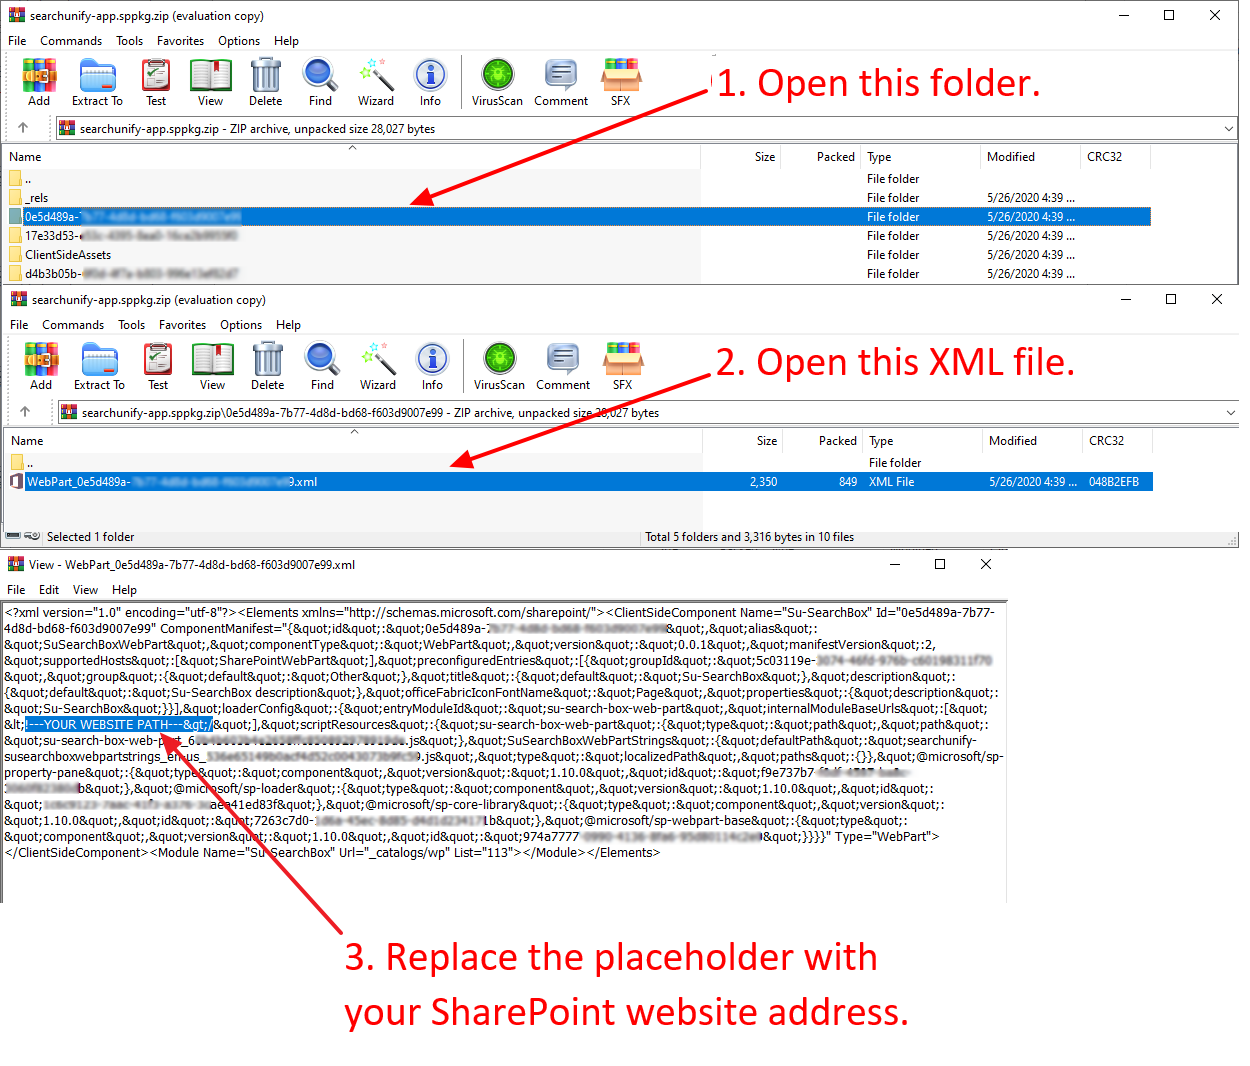
- Save the file and close it.
- Return to
searchunify-app.sppkg(Windows) orsearchunify-app.sppkg.zip(Linux) and repeat the steps 6 and 7 for folders17e33d53-andd4b3b05b-. The XML files in these folders will beWebPart_{{FOLDERNAME}}.xml.
The SharePoint search client is now ready to be installed on a SharePoint website.
Deploy Search Client on SharePoint
In this section, you will find out how to install the downloaded search client—which is still a zip folder, despite the changes during preparation—on a SharePoint website as an app.
- Log into SharePoint and look up "Apps" in the search box.
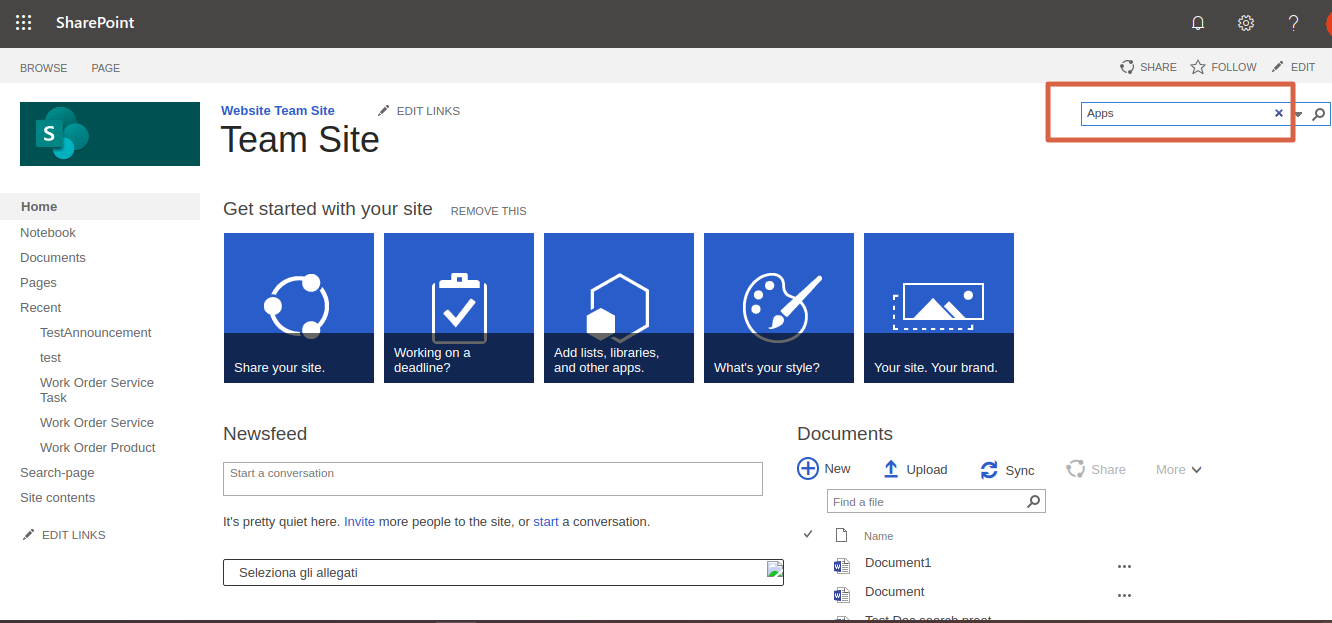
- In the results, open My Apps.
- Go to Apps for SharePoint, click Upload, and upload only
searchunify-sharpoint.sppkgfrom the zipped folder. Once you can see on SharePoint, click Deploy.
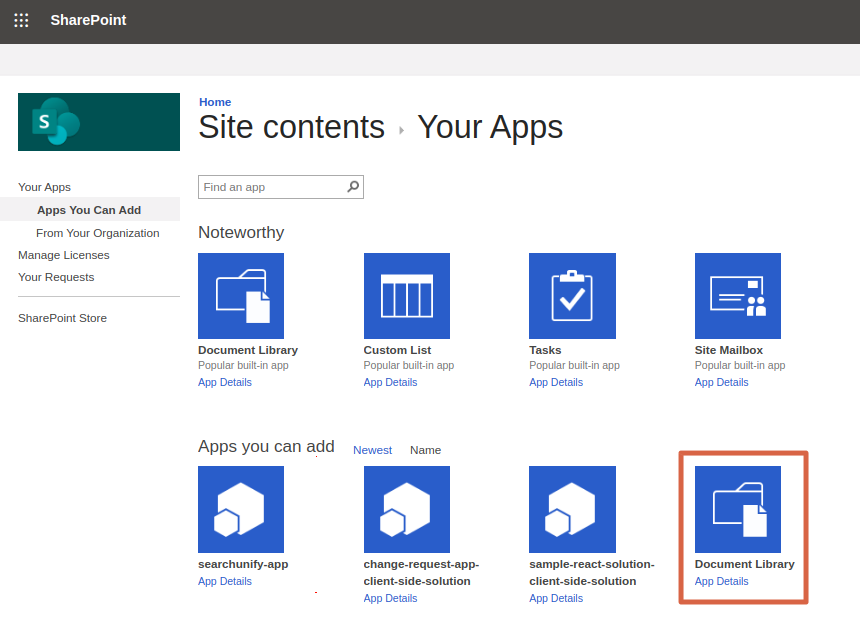
- Open Settings from the main navigation bar on the top, and click Add an App.

- On the Your Apps page, search for
searchunify-app, double click on it, and then installsearchunify-webpart-client-side-solution.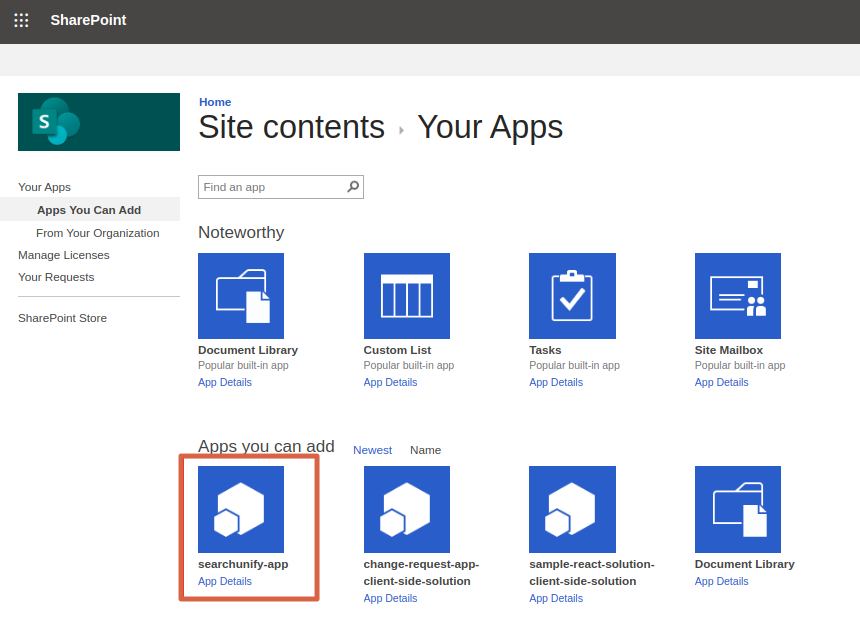
- Go to Document Library.The remaining search client files are stored here.
- Upload all the files from the zipped folder except for
searchunify-app.sppkgin Document Library.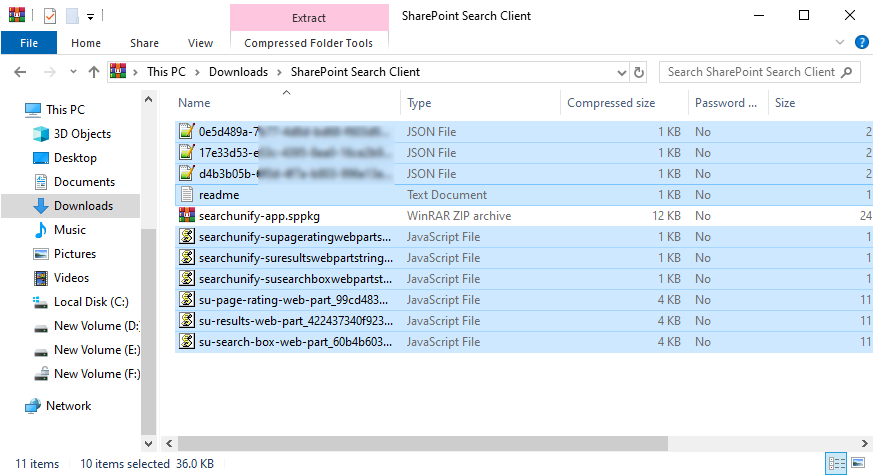
- Search
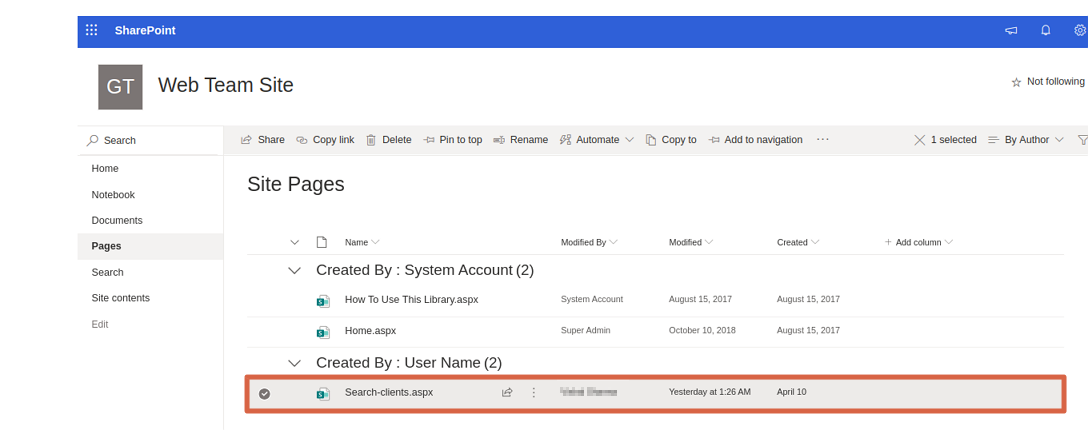
searchunify-sharpoint, and from the results selectsearchunify-webpart-client-side-solutionand install it. - Go to Pages and open for editing the page on which the search client will be installed.
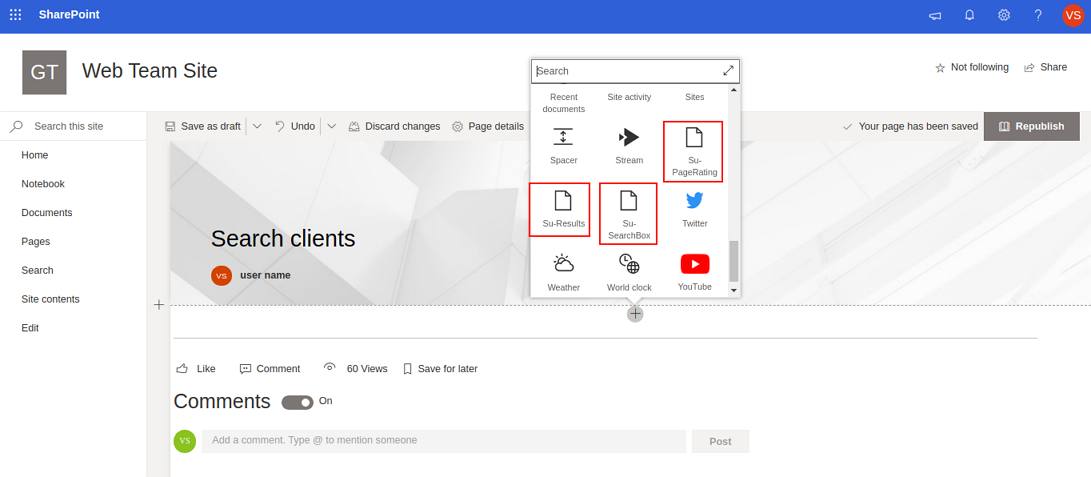
- Insert Su-PageRating, Su-Results, and Su-SearchBox on the page.
- Edit the Su-Results component, enter the search client UID, instance URL, and click Apply.
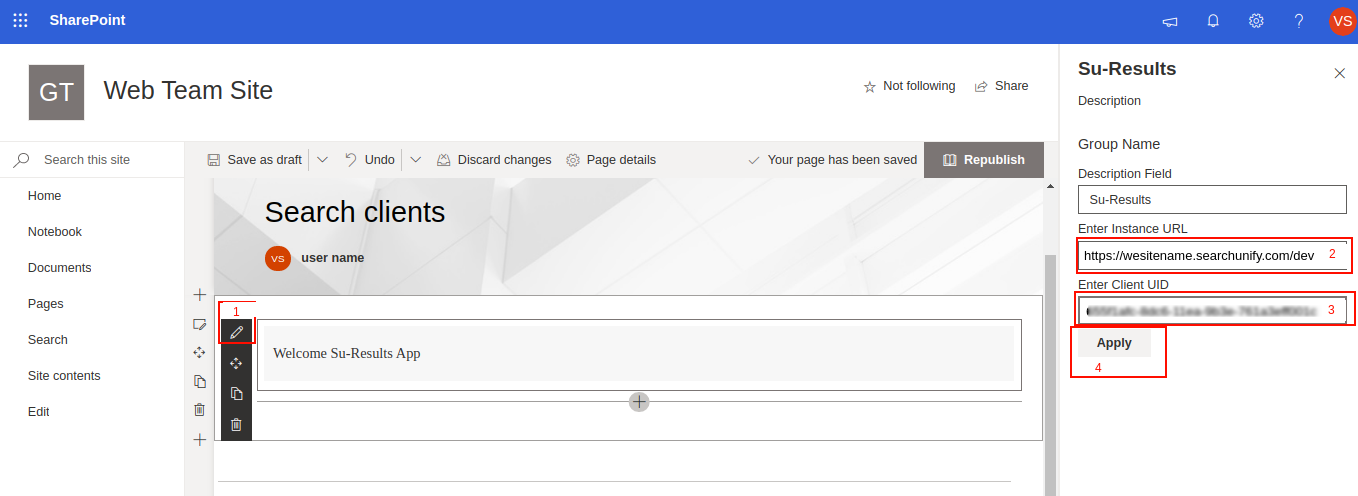
- Click Republish.

SearchUnify has been installed on SharePoint.