

Configure Agent Helper in Zendesk Support
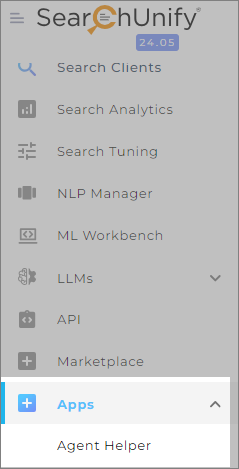
Once you have installed the Agent Helper app, you can find it under the Apps section.
-
Expand the Apps section and click Agent Helper.
-
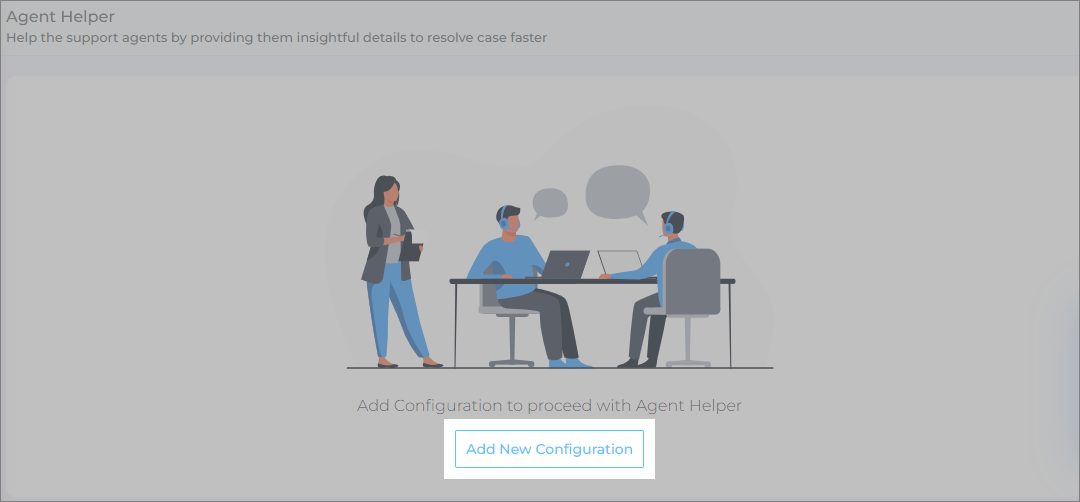
Click Add New Configuration.
-
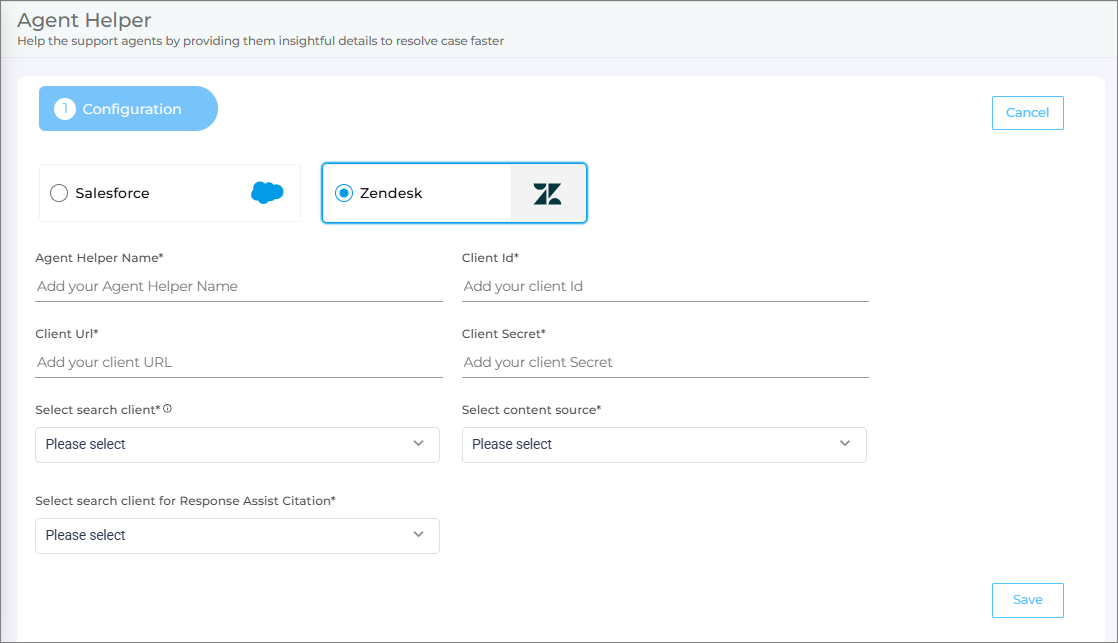
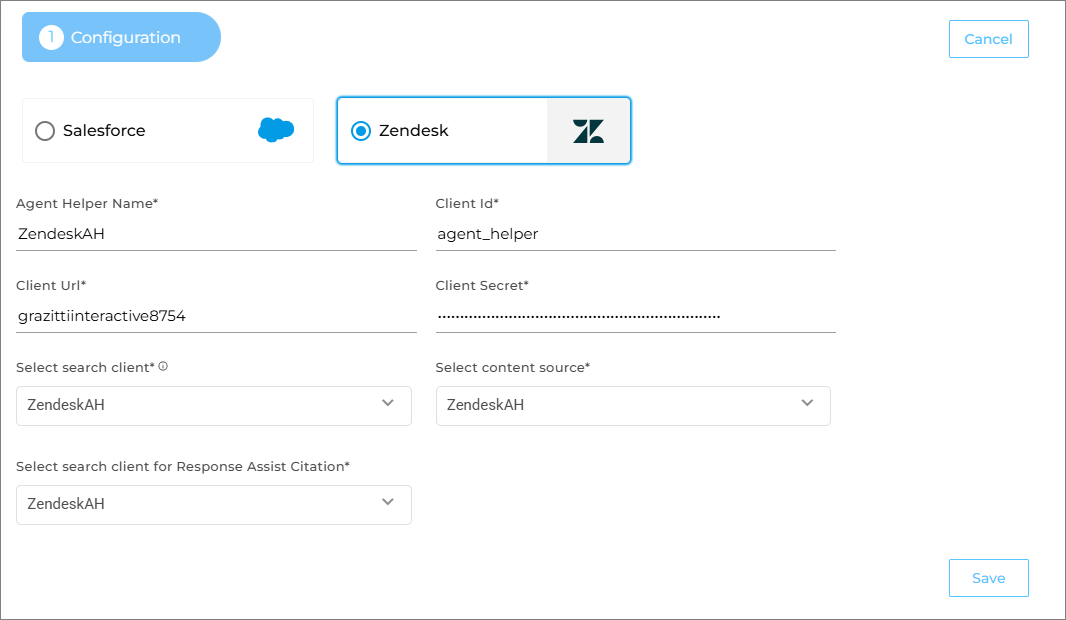
Select Zendesk to configure your Agent Helper in Zendesk Support.
-
Enter the required details:
-
Agent Helper Name: Give your Agent helper app a unique name.
-
Client Id: Enter the Client ID of your Zendesk instance. Refer to this doc to learn how you can obtain the Zendesk Client Id - Obtaining Zendesk Client ID
-
Client Url: Enter the base URL of your Zendesk instance.
-
Client Secret: Enter the Client Secret of your Zendesk instance. Refer to this doc to learn how you can obtain the Zendesk Client Secret - Obtaining Zendesk Client Secret
-
Select search client: Select your Zendesk search client you want to configure with the Agent Helper.
-
Select content source: Select your Zendesk content source linked with the selected Zendesk search client.
-
Select search client for Response Assist Citation: Select the search client(s) you want to use for Citations. This is helpful if you want to use a different search client (other than the Zendesk search client selected for Agent Helper) for getting citations for SUGPT-generated responses.
-
-
After you have entered all the details, click Save.
-
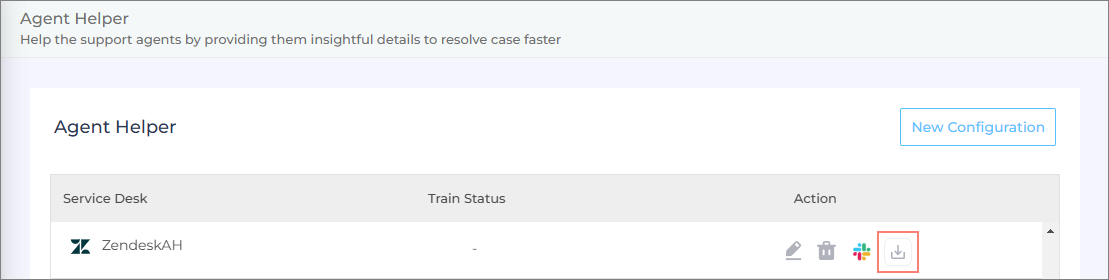
Download the Agent Helper app you just configured.
Configure Agent Helper App in Zendesk
-
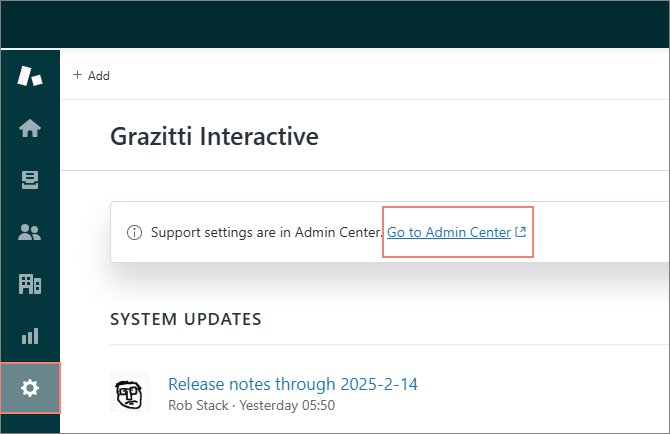
Log into your Zendesk instance, navigate to the Settings, and select Go to Admin Center.
-
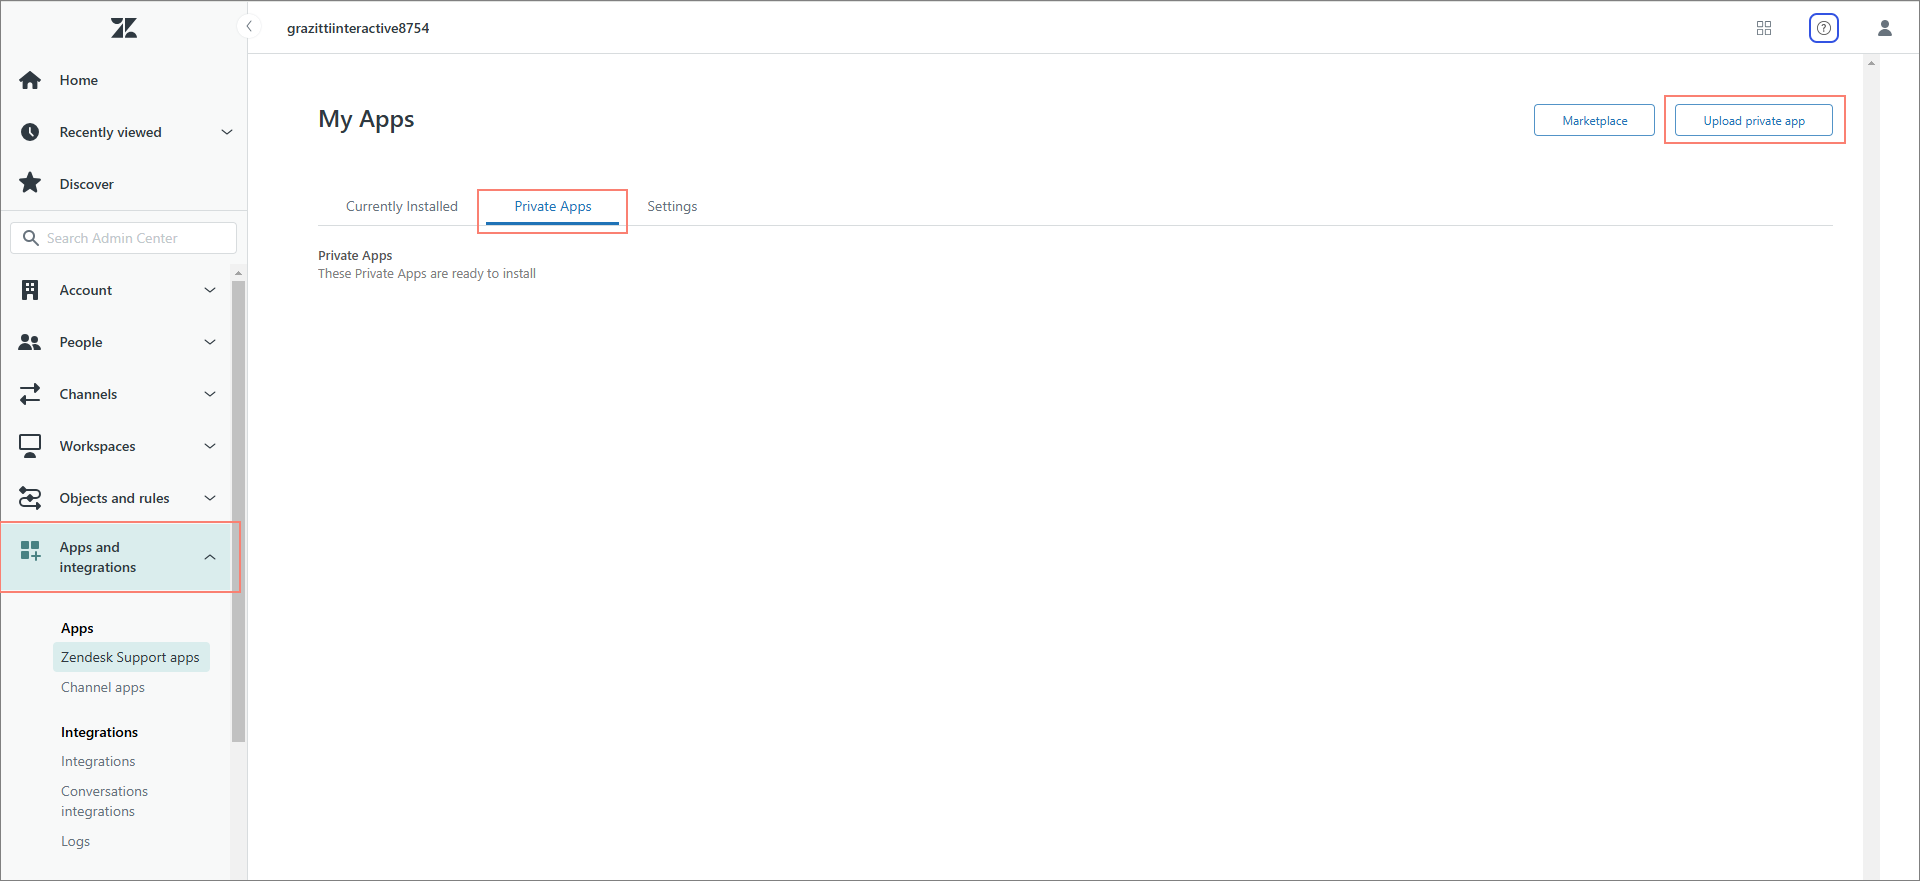
Navigate to Apps and Integrations > Private Apps and click Upload private app.
-
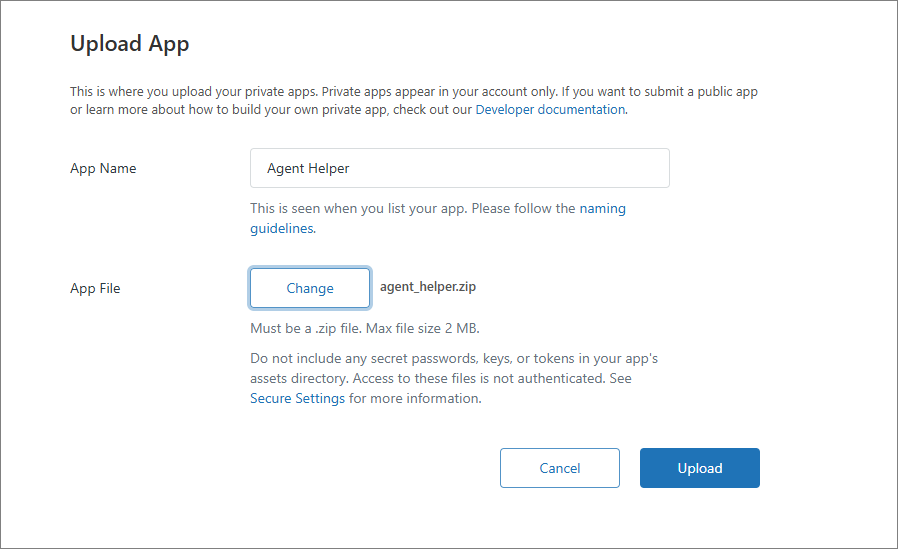
Give your app a Name and upload the .zipfile of the Agent Helper app you configured (refer to step 6 of the previous section).
-
Click Upload. If you see a confirmation message, click Upload to confirm uploading the .zip file of the app.
-
You will now see the Agent Helper app configurations.
Note: The title of the app will be the same as the name you provided in Step 3.
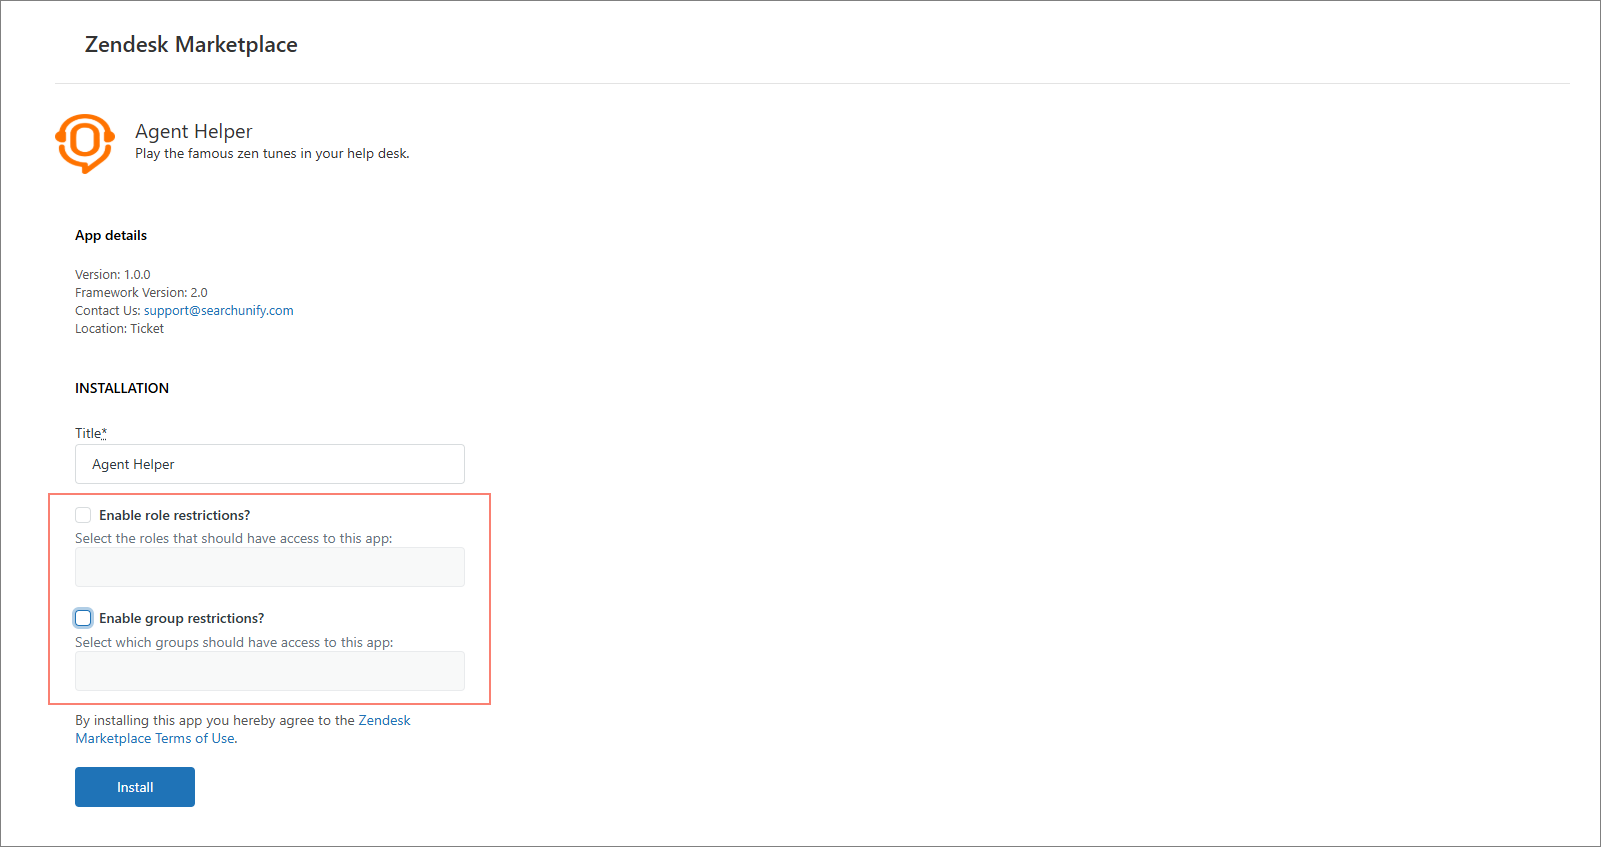
You will see two options that you can use to restrict the access to the Agent Helper application in Zendesk. As Zendesk admins, you can add both role restrictions and group restrictions.
-
Once you have added the access restrictions, click Install to complete the installation of the Agent Helper application in Zendesk.
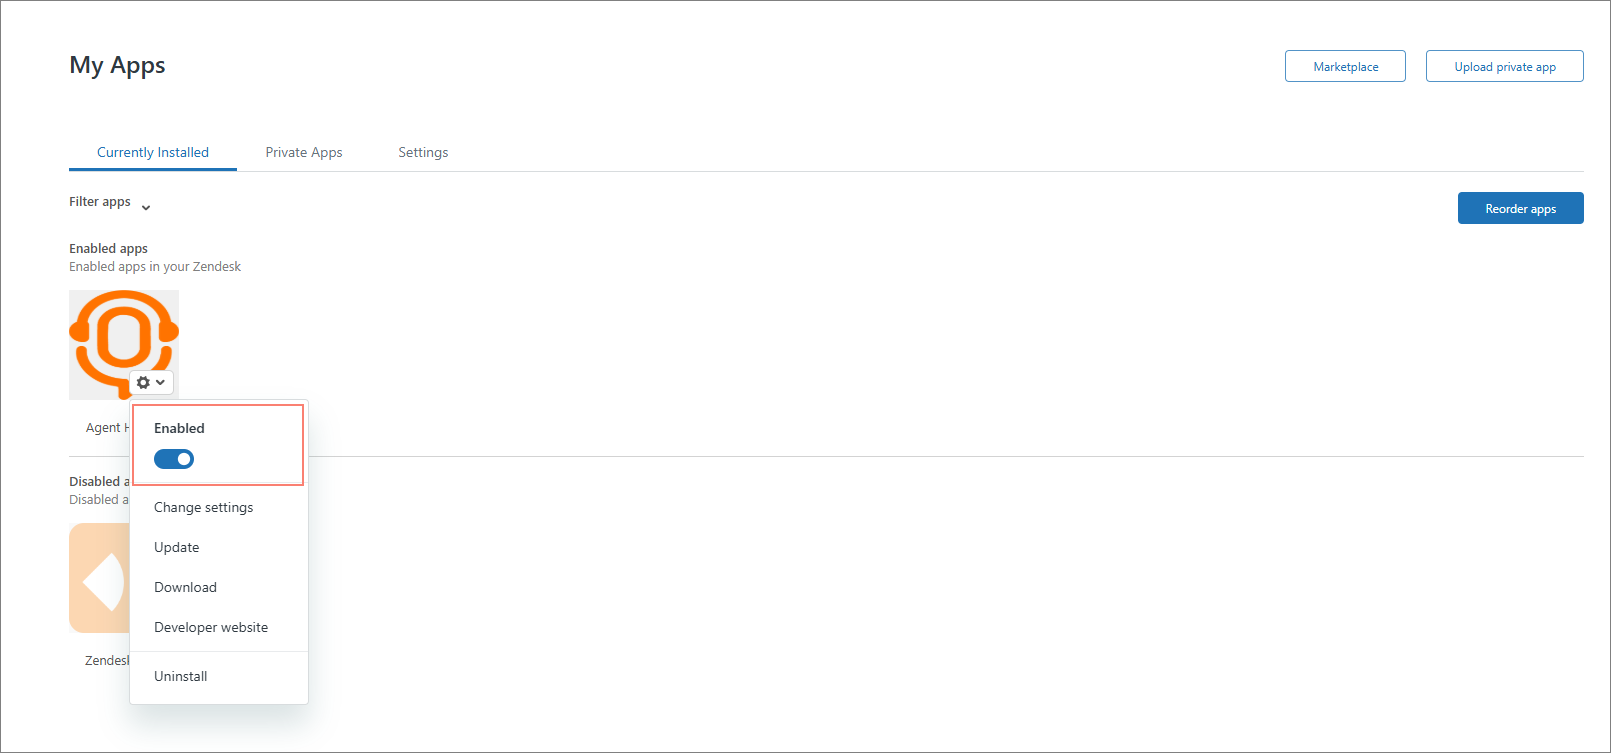
The installation is now complete. You can see the installed App on the Apps and Integrations screen.
There are options to edit the application settings. You can also disable the app by using the toggle. Other options for the app are shown in the image below.
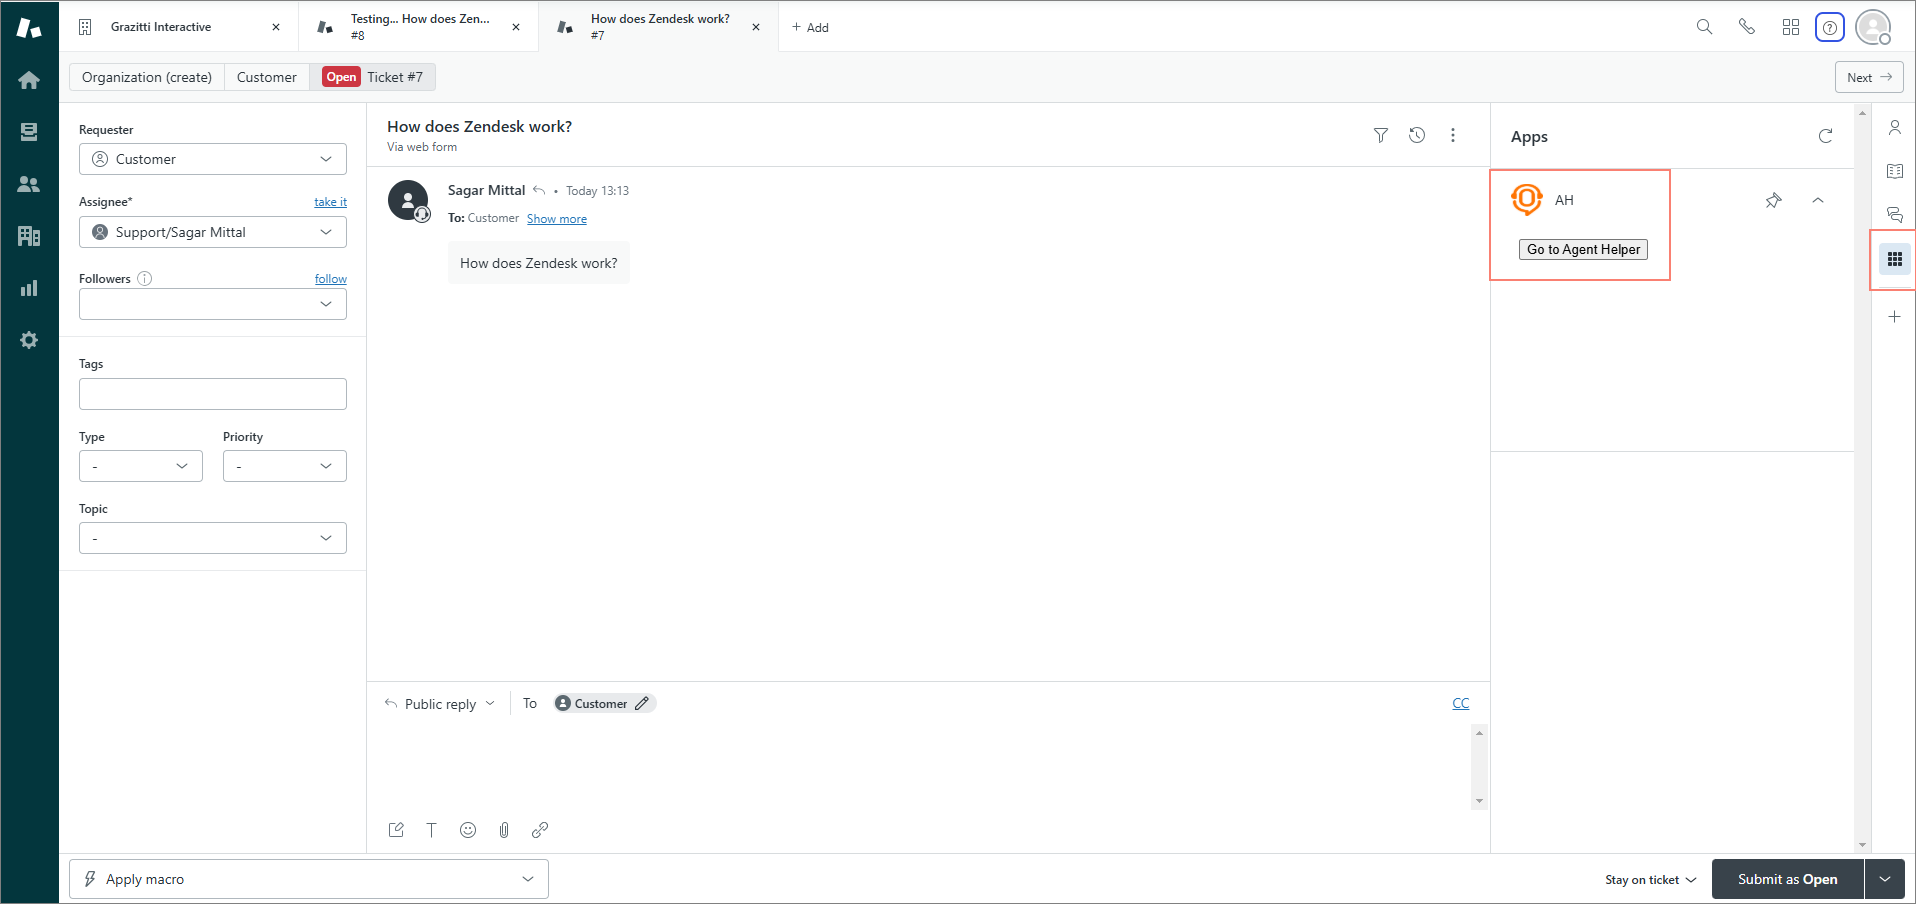
Go to the Zendesk Support console and open a support ticket.
Expand the Apps section on the far right of the screen and you will see the Agent Helper app. Click Go to Agent Helper.
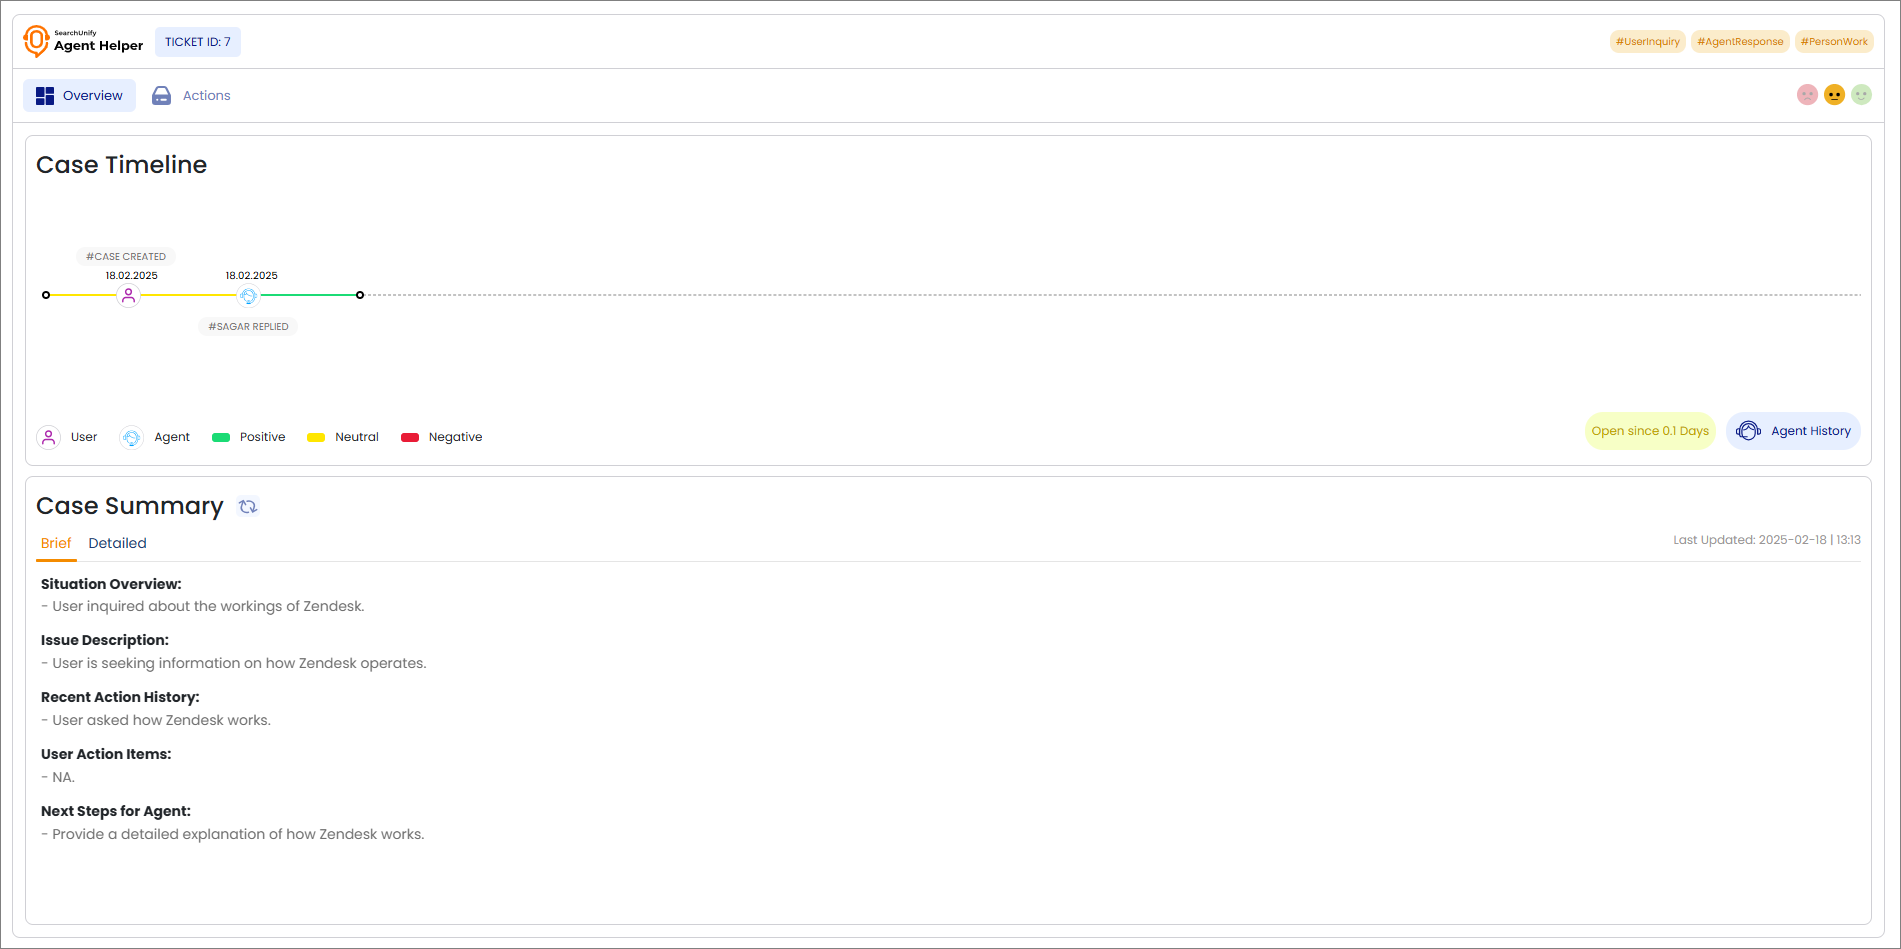
The Agent Helper console will open in a new tab, and it will appear as shown in the image below.
Related Docs:
Refer to the respective docs to learn how to use the Agent Helper app: